
Tips for Bracketing
One of the challenges in landscape photography comes when we come upon a scene with a dynamic range wider than our cameras can capture. The scenes where exposing for the beautiful sky leaves the foreground land completely black but when you expose for the foreground, the sky is blown out and white. When I’m out shooting my goal is always to capture all the information I can so that when I upload to my computer I have all the options I need for post processing. And this means capturing details in the entire dynamic range of the scene.
These days our cameras are capturing a much wider dynamic range and quite often we can find a happy medium where we can expose at the edge too bright where we can pull down the highlights and bright enough that the shadows can be pulled up to bring out the darker details. But sometimes bringing up these shadows creates more noise than we want in our image. So in the field, I will generally bracket my exposures to capture full detail in my highlights AND in my shadows.
To do this, you can bracket automatically by setting your camera to shoot a certain numbers of exposures at a set number of stops apart or you can spot meter for various tones in your scene (i.e. shadows, midtones, highlights). For example, you can set your camera to take 3 exposures each 1 stop apart, or you could set it for 5 exposures .7 stops apart, etc. My Nikon D850 has a little button on the front left of the camera that opens my bracketing menu and makes this extremely easy. Check your own camera manual to find out how you can set your bracketing. Alternatively, you can capture several bracketed exposures manually by spot metering to take a shot exposed for the highlights, then the same for the midtones, and finally the shadows.
A couple tips:
1) Use a Tripod - While you can bracket handheld, and I do at times in brighter light, a tripod will ensure greater success when you go to merge them in post processing. The tripod will keep your exposures identically composed and focused and avoid problems with alignment.
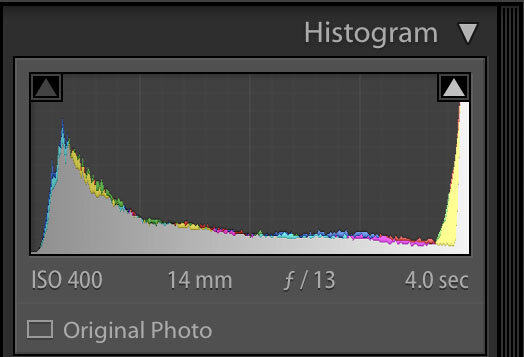
2) Check your Histogram - After you have taken a series of bracketed exposures, check your histogram to see that you have captured the full dynamic range. Your brightest exposure should not have any clipped shadows (clipped shadows are shown by a histogram climbing the left wall) and your darkest exposure should not have any blown highlights (blown highlights shown by a histogram climbing the right wall). Look at both your overall histogram and the individual channels as well.
3) Turn on your Highlight Blinkies - If you turn on the highlight warning in your camera, any areas of blown out highlights will blink on your LCD screen in the correct preview setting. This is extremely helpful so that you know you have captured all the highlight detail of the scene
4) In post processing, you may not need ALL your bracketed exposures. Your goal in the field is to capture all the information you might need later. If you capture 5 bracketed exposures, you may find that you only need two or three of them to achieve your final edit. Learning what you need just takes experimenting and practice.
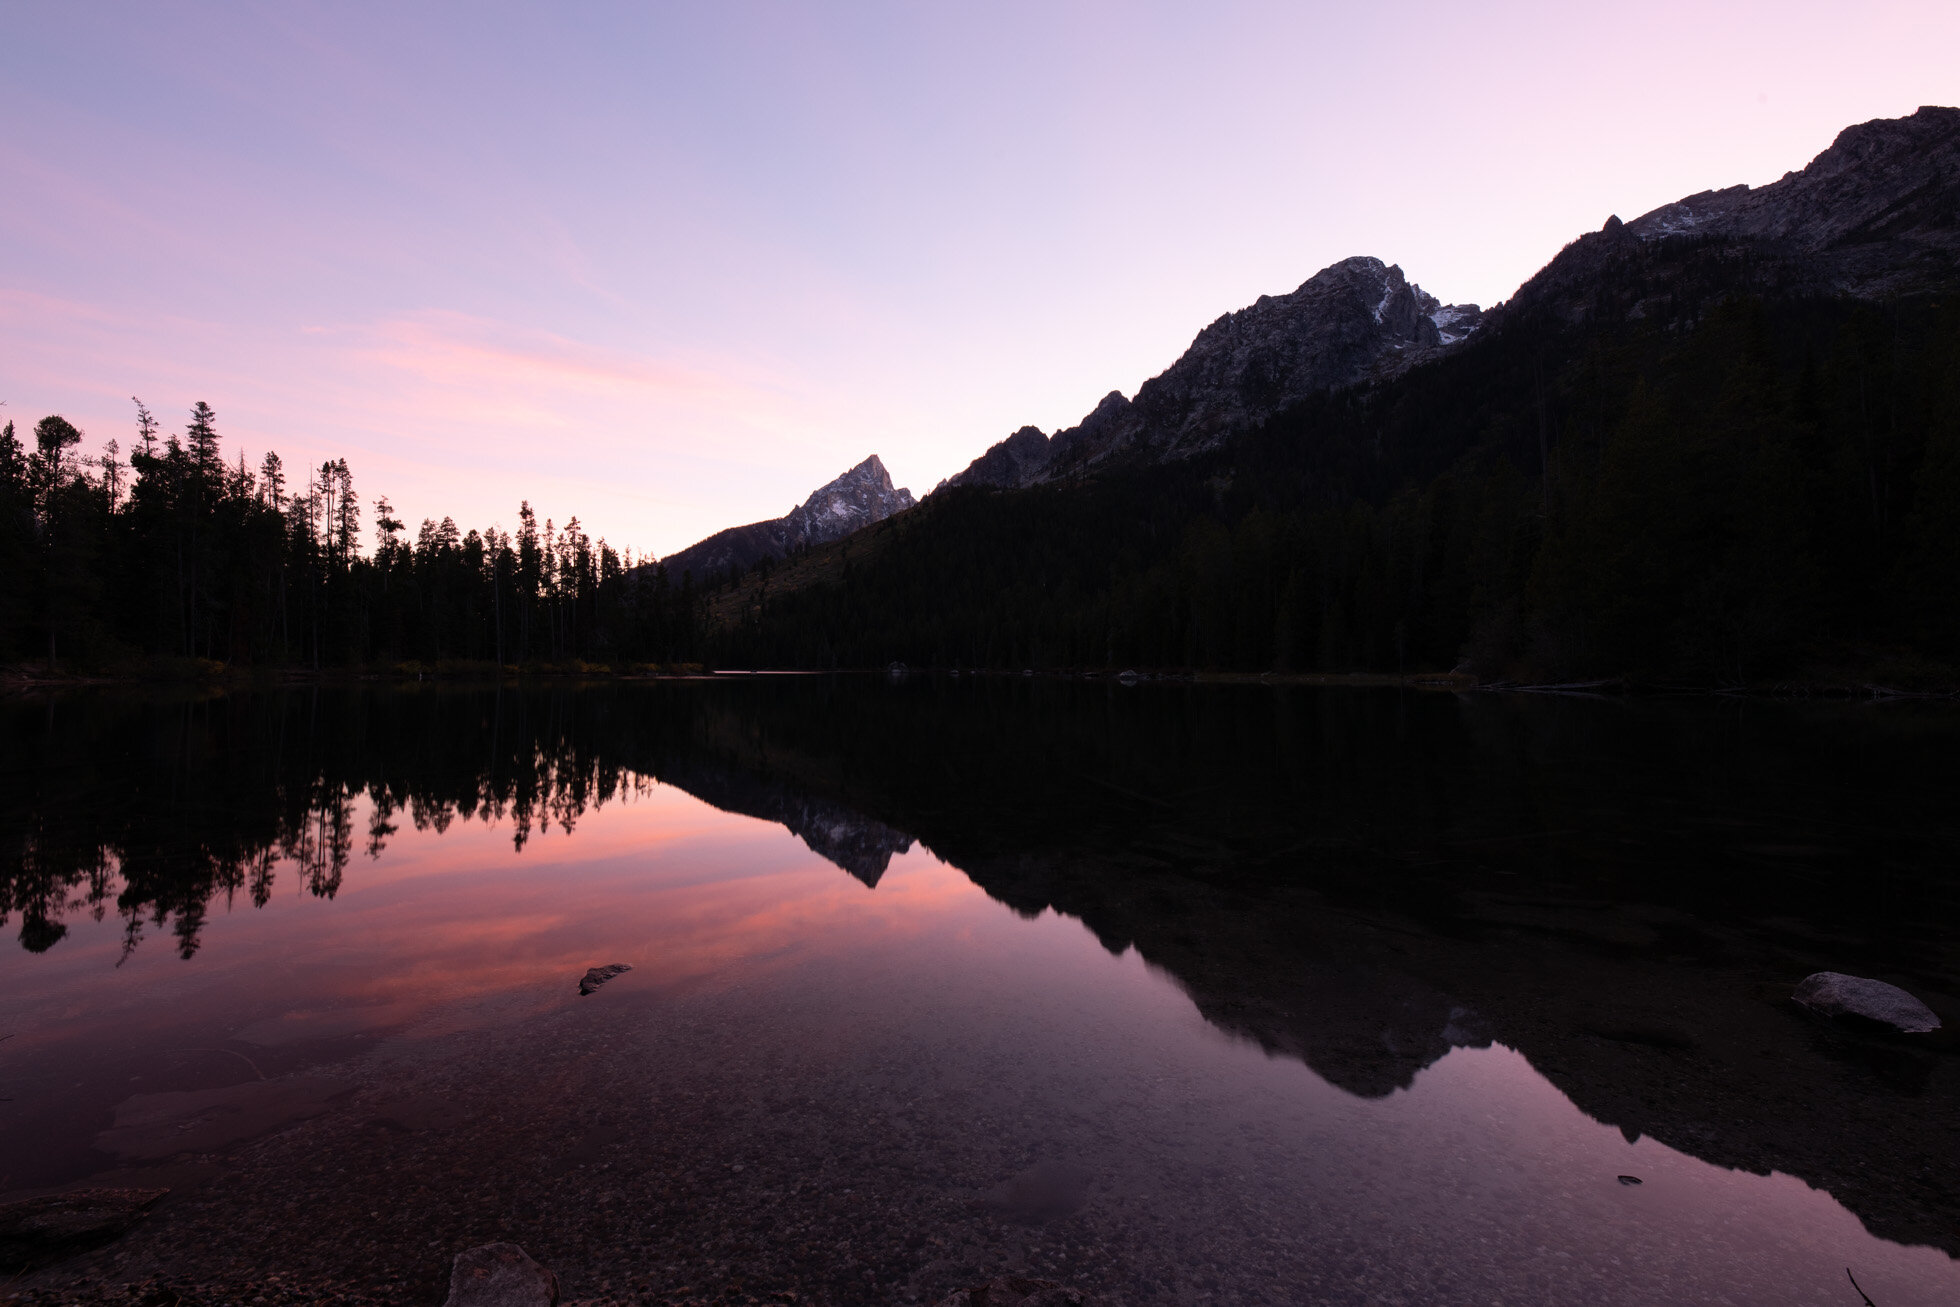
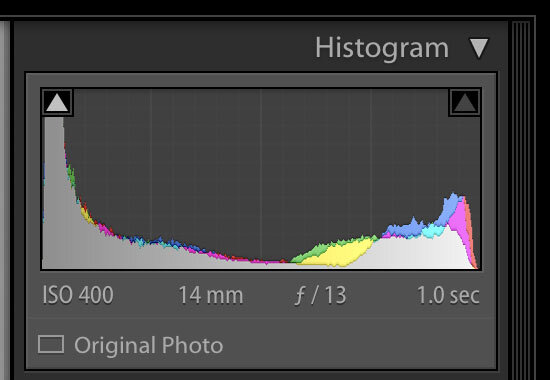
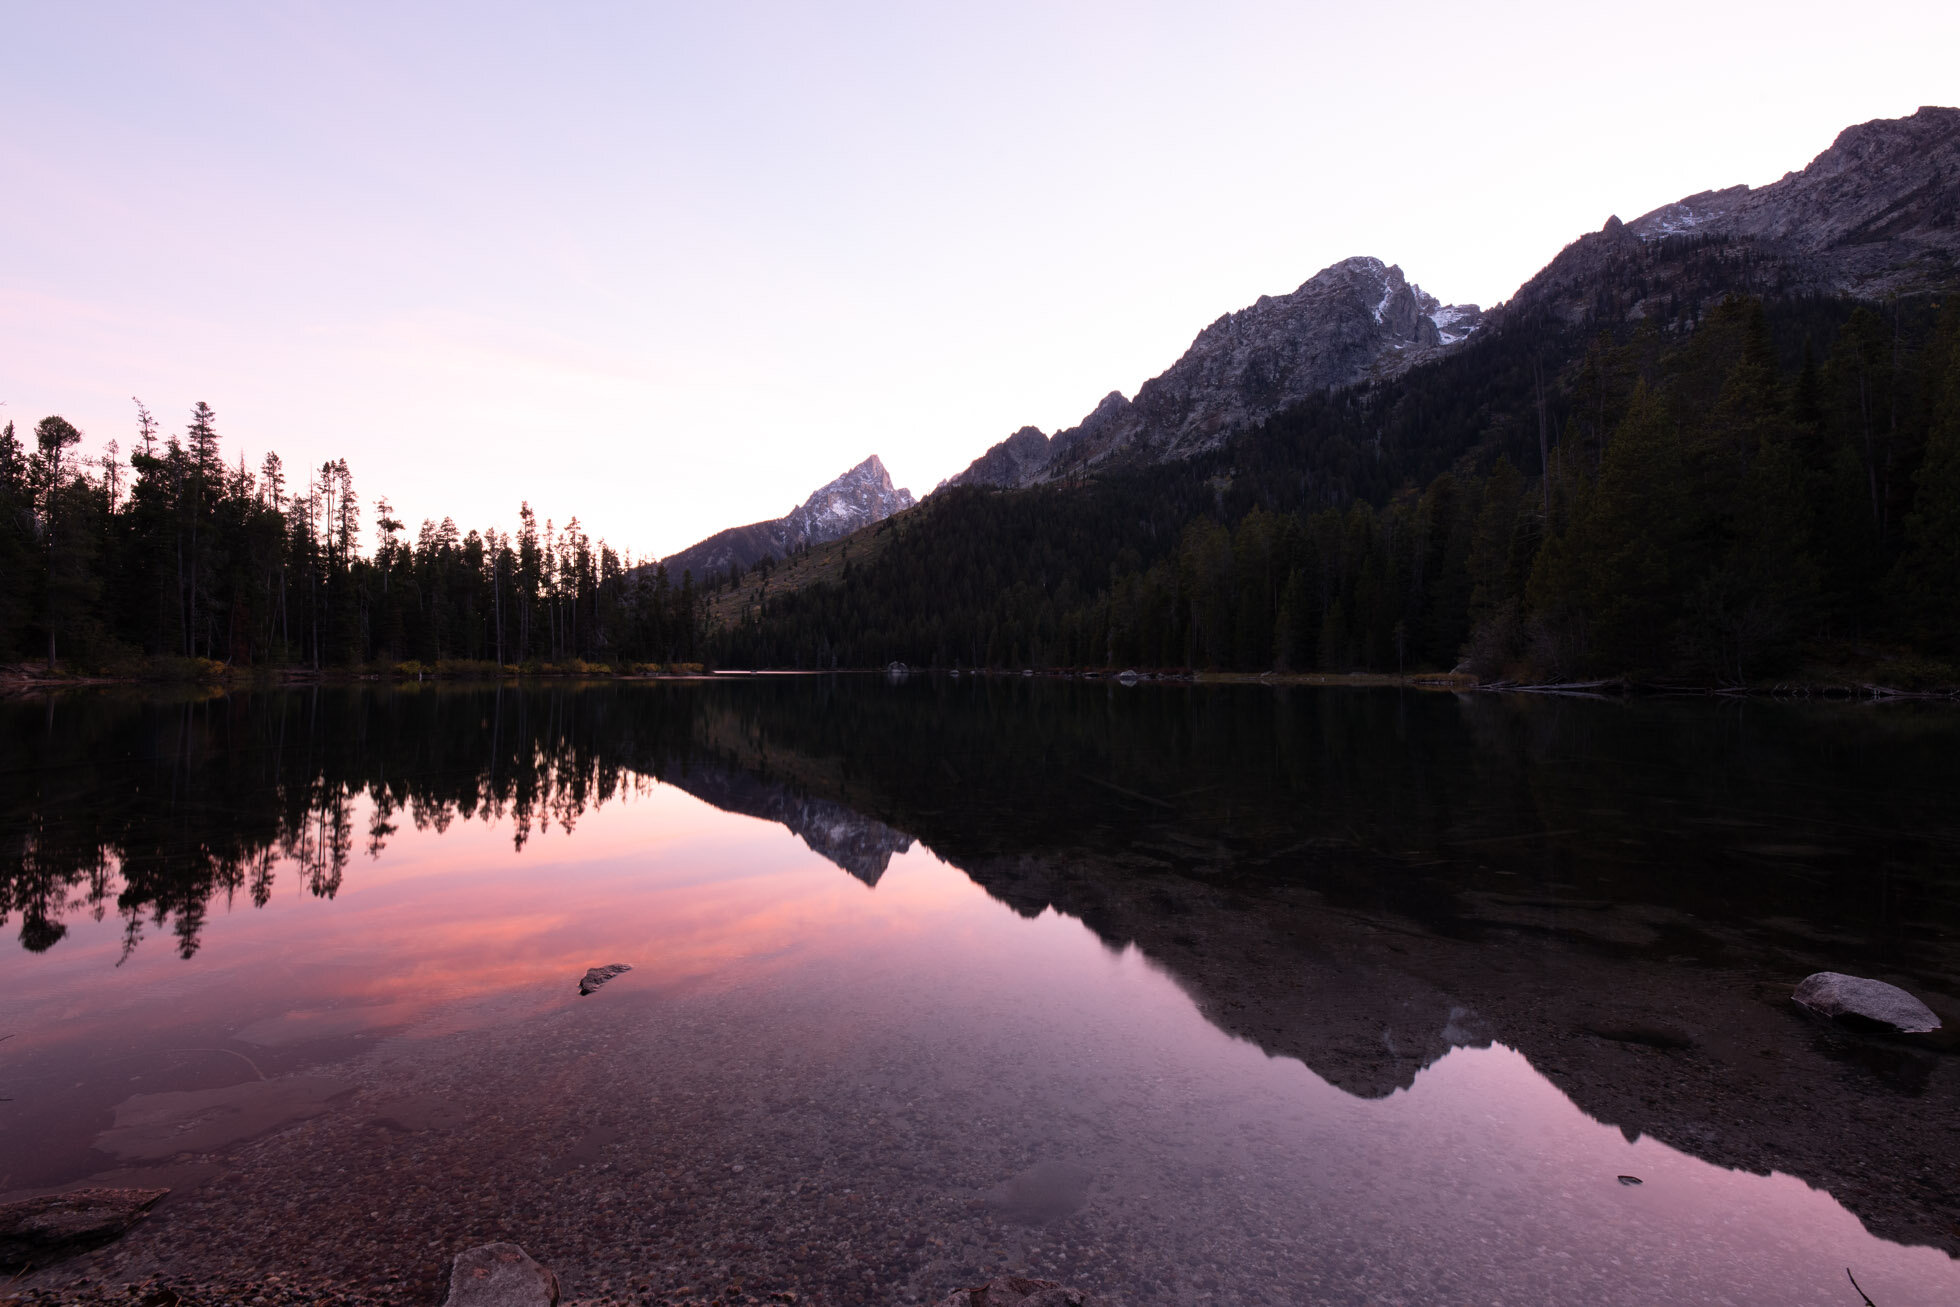
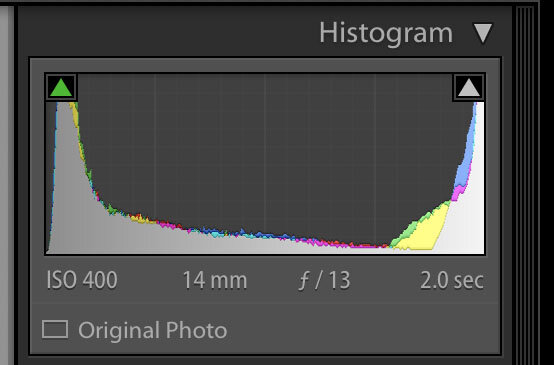
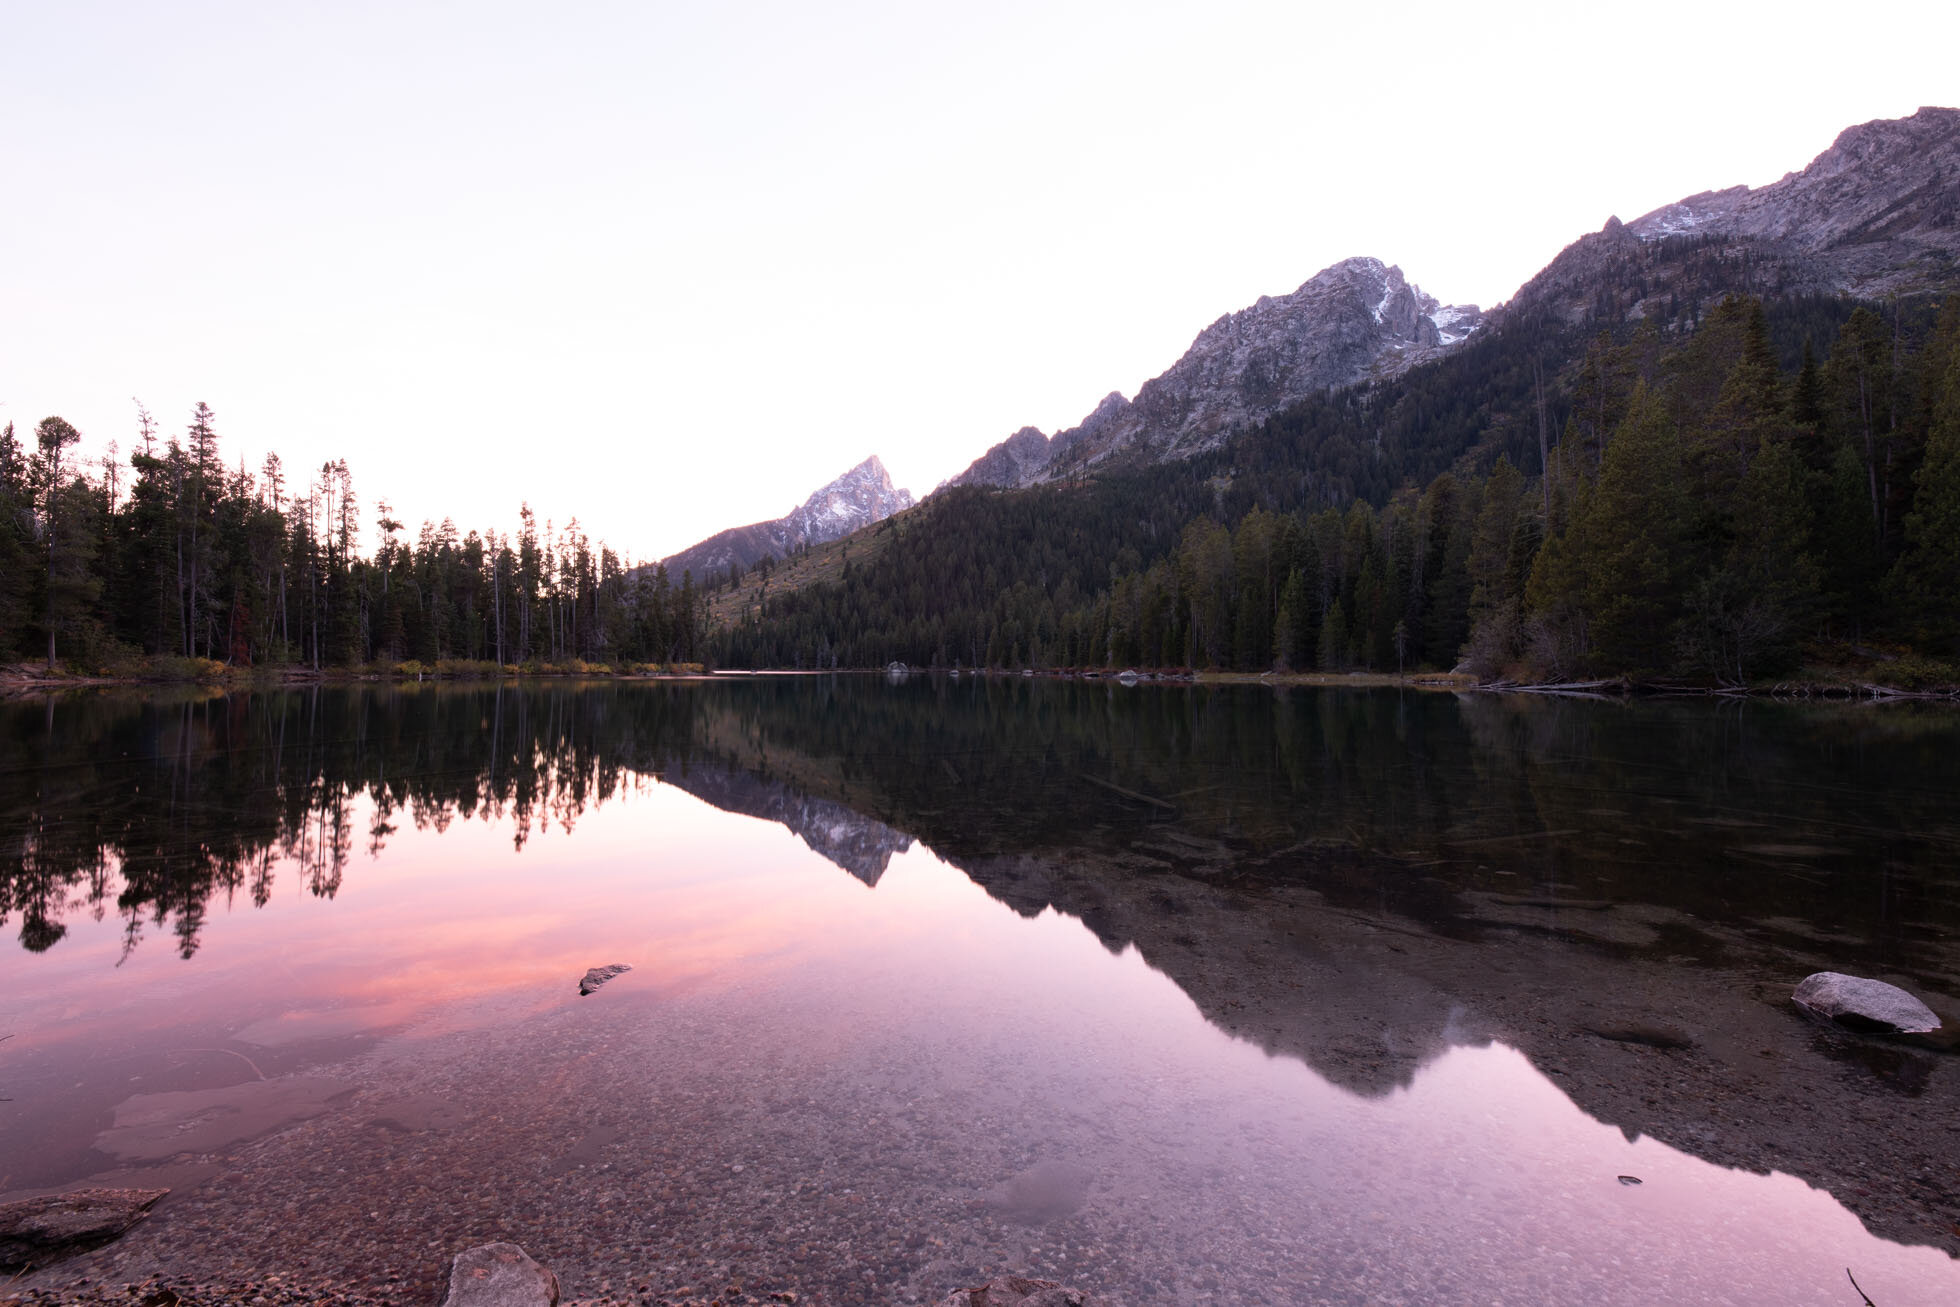
Below is an example of three bracketed exposures during sunset. The middle exposure of 2 seconds could be edited as a single file as the details of the shadows and highlights can be brought back despite the histogram showing these areas losing detail. I could choose to use this exposure for editing and disregard the other two. The darker exposure, however maintains nicer color in the sunset tones and the brightest exposure captures a lot more detail in the shadows. I am sharing my histograms with each exposure so you can see how they show my success in capturing detail in the shadows in the brightest exposure and full detail in the highlights in my darkest exposure.
Darkest Exposure at 1 second
Middle Exposure at 2 seconds
Brightest Exposure at 4 seconds
In the end, I chose to combine the brightest and darkest exposures in Photoshop by using luminosity masking. This technique using the TK Actions makes it really simple to combine exposures.

Hope this helps you capture the full range of the scene next time you are out!
Kristen Ryan is an award winning and published landscape and fine art photographer and educator residing in the Midwest suburbs of Chicago. All images are available for purchase in the Fine Art Store or by request. Kristen leads ladies landscape photography retreats in the Tetons, Chicago, and the Canadian Rockies, offers private mentoring and teaches an online landscape photography workshop.