Welcome to my blog! Thank you for clicking into my little corner of the online world where I share my landscape passion through my images and tips for other landscape photographers! Sign up for my newsletter and get your free ebook with 25 Tips for Impactful Landscape Photography.
Links to Check Out!
Listen to my conversation with Brenda Patrella on the Outdoor Photography Podcast from October 4, 2022
Check out my podcast episode over on InFocus Women - with Sarina Jackson and Steph Vella
Listen to my conversation with Allison Jacobs on “The Creative Frame” podcast.
Read Kristen’s article, “The Allure of Nature”, in the December, 2020 issue of Outdoor Photographer.
Listen to Kristen & Matt Payne’s conversation on the F Stop Collaborate & Listen podcast aired January 6, 2021.
4 Tasks to Prepare Camera Gear for a Photography Trip
Are you getting ready for a photography trip coming up soon? I’m just getting started with my 2022 travels and thought I would share the 4 things I do to prepare my gear before I travel so I’m prepared when I get out in the field.
1) There is one thing that I do before almost every trip I take and I cannot recommend it highly enough. I clean my camera sensor. If you have gone on a trip and come home to upload your images only to find that you have tons of little sensor dust spots, then you know how truly annoying it can be. It is a tedious and thankless job to have to clone out all those spots.
I know that cleaning my sensor a week or two before a trip is one small thing I can do to start out with my gear in the best shape. And clean gear is one factor that plays a part in creating high quality images.
If you have a camera store near you, you should be able to get your sensor cleaned there. (Note: Take it in with a fully charged battery!) You can also get sensor cleaning kits that allow you to clean your sensor yourself. There are a lot of tutorials out there to show you how to do this for your specific camera.
In addition to cleaning my sensor, as I get ready to travel, there are a few more things I do as I get ready to travel or prepare for a day of shooting.
2) As I gather and organize my lenses and filters to pack in my bag, I spend a little time cleaning them and checking them for smudges and spots. Just like camera sensor spots, dirty filters and lenses can also ruin image quality.
3) I charge up my batteries and make sure I start with a full battery in my main camera, my back up camera and an extra one for each. Then I put my charger right into my bag or suitcase so I don’t forget it!
4) Since I want to start out with an empty memory card with lots of space for my new images, I check to be sure all the images are uploaded and backed up in two places. Then I format my card so it’s ready for more exploring! While it is my typical workflow to upload and back up upon return from a shoot, it’s always a good idea to double check before formatting a card.
These steps set me up for success with clean gear ready to start off my next photography outing in the best possible way. I hope they serve as a helpful reminder to you for your next trip!
Kristen Ryan is an award winning and published landscape photographer and educator residing in the Midwest suburbs of Chicago. All images are available for purchase in the Fine Art Store or by request. Kristen leads ladies landscape photography retreats in the Tetons, Glacier NP, Hilton Head, Chicago, and the Canadian Rockies, offers private mentoring . New online educational materials are coming soon!
8 of my Favorite Things for my Photography
With the holidays coming up, I thought I’d take a few moments to share some of my favorite things that make my photography more successful and enjoyable! Perhaps one of these items will be a great addition to your wish list or a great gift for a loved one who is a photographer.
1) Sigma 150-600 f/5-6.3 DG OS HSM | Contemporary Lens - If you have read about my favorite lenses for landscape photography, you know that I use focal lengths from ultra wide to telephoto. When I began shooting landscapes, I was so drawn to dramatic skies and vast scenes that my wide angle lens was the one I reached for most. Several years ago, I purchased this telephoto lens, largely for wildlife and some of my kids’ sports. Gradually I also started using it for landscape photography and the more I used it, the more I reached for it. This lens lives on my Nikon Z6 most of the time and many of my favorite landscapes are captured with this combo. I love the way I can zoom into far off details and isolate small scenes that capture my eye. It is definitely my go to lens for photographing intimate landscapes and I used it to capture many of my favorite images this year.
Light & clouds over the Tetons with the Sigma 150-600
Distant road in the Great Smoky Mountains at 600mm with the Sigma 150-600
2) Peak Design Carbon Fiber Travel Tripod - I received this tripod in the spring of this past year and I absolutely love it! I have used many tripods in my years of shooting landscapes and I have to say that this is one is my favorite for its size and ease of use. This tripod is light and compact for travel and hiking. The flip legs are simple to open and close for quick and easy set up or adjustment. It is sturdy for my heavy Nikon D850 and large lens. Putting the camera on this tripod head is the absolute easiest I have experienced. Additionally, adjusting the camera on this head is smooth and simple. This makes all set up and shooting easier but especially in low light and night. As a lover of long exposure photography, a sturdy tripod is essential to my work.
Long Exposure at Colter Bay, Grand Teton National Park with the Peak Design Travel Tripod
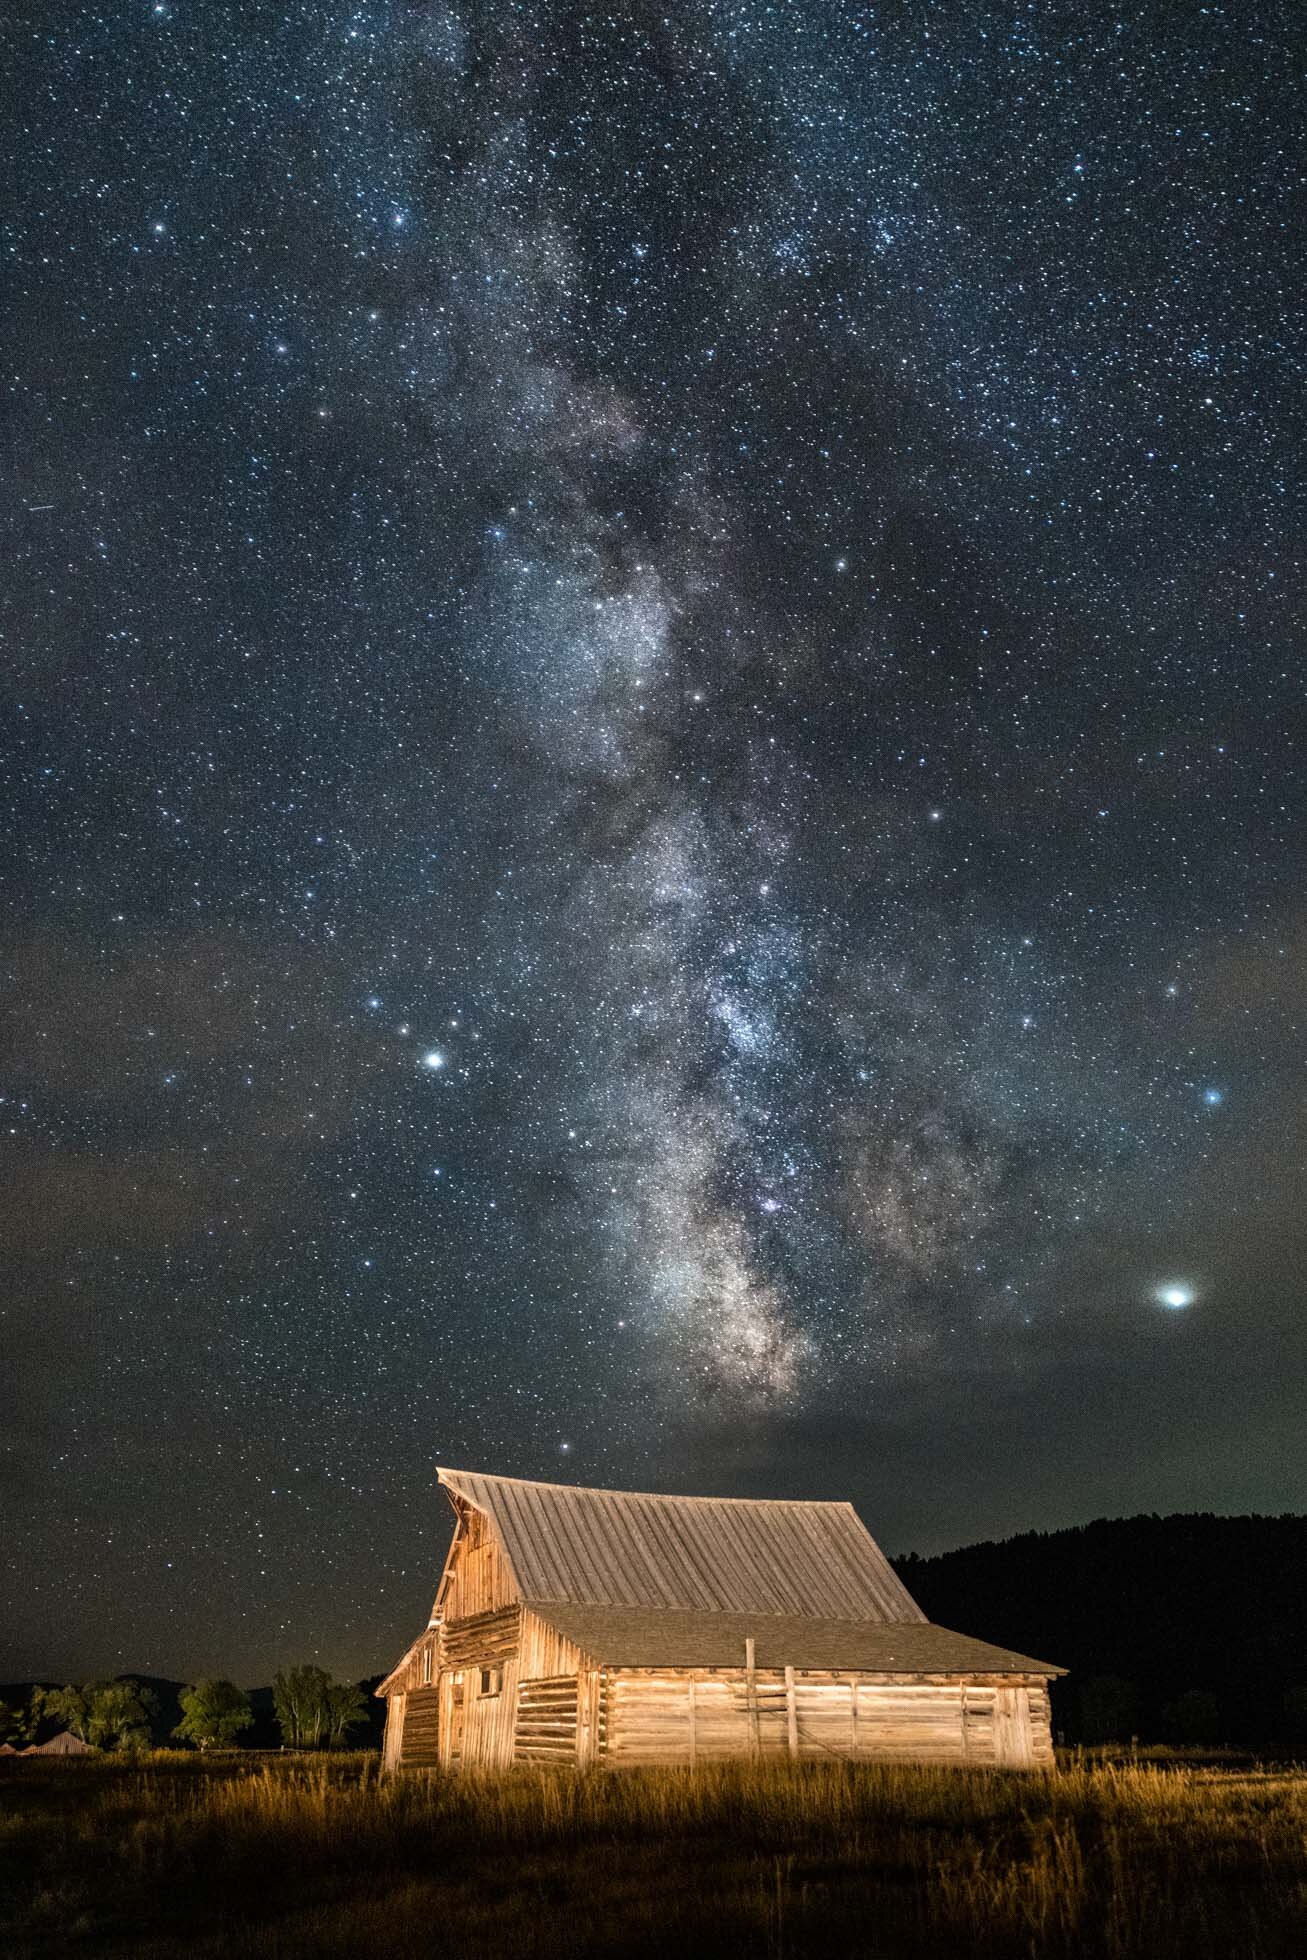
3) L Bracket - I have L Brackets on all my camera bodies and it is a true game changer. This makes shooting horizontally and vertically simple and no need to get multiple tripod plates for more than one camera either. I can’t believe I didn’t install these on my camera bodies earlier in my career. It has been so helpful in allowing me to capture vertical long exposures. (Note: The Kirk L Bracket is the one I have on both my Nikon D850 and Z6 but there are other brands you can explore)
Vertical Milky Way capture over Moulton Barn in Grand Teton National park with my L Bracket
4) Zojirushi Thermos - While not photography gear, this thermos is a go-to for me in all my photography outings. It will keep my coffee hot for hours as I head out for sunrise. While they come in multiple sizes, the 20 oz thermos is perfect to keep me going for a long time. One of the best things about this thermos is the lock on the top. When it is locked, there is absolutely no leak which makes it perfect when I am carrying it with my camera gear or in a carryon with my laptop when I travel. (Just make sure the parts of the top are intact as if they are not, then it does leak!) Sometimes I even have two of these with me - one with coffee and one with ice water as it will keep your ice intact for a crazy long time as well! Each member of my family has one of these for our travels & hiking adventures. (Note: Link takes you to red thermos but various colors are available)
5) Breakthrough Photography Filters - Whether a polarizer or neutral density filter, Breakthrough Photography is my go to brand for my filters. I always carry a polarizer, 6 stop ND filter, 10 stop ND filter and 15 stop ND filter in my bag. I also love the X4 Dark Circular Polarizer for photographing waterfalls and other water scenes. When photographing water and clouds, my favorite thing is to shoot long exposures of various lengths and these filters make it possible. (Note: Link here is my affiliate link. If you choose to use it to order, thank you!)
Long exposure using a Breakthrough Photography 6 stop ND filter to smooth the water just a little
6) Heat Company Gloves - These gloves save my fingers when I am shooting in the cold winter weather. In truth, they make it possible for me to shoot in the frigid temperatures. I purchased these before my winter trip to the Tetons in 2016 and I discovered I could shoot for hours without my fingers getting frozen and numb as they always had before. These have thin tight linings for your fingers so you can easily maneuver your camera and then have a warm insulated mitten to cover your fingers. There is even a pocket to put hand warmers in. These are absolutely worth the investment if you want to capture those beautiful winter landscapes without frigid fingers. (Note: link goes to just one of various sizes on B&H photo’s website. Various sizes available)
Misty sunrise at Vermilion Lakes in Banff National Park in negative temperatures. Thank good for my Heat Company gloves.
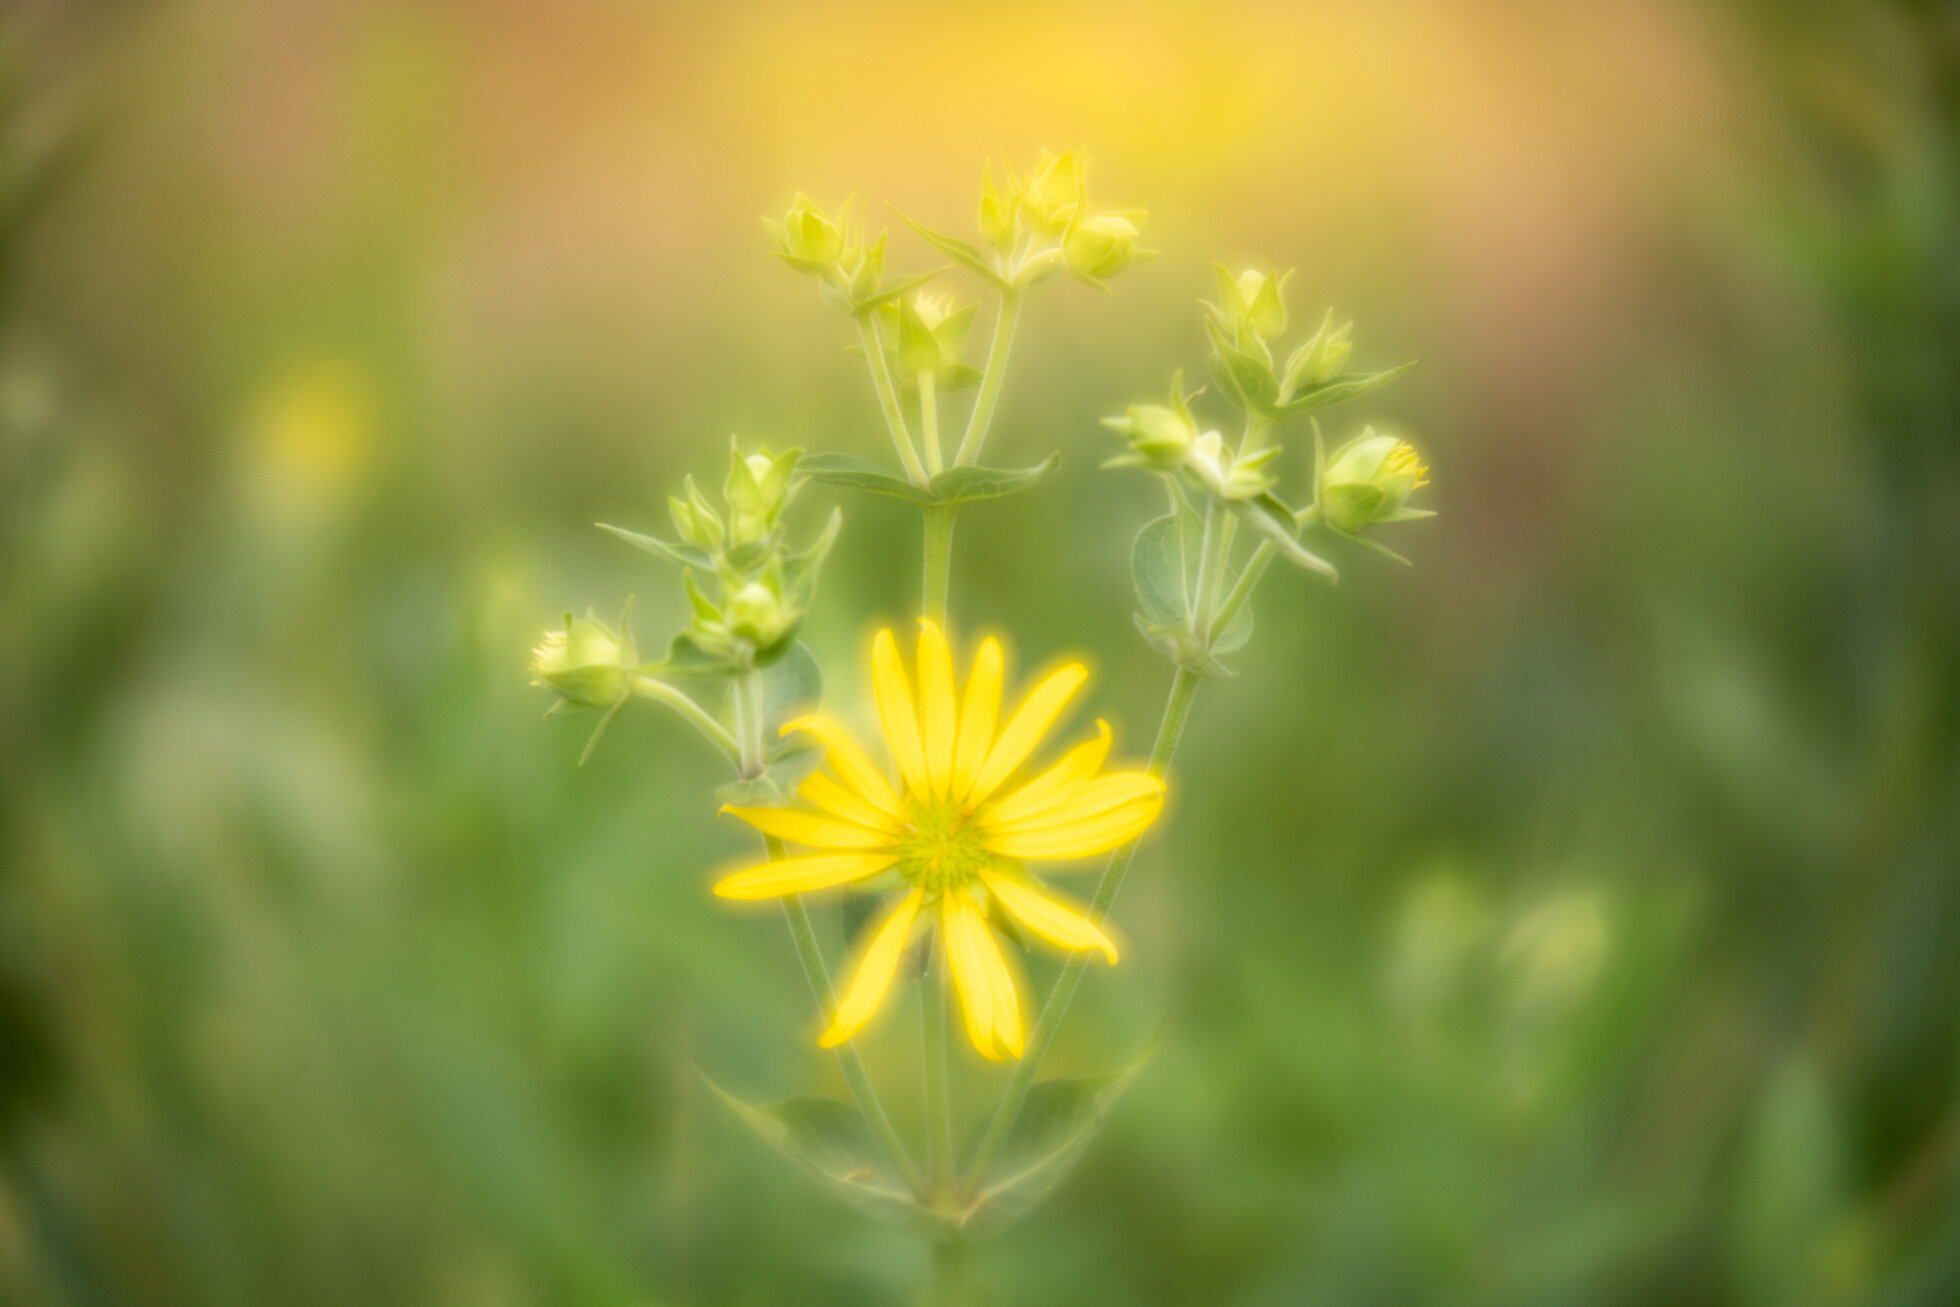
7) Lensbaby Velvet 56 - My Lensbaby Velvet 56 is a go to lens for me when shooting macro and small scenes. I love the creative blur and dreaminess it creates. It always leaves me feeling inspired and it sparks my creativity. When I shoot with this lens I am drawn into how I feel rather than worrying about technical execution. I also love this lens for seascapes and forest scenes.
A flower by my pond with the Lensbaby Velvet 56
A gorgeous Turks & Caicos beach with the Lensbaby Velvet 56
8) Icebreaker Merino Wool Hoodie - As I began to do more winter shooting, I started looking for some nice warm clothing to layer under my puffy winter coat. I came across this hoodie and fell in love. It is so versatile. It is perfect to put over a base layer and thin enough to wear it under a fleece and outer winter coat. It is quite warm on its on as well and I love to wear it as an outer layer on a temperate spring or fall day. The pockets are zippered making it easy to stash keys or a phone in a pocket without worry of losing them. (Note: my first hoodie was the original Quantum hoodie though they seem to be harder to find now and this is the new one I just ordered. It’s not cheap but I love it that much!)
Thanks for reading! If you have any questions about my favorite things, don’t hesitate to reach out! Happy Shooting!
Kristen Ryan is an award winning and published landscape and fine art photographer and educator residing in the Midwest suburbs of Chicago. All images are available for purchase in the Fine Art Store or by request. Kristen leads ladies landscape photography retreats in the Tetons, Chicago, and the Canadian Rockies, offers private mentoring and teaches an online landscape photography workshop, The World Around You.
Night Photography Part 1: Preparation
Night photography is one of my very favorite genres to shoot whenever I get the chance. And when I say Night Photography, I mean both Astrophotography and general night photography, such as night cityscapes, light trails, and other night scenes. Today’s tips for preparation apply to all areas of night photography. If you are looking for Astrophotography tips in particular you can visit my past blog posts: 9 Tips for Astrophotography Part 1 and 9 More Tips for Astrophotography Part 2. In this series, later posts will be focused on town & city scenes, light trails and star trails.
8 minute exposure of the stars over Mt. Rundle at Vermilion Lakes
I believe that preparation is key to enjoyable and successful night photography. Being prepared with the proper gear, knowing that gear and your location is the best first step toward creating amazing night imagery.
1 -Invest in a quality tripod - If you already shoot nightscapes even occasionally, you know that a tripod is critical to sharp night photography. The longer exposures you are shooting, the more important that the tripod is strong and sturdy so it won’t move if the conditions are windy. In addition to this, it is important to choose a tripod that is intuitive to you in its use. Being able to easily put the camera on the head and shift its position, especially in the dark is so important. If your tripod doesn’t feel easy for you to adjust, find one that is. It will take so much frustration out of working in the dark.
2) Pack Your Cable Release/Remote - When photographing long exposures, whether just 1-2 seconds or longer, a cable release will help eliminate any camera shake from pressing the shutter. Get to know your remote and how it works if you will be programming it for a time lapse or long exposure in bulb mode.
3) Bring a Headlamp and/or Flashlight - Depending on where you will be shooting, be sure to have a headlamp or flashlight to light your way and to help you work with your gear if you get stuck working in the dark. If you are shooting with other photographers, you’ll want to all get set up and try to avoid turning on any lights once you get shooting. Even a little light shining into the foreground can ruin a fellow photographer’s exposure.
4) Know Your Gear Well - Being able to work with your gear in the dark is so important for an enjoyable night shooting experience. If you can adjust your camera on your tripod and access the buttons you need on your camera without fumbling around, you’ll save yourself so much frustration. Know how to change your settings, playback and zoom in to check focus without having to turn on a flashlight. Spending a little time mindfully noticing where all these buttons are can make a world of difference.
Harbour Town on Hilton Head Island as Blue Hour transitions to night.
5) Scout your location - Spend time during the day scouting out your location. Being able to see where you will be walking and setting up will help you when it is dark. Additionally, it can help to envision the composition you want to shoot in the daytime. Taking this time will create familiarity with the scene, minimize unexpected obstacles, and aid success in finding an intriguing composition.
6) Lower Your Screen Brightness & Turn on your Highlight Blinkies - One of the most frequent difficulties with night photography is underexposed images. It is easy to look at your LCD screen on playback and think your image is well exposed when in reality is it underexposed. Lowering the screen brightness is helpful in preventing this mistake. Checking the histogram for proper exposure is the second important step. Using the highlight blinkies on your LCD is another helpful tool to use to ensure the brightest areas of your night scene (e.g. stars, city lights, etc) are not blown out. Check your camera manual to learn how to turn down the brightness and enable the highlight warnings.
7) Prepare for the Elements - Depending on where you are shooting you may run into various weather conditions. In the summer months, some areas could get buggy at night so you may want to have bug spray on hand. In cooler months, and even in some climates, such as the mountains, the night temperatures get far cooler than the days. Be prepared with layers to keep yourself warm. If you will be in wet areas, waterproof shoes might be helpful, or hiking boots for slippery and uneven terrain.
8) Be safe - In the city or the wilderness, night time has its dangers. In both cases, it is important to be safe by being aware of your surroundings and it is always best to have a friend for shooting partner with you.
Chicago River at Night
Night Photography Part 2 coming next week!
Kristen Ryan is an award winning and published landscape and fine art photographer and educator residing in the Midwest suburbs of Chicago. All images are available for purchase in the Fine Art Store or by request. Kristen leads ladies landscape photography retreats in the Tetons, Chicago, and the Canadian Rockies, offers private mentoring and teaches an online landscape photography workshop, The World Around You. The next run of The World Around You begins August 17!


