
Welcome to my blog! Thank you for clicking into my little corner of the online world where I share my landscape passion through my images and tips for other landscape photographers! Sign up for my newsletter and get your free ebook with 25 Tips for Impactful Landscape Photography.
Links to Check Out!
Looking for filters to add to your creativity? Check out MAVEN FILTERS!
Listen to my podcast episode with Jen Ritchie on Wildlife Conversations or watch on YouTube HERE.
Listen to my episode HERE with Austin James Jackson on his podcast, Master the Moment.
Listen to my episode on the Landscape Photography World podcast, hosted by Grant Swinbourne.
Listen to my conversation with Brenda Patrella on the Outdoor Photography Podcast from October 4, 2022
Check out my podcast episode over on InFocus Women - with Sarina Jackson and Steph Vella
Listen to my conversation with Allison Jacobs on “The Creative Frame” podcast.
Read Kristen’s article, “The Allure of Nature”, in the December, 2020 issue of Outdoor Photographer.
Listen to Kristen & Matt Payne’s conversation on the F Stop Collaborate & Listen podcast aired January 6, 2021.


My 5 Favorite Weather Apps for Landscape Photography Planning
Weather has such a strong impact on landscape photography and getting out in ideal conditions can really take your imagery to the next level. There are a number of helpful weather apps that are helpful in predicting when Mother Nature will provide those ideal conditions. While no app or forecast is foolproof or perfect, here are 5 of my favorite apps I use in planning my photography adventures.
1 ) Sun Surveyor
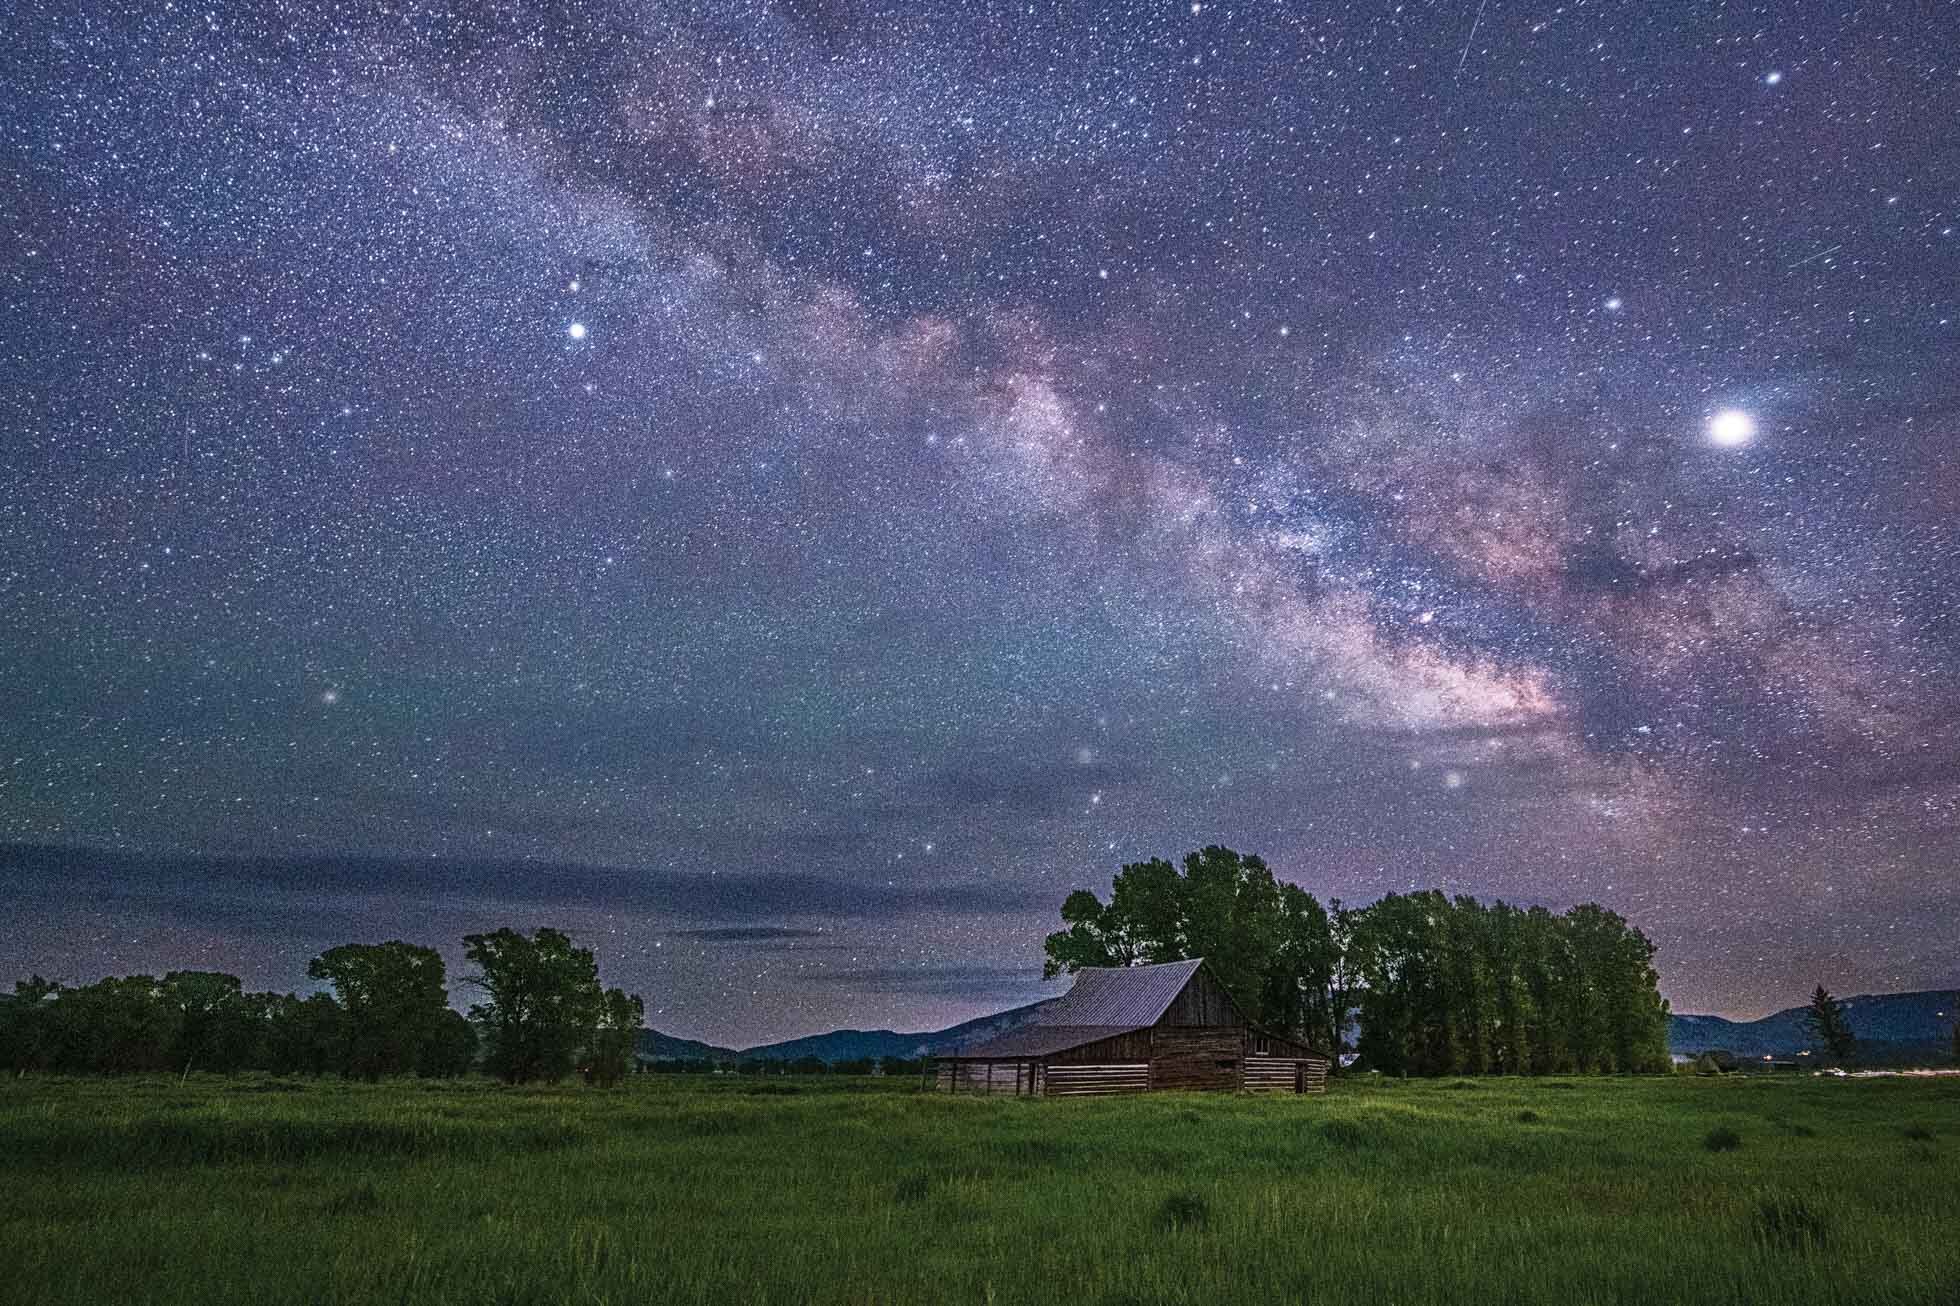
I love Sun Surveyor because it gives so many different tidbits of information in one little app! Put in your location and date and Sun Surveyor tells you sunrise and sunset time, moonrise and moonset, golden hour, and blue hour. You can find out the phase of the moon and the time that the core of the milky way will be visible (if applicable). There is a map that will show the arc of the movement of the sun and moon across your location. The live view will also show you exactly where the sun, moon or milky way will be at any given time as you stand in your location.
2) Photopills
Photopills is my go-to app for planning my Milky Way shoots. Using the Photopills planner, I can plan my Milky Way shooting wherever I may traveling too. I can set the pin at a location and see how the Milky Way will line up at all hours of the night. This eliminates the guesswork involved with astrophotography. The Night AR view allows me to see exactly how the Milky Way will line up at a particular time as I stand in a location. I have planned many Milky Way shooting sessions for my retreats months in advance by using Photopills.
3) Astrospheric
Astrospheric is another awesome weather app that shows cloud cover by the hour and includes a radar that shows the clouds moving over your location. You can watch the radar or click on a particular hour to see the cloud cover prediction and location of the clouds. Great for predicting those clear nights for astrophotography.
This app gives you hour by hour information on the cloud cover in your chosen location. Not only does it tell your overall cloud cover but it also tells you whether they are low, mid or high clouds. You can also see visibility, fog, chance of rain and temperature. The cloud cover numbers are so helpful for predicting clear nights for astrophotography as well as chance of clouds for enhancing sunrise and sunset.

This helpful app will give you the current KP index and show you the likelihood of seeing the Northern Lights in your chosen location. There is an Aurora Map that shows the best locations to see the Aurora and shows you the long term KP potential forecast. A forecast is always a forecast though, right?! The app also will alert you of high aurora activity.
Again, forecasts can be unpredictable and no app is perfect, but the combination of these apps can help to figure out when and where I can find the best opportunities for landscape and astrophotography. Do you have any favorite apps not listed here? I’d love to hear about them and add them to my tool list 😊
Just 3 spots left in my 2023 Ladies Landscape Retreats! 1 spot in the June Magic in the Tetons Retreat and 2 spots in Magic in Hilton Head!
Kristen Ryan is an award winning and published landscape and fine art photographer and educator residing in the Midwest suburbs of Chicago. All images are available for purchase in the Fine Art Store or by request. Kristen leads ladies landscape photography retreats in the Tetons, Chicago, Glacier, Hilton Head and the Canadian Rockies, and offers private mentoring.
6 Tips for Capturing Winter's Beauty Part 2
Last week I shared some tips for preparing your camera gear and clothing to survive the cold while shooting in the winter landscape. If you don’t prepare well enough, the shooting adventures are likely to be cut short due to cold and discomfort!
Now that you are well equipped to manage the cold and snow, I have some tips for photographing the winter beauty! There is the most magical feeling that comes with fresh fallen snow or beautiful hoar frost covering the trees and grasses. Winter landscapes are some of my most favorite scenes to photograph.

Falling snow in Grand Teton National Park
1 - Exposure - As always, I recommend watching your histogram to make sure not to blow out the highlights of the scene to keep texture and detail in the snow. I always look to expose snowy scenes a little bit brighter than my camera tells me to. Exposing at zero, your camera will make the snow look more gray instead of white. I always look to expose snow about +1 to +1 2/3 stops. You can do this manually or by using exposure compensation if you shoot in aperture mode. One easy way to ensure a great exposure is to bracket three exposures at 0, +1, and -1. Again, keep an eye on your histogram to expose to the right without letting it climb the right wall.
2- White Balance - While snow is white, it won’t always appear pure white in a photograph or in real life. Snow reflects the colors and light of a scene. In very low light, the shadows will be quite cool and the snow will have a bluish hue to it. However, in warm sunrise, sunset or golden hour light, the snow may reflect golden, orange, or pink tones. You may want to choose a white balance that enhances these colors or you may want to choose a white balance that neutralizes them somewhat. You’ll likely want to choose a white balance that is representative of the scene and helps to enhance the mood and atmosphere of that moment you clicked the shutter. Unless you are shooting a warm sunrise or sunset, a cooler white balance will typically bring out the cool mood of a winter scene. Using live view when adjusting your white balance can help you see whether you are capturing accurate colors and achieving the mood you envision.

Winter Suburban Sunset
3 - Take Advantage of Falling Snow - Even better than fresh fallen snow is snow that is FALLING!! There is something incredibly magical about a landscape captured with snowflakes falling all around. So grab all your protective gear to keep your camera weather proofed and head out to capture the atmosphere.
4- Get Out When the Snow is Fresh - Whenever possible, head out to capture a fresh fallen snow as early as possible. The earlier you get out, the fluffier the new snow and the less car tracks or footprints will have been made in the snow. Additionally, when you consider your composition, avoid walking around aimlessly as you may end up wanting a composition that includes all the tracks YOU just made!

5 - Avoid Condensation & Moisture in Your Gear - Whenever you can, try to avoid changing your lens out in the cold and wet weather. This will minimize any moisture or condensation getting inside the camera. If you have more than one camera body, you could consider choosing a wide angle lens for one body and a telephoto lens for the second. Additionally, while I have never had trouble with my camera having condensation coming in from the cold, placing it in a sealed ziplock bag as it comes to warmer temperatures is recommended.
6 - Pack a Towel - It’s a great idea to keep a towel in your camera bag in case any of your gear does get wet. Choose something soft like a microfiber towel to dry off your gear.
Hope these are helpful tips to add to your winter shooting! Part 3 coming next week! Do you have a favorite winter shooting tip? Tell me in the comments.
Happy Shooting!
Kristen Ryan is an award winning and published landscape and fine art photographer and educator residing in the Midwest suburbs of Chicago. All images are available for purchase in the Fine Art Store or by request. Kristen leads ladies landscape photography retreats in the Tetons, Chicago, and the Canadian Rockies, offers private mentoring and teaches an online landscape photography workshop, The World Around You.
7 Tips for Shooting on Clear Days
In my last blog post, I shared tips for those overcast days when so many clouds come in that the sky becomes gray and blah. But what do you do when the sky is clear and there is not a cloud in sight? The sun is shining and it is a beautiful day but there are no clouds to add interest to the scenery in front of you. All is not lost. There are many approaches you can take to capture beauty on those bluebird sky days! Here are a few tips to take with you.
1) Minimize the sky ~ Make the land the story of your image by composing with the horizon higher in the frame. Use a longer lens and focus on a smaller segment of the scene rather than a wider angle. Get low and look for foreground interest to add depth to the frame.

2) Look for Reflections ~ Reflections captures can be a dynamic and interesting scene all on their own by creating layers in the foreground. Sunny days really bring out the colors and clarity of a reflection. Clear skies can allow mountain reflections to stand out. There is beauty in the simplicity.

3) Capture a Starburst ~ When the sun is in the scene, take advantage of those clear skies by closing down your aperture and adding a sunburst to the frame. See this blog post for 7 Tips for a Great Sunburst..

4) Focus on Color & Texture ~ Brilliant sunshine enhances the colors and textures of the scenery around us. The blue sky reflecting in water will bring out the beautiful blues of glacial waters. Colorful trees, foliage and flowers are enhanced by the sunlight. Textures of rocks, trees, and mountains are highlighted as well. Look for these features in the landscape. Capture the gorgeous blue of the sky in contrast with the colors or focus in on the details and eliminate the sky from the frame completely.

5) Play with Abstract Shooting ~ Grab your 6 stop Neutral Density filter and capture some abstract shots of trees or water. See this article for tips on Seascape Panning. Look for vertical panning tips to be shared on the blog soon!

6) Explore the Forest ~ Walking through the forest, our focus is on the trees, lines and details of the land. Look for the light shining down through the trees or capture a sunburst coming through.

7) Stay out for the Stars ~ While the clear blue skies of the day may not be as intriguing as a sky filled with dramatic clouds, a clear night sky is filled with magic. Don’t pack up with the sun, stay out and capture the incredible starry night! Head over here for 9 Tips for Astrophotography Part 1, and then scroll up the blog for Part 2.

Next time Mother Nature offers full sun and clear nights, I hope you find these tips helpful!!
Kristen Ryan is an award winning and published landscape and fine art photographer and educator residing in the Midwest suburbs of Chicago. All images are available for purchase in the Fine Art Store or by request. Kristen leads ladies landscape photography retreats in the Tetons, Chicago, and the Canadian Rockies, offers private mentoring and teaches an online landscape photography workshop, The World Around You.
5 Tips for Shooting in Overcast Weather
It’s no secret that I love clouds, as most landscape photographers do. Clouds make a sky far more interesting than a clear blue sky. They create mood and atmosphere. But sometimes the clouds are so thick that the sky becomes gray and overcast, which is not any more interesting than a clear blue sky. What do you do in those situations? I suppose if you are home, you can just sit that one out and spend your day editing or engaging in life outside of photography. But when it happens during a long awaited trip to a dream destination, you want to make the best of it. So here are a few ideas of how to embrace that overcast light.
1) Seek Out Waterfalls or Other Moving Water ~ Overcast light is the perfect time to shoot waterfalls, rivers, or streams. Grab your 6 stop Neutral Density Filter and play with shutter speed and long exposures . The soft, overcast light helps to shrink the dynamic range and eliminates the dappled light and harsh shadows that come with bright sunlight. Bonus in the autumn, overcast light lets you bring out the fall colors without the harsh highlights.

2) Experiment with Slow Shutter and Panning ~ Experimenting with tree panning is a perfect activity for an overcast day. Panning can be done in any light, but in softer light, it will be easier to get a slower shutter speed and avoid bright highlights that come in full sun.

3) Fill the Frame ~ Look for some beautiful details in the foreground and fill your frame with them. For example, maybe a mix of fall colors in the foliage or fog floating through the trees. I often use a longer focal length for this kind of shooting.

4) Minimize the Sky in the Frame ~ If the sky is not adding interest to the scene, make the foreground the majority of the frame. Place the horizon or tops of trees, mountains or hills near the upper line of the Rule of Thirds or even higher. Typically in these situations I will use a mid focal length or longer focal length rather than my wide angle.

5) Underexpose the Sky ~ Sometimes the sky is a pure gray or white blanket over the scene, but other times you might be able to see some texture in the clouds. If you see texture, you can work with it in post processing. By underexposing, you capture more sky detail and can edit to create some moody atmosphere.

So next time the clouds got you down, remember these tips and get creative. There is always some beauty to be found!
Kristen Ryan is an award winning and published landscape and fine art photographer and educator residing in the Midwest suburbs of Chicago. All images are available for purchase in the Fine Art Store or by request. Kristen leads ladies landscape photography retreats in the Tetons, Chicago, and the Canadian Rockies, offers private mentoring and teaches an online landscape photography workshop.
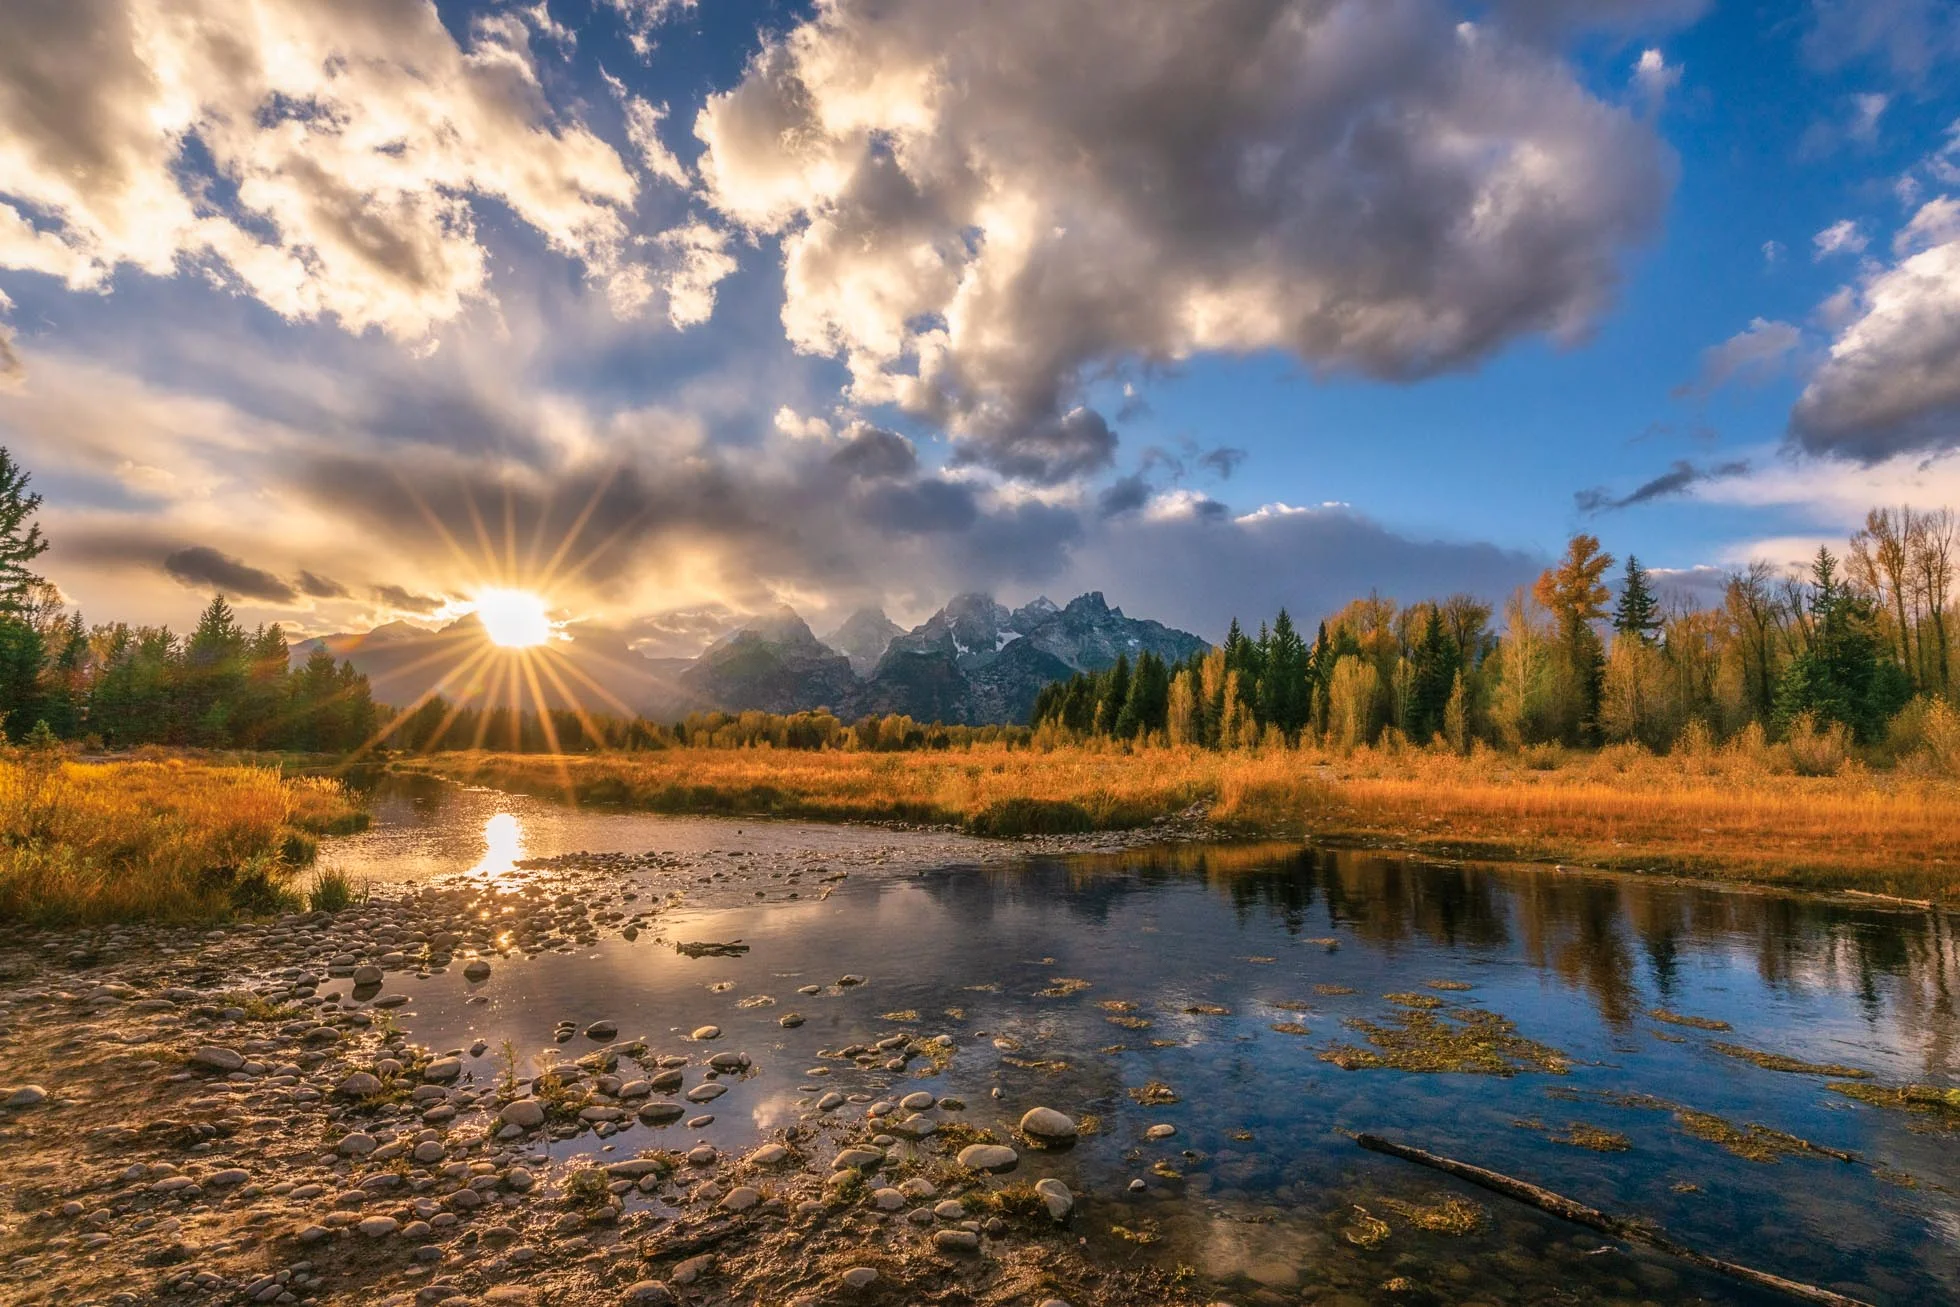
7 Tips for a Great Sunburst
One of my very favorite techniques for adding drama and impact to landscape images is creating a sunburst when the sun is in the frame. Sunbursts introduce added interest to any frame and are especially fun to add in when you have a completely clear sky.
A starburst of the sun happens as a result of diffraction. Light goes into the small opening of a narrow aperture of our camera and is then bent around the edges of the blades. This disperses the light rays into a starburst.

Here are some tips and thoughts to think about as you capture sunbursts in your shooting!
1) Choose A Wide Angle Lens - Wider focal lengths will produce more rays in the starburst so your best bet will be a focal length in the 14-35mm range. This is not to say you cannot capture a sunburst with a longer lens, but the wider angles are ideal. Keep in mind that regardless of focal length, different lenses create different looking sunbursts. For example, my Nikon 14-24mm lens produces a bit of a circular flare starburst at 14mm (image below) which is different from my Nikon 16-35mm lens at 16mm. (image above) Experiment with your lenses and focal lengths to see which one produces your favorite burst!

2) Close Down Your Aperture - Closing down the aperture will produce more distinctive rays in the sunburst. It is possible to get a sunburst with an aperture wider than f/16 but f/16 or f/18 are my top choices for a great sunburst.
3) Sky Matters - The best conditions for a good sunburst will be a patch of clear sky for a bright and sharp sunburst! Trying to create a starburst through a thin layer of hazy clouds is like banging your head against a wall. When the sky has some thicker clouds amongst clear sky, when the sun hits the clouds, this can create nice potential for a burst of rays into the sky and over the clouds.
4) Consider the Position of the Sun - When the sun is in the middle of a clear blue sky, a nice sunburst can be achieved. Other times, the best sunbursts are created as the sun hits another object, such as a mountain top, horizon, building, tree, etc. This helps the rays to disperse over the object the sun is hitting. This can require patience waiting for the sun to rise or set to the position desired. And sometimes it can require a little movement on your part to line things up.


When shooting sunbursts through trees, even slight shifts in position can help create a better or more distinct sunburst.
5) Expose for the Highlights - One of the keys to getting a great sunburst with distinct rays is to be sure that the highlights are well contained. Ideally, it is best to avoid blowing any of the sun highlights except for the circle of the sun. Exposing for the bright sun does mean that the overall image is somewhat underexposed and the shadows will be quite dark.
6) Bracket Exposures - Following #5’s tip for exposing for the highlights to get a great sunburst, consider bracketing your exposures and also taking an image exposed for the shadows and one for the midtones. Then combine them in post processing so you have detail in the full tonal range of the scene. You can bracket manually or program the camera to automatically take several images at different exposures.

7) Consider Your Position - As mentioned in tip #4, both the position of the sun and your position matter for creating a strong sunburst. Another thing that is impacted by your position is additional flare. Shooting into the sun can bring creative and desirable flare but it can also create unwanted and distracting flare. Look for this unwanted flare as you shoot and in your test shots and consider shifting your position. Sometimes minor adjustments in your position can remove unwanted flare or position it better in the frame where it is less distracting or more easily cloned out. A lens hood can also be a useful tool to avoid unwanted flare. Though sometimes nothing avoids it completely.

Kristen Ryan is a landscape and fine art photographer residing in the Midwest suburbs of Chicago. All images can be purchased in the Fine Art Store. Kristen leads ladies landscape photography retreats in the Tetons, Chicago, and the Canadian Rockies, offers private mentoring and teaches an online landscape photography workshop twice a year.
4 Ingredients to Impactful Landscape Photography
Sunrise on the North Shore of Oahu, Hawaii
I often reflect on why I spend a lot of my time with landscape photography, both shooting and processing as well as educating others. The reasons why are a topic all their own. But all the time I spend shooting, studying, practicing, educating and encouraging others has made me reflect on what it is that creates stunning landscape photographs. I think about how to take my photographs to that next level and of new ways to teach and encourage others in my retreats and online workshop.
In my mind, it comes down to 4 ingredients. There are exceptions to every rule, of course, but there are 4 ingredients that must come together to create exceptional landscape and nature imagery. Several of which we can control, and one in which we cannot, at least for the most part.
1. CRAFT
The first ingredient in creating amazing landscape images is knowing your craft. And when I say craft, I am referring to the technical settings and techniques involved in mastering your camera and in shooting landscape photography more specifically. It is important to put in the time to learn the basics of photography, including the exposure triangle, white balance, focus and metering modes. Learn how to use filters such as polarizers, graduated neutral density filters and regular neutral density filters. Honing your craft including learning to read your histogram and how to bracket images to capture the entire dynamic range of the scene. Develop an understanding of depth of field and learn to use a tripod and intervalometer with ease. Learn the rule of thirds and other composition elements that will add depth and strength to your frame. Take a class on post processing or study on your own how to use the tools of these programs. This is all about learning the techniques and tools you may need to capture a well exposed and focused image and edit it in Lightroom or Photoshop.
2. VISION
The second ingredient in creating amazing landscape images is vision. Learning the tools and techniques is just half the equation. Beyond understanding the technicals, we have to learn to see in our minds what we want to create with these techniques. The two go hand in hand, as the stronger understanding of the technicals and the more we hone our craft, the stronger and more creative our vision grows. Vision helps us find that unique perspective or puts an artistic polish on the image through post processing. Craft is the skill while vision allows us to express ourselves with that skill. The more we practice the various techniques, in shooting and processing, the more creative possibilities open up to us. We learn to see what we might not have seen before. For me, this vision comes from framing images in my mind as I drive or hike, and from reflecting on past clicks of the shutter that fall short of impressing me. Just like our craft, our vision grows from practice and is integral to creating unique and impactful landscape images.

My vision here called for an 8 minute exposure. Mt. Rundle in Banff National Park. Alberta, Canada
3. OPPORTUNITY
To practice and develop both craft and vision, there must be opportunity. Sometimes these opportunities may fall in your lap and other times you must create opportunities. You have to sacrifice sleep or time with family to get out when the light is good or to travel to a place which inspires you. This can be easier said than done. Unless photography is your full-time job, you may have another job that restricts your time or perhaps you take care of kids full time and getting out or away requires finding childcare. If you live close to incredible scenery, you may have many great opportunities close by. If you don’t, you may have to work a little harder.
The opportunity factor can be a little complicated because in many ways you have control. You can decide (to an extent) where you live but if you are married, you have only some control. You can decide to get up early for sunrise, but you may have kids who have to get to school and your spouse is already off to work, such as my situation. You may love photography but your career is another profession and it demands a lot of your time. You may dream of traveling off to Norway, New Zealand, Bora Bora or Patagonia, and maybe you could, but your 3 young and adoring kids are at home needing care. You may want to go shooting at night in the city or in the middle of nowhere to find dark skies, but venturing out alone as a woman feels scary or unsafe.
It can be challenging to combat the things that work against you, and in some cases you COULD make more opportunities but then other aspects of life may suffer. I feel this often as I long to live near the mountains and to travel to those places like Norway and New Zealand. However, my life is outside Chicago, where my husband’s job supports myself and my 4 kids in a way for which I am so grateful. I steal my opportunities to shoot at sunrise when we travel as a family, though I don’t explore in the same way I would as a photographer. I am finding ways to travel as a landscape photographer but going too far or being gone too long is not something I am comfortable with right now. My creative heart is pulled in one direction but my mama heart is pulled in another. I may not be ‘less’ of a photographer for lacking some of these opportunities, but it means some of the images I dream of are for another day, another season of life perhaps.
The trouble with having (and to some extent choosing) limited opportunities leads me to the fourth ingredient over which we have little to no control….
4. LUCK
The fourth ingredient is luck. And when I say luck I am referring to the luck of Mother Nature. We have absolutely no control over the weather! Where we sometimes, but not always, have a little control is that we can make an effort to go out to shoot when we see an optimistic forecast. You can head out for sunset when the forecast is for partly cloudy or head out to shoot the Milky Way during the New Moon and a clear forecast. But you cannot control when that beautiful puffy cloud filled sky in the afternoon suddenly decides to become clear with no sunset color whatsoever. If you head out to shoot those stars and the clouds come earlier than expected, you cannot just blow them away. If you plan a trip to the mountains in the autumn when it is usually peak color and peak comes the next week, there is nothing you can do about it. You can get up every morning of a vacation, but if you get a week of clear skies, your sunrise will look mostly the same. Only a landscape photographer gets sad to see a weekly forecast of full sun after full sun! There is nothing you can do to change the weather when Mother Nature foils your plans.

When Sunset is Stormy in the Tetons. Grand Teton National Park, Wyoming
There are two things you can do, however. The first is to look for the beauty that IS in front of you, because if you are open to the idea that there is always SOMETHING beautiful to photograph, you can usually find it. It may not be what you were hoping for, but if your mind is open to creativity and possiblities, you might just find it. Maybe the photographs won’t be as epic as what you hoped for, or maybe they will be, just in a different way. If all fails, the other option is to try again another day. Create another opportunity. It may take some time but keep trying, and you will find the jaw dropping sunrises, the star filled skies and the rainbows through the clouds.

Magical morning in Oahu, Hawaii
So hone your craft, let your vision and creativity run wild often, create and seize the opportunities you get! You may find Mother Nature rewards you with what you hope for, or perhaps something else entirely. And when you get drenching rain while your photographer peer gets a gorgeous rainbow, congratulate them on a beautiful capture, knowing yours is out there for another day :)
And lastly, get out for the experience of being in nature. In the end, isn’t that what draws us out there as much as the images? It does for me anyway.
Happy shooting my friends!
Looking for some photography filters to add to your creativity, check out Maven Filters! *
Kristen Ryan is a landscape and fine art photographer residing in the Midwest suburbs of Chicago. All images can be purchased in the Fine Art Store. Kristen leads ladies landscape photography retreats in the Tetons, Chicago, and the Canadian Rockies, offers private mentoring and teaches an online landscape photography workshop twice a year.
*affiliate link

