
Welcome to my blog! Thank you for clicking into my little corner of the online world where I share my landscape passion through my images and tips for other landscape photographers! Sign up for my newsletter and get your free ebook with 25 Tips for Impactful Landscape Photography.
Links to Check Out!
Looking for filters to add to your creativity? Check out MAVEN FILTERS!
Listen to my podcast episode with Jen Ritchie on Wildlife Conversations or watch on YouTube HERE.
Listen to my episode HERE with Austin James Jackson on his podcast, Master the Moment.
Listen to my episode on the Landscape Photography World podcast, hosted by Grant Swinbourne.
Listen to my conversation with Brenda Patrella on the Outdoor Photography Podcast from October 4, 2022
Check out my podcast episode over on InFocus Women - with Sarina Jackson and Steph Vella
Listen to my conversation with Allison Jacobs on “The Creative Frame” podcast.
Read Kristen’s article, “The Allure of Nature”, in the December, 2020 issue of Outdoor Photographer.
Listen to Kristen & Matt Payne’s conversation on the F Stop Collaborate & Listen podcast aired January 6, 2021.


10 Tips to Improve Your Landscape Photography
1. Learn the fundamentals - It is really important to understand all the settings of your camera and have a solid understanding of the exposure triangle and white balance. Having a solid understanding of how to use ISO, aperture and shutter speed will not only create better technical photographs but increase your artistic creativity as well.

2. Buy a great tripod and USE it!
I know no one is excited about another heavy piece of gear to carry but a tripod is one of the best investments you can make in your landscape photography. A tripod will help increase the sharpness of your images by keeping your camera steady. This is especially crucial when bracketing images or using slow shutter speeds. This is such an easy step to achieve in improving your landscape imagery.

This 30 second exposure in the Tetons could not be achieved without a tripod
3. Shoot In RAW
Landscape photography often means shooting in light with a high dynamic range. In order to capture and keep all the details in your image, you want all the information that a RAW file will capture. RAW files are much more forgiving when you make a mistake an underexpose your image. You can often rescue a underexposed image without damaging the image quality with a RAW file, but not with a JPEG.
4. Learn Basic Post Processing
Learn to process those RAW files so that you can bring out the scene you captured. Even the most basic RAW adjustments can go a long way to transforming the straight out of camera file you captured. Lightroom is excellent for cataloging and quick adjustments and is easy to use. Remember that often just some small adjustments are all you need to take an image to that next level.
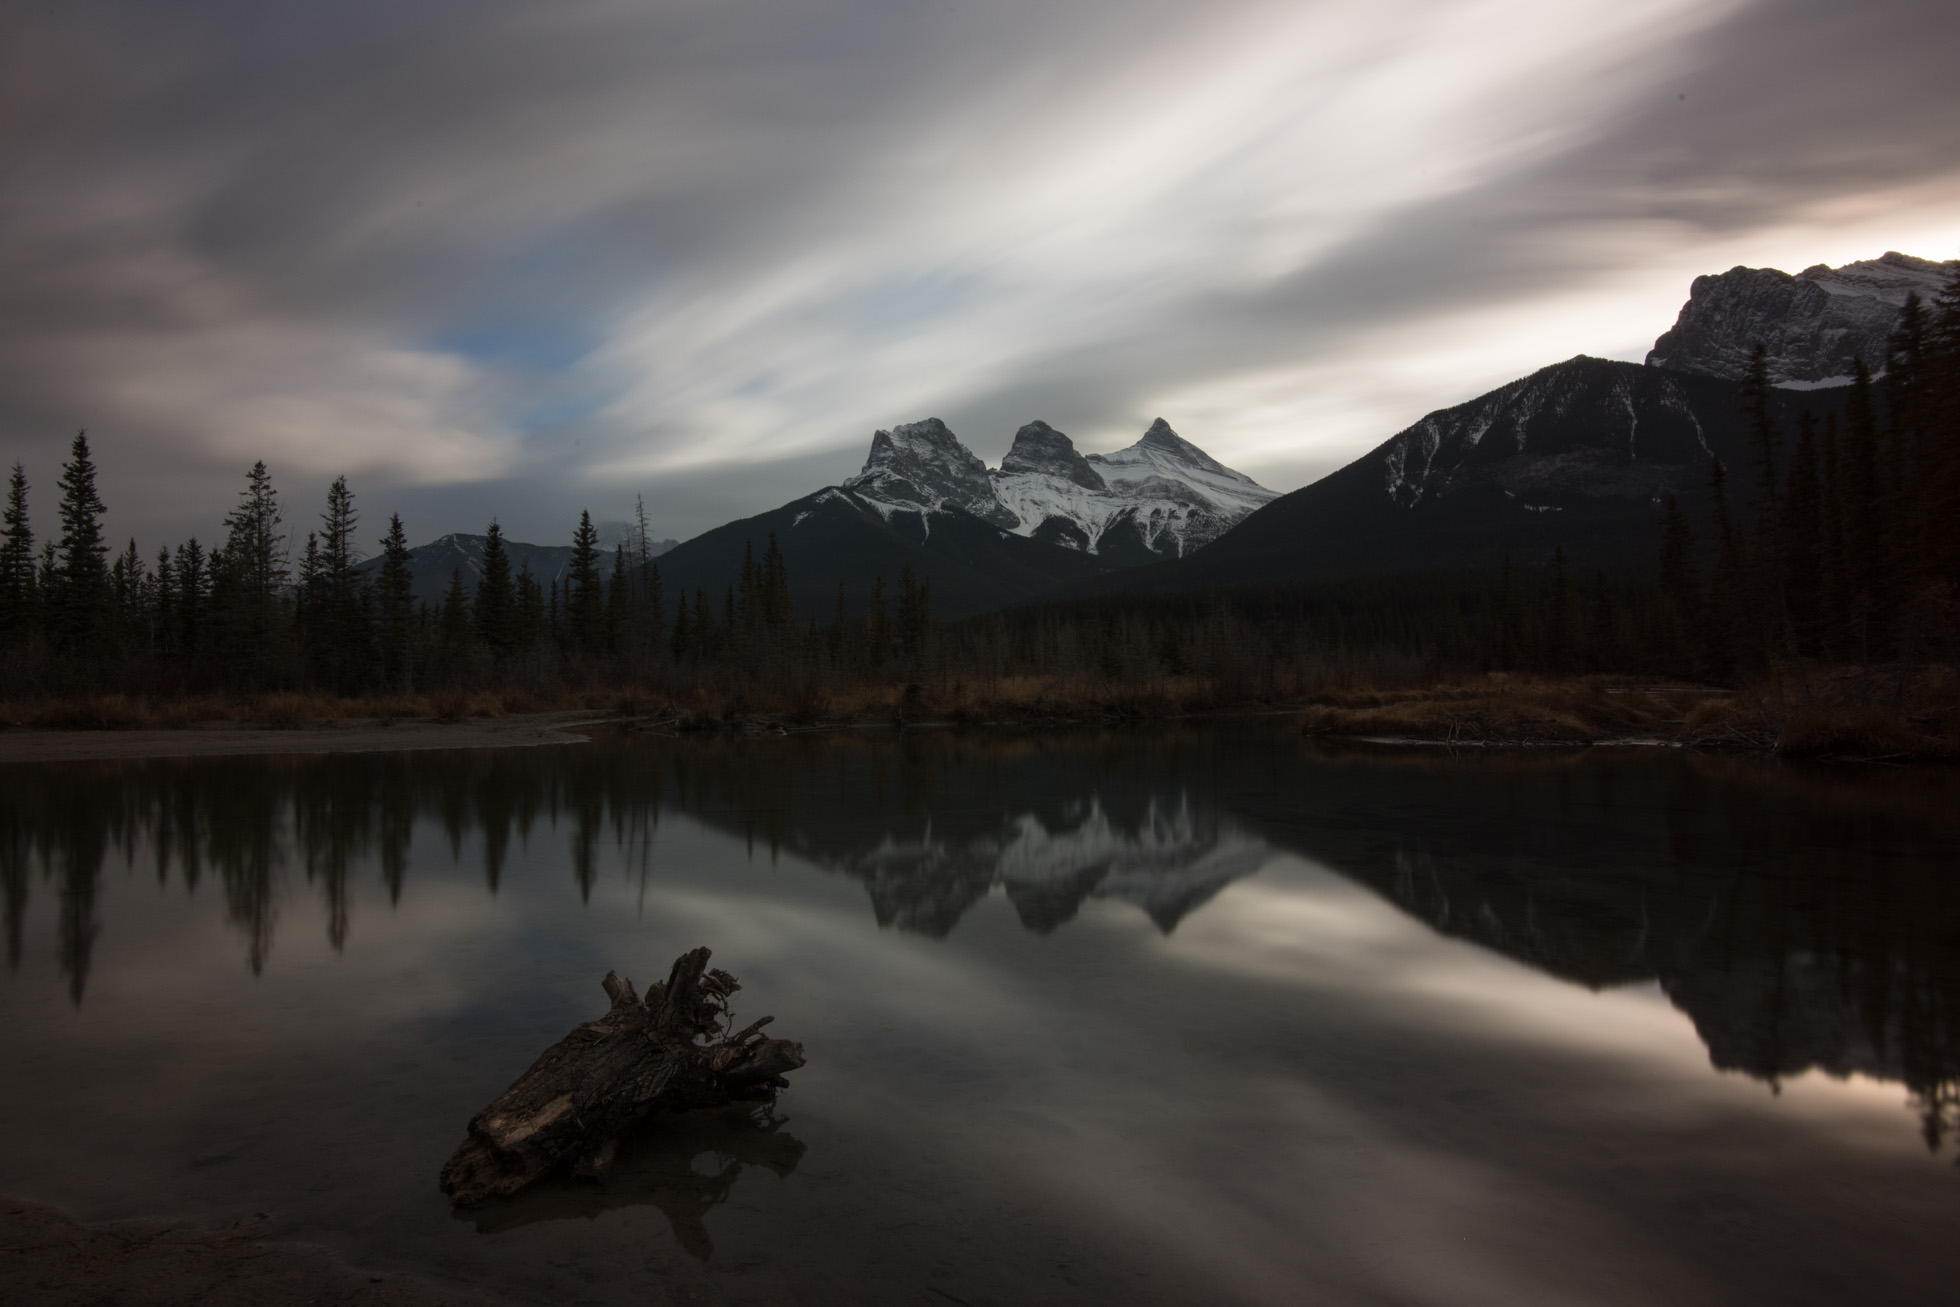
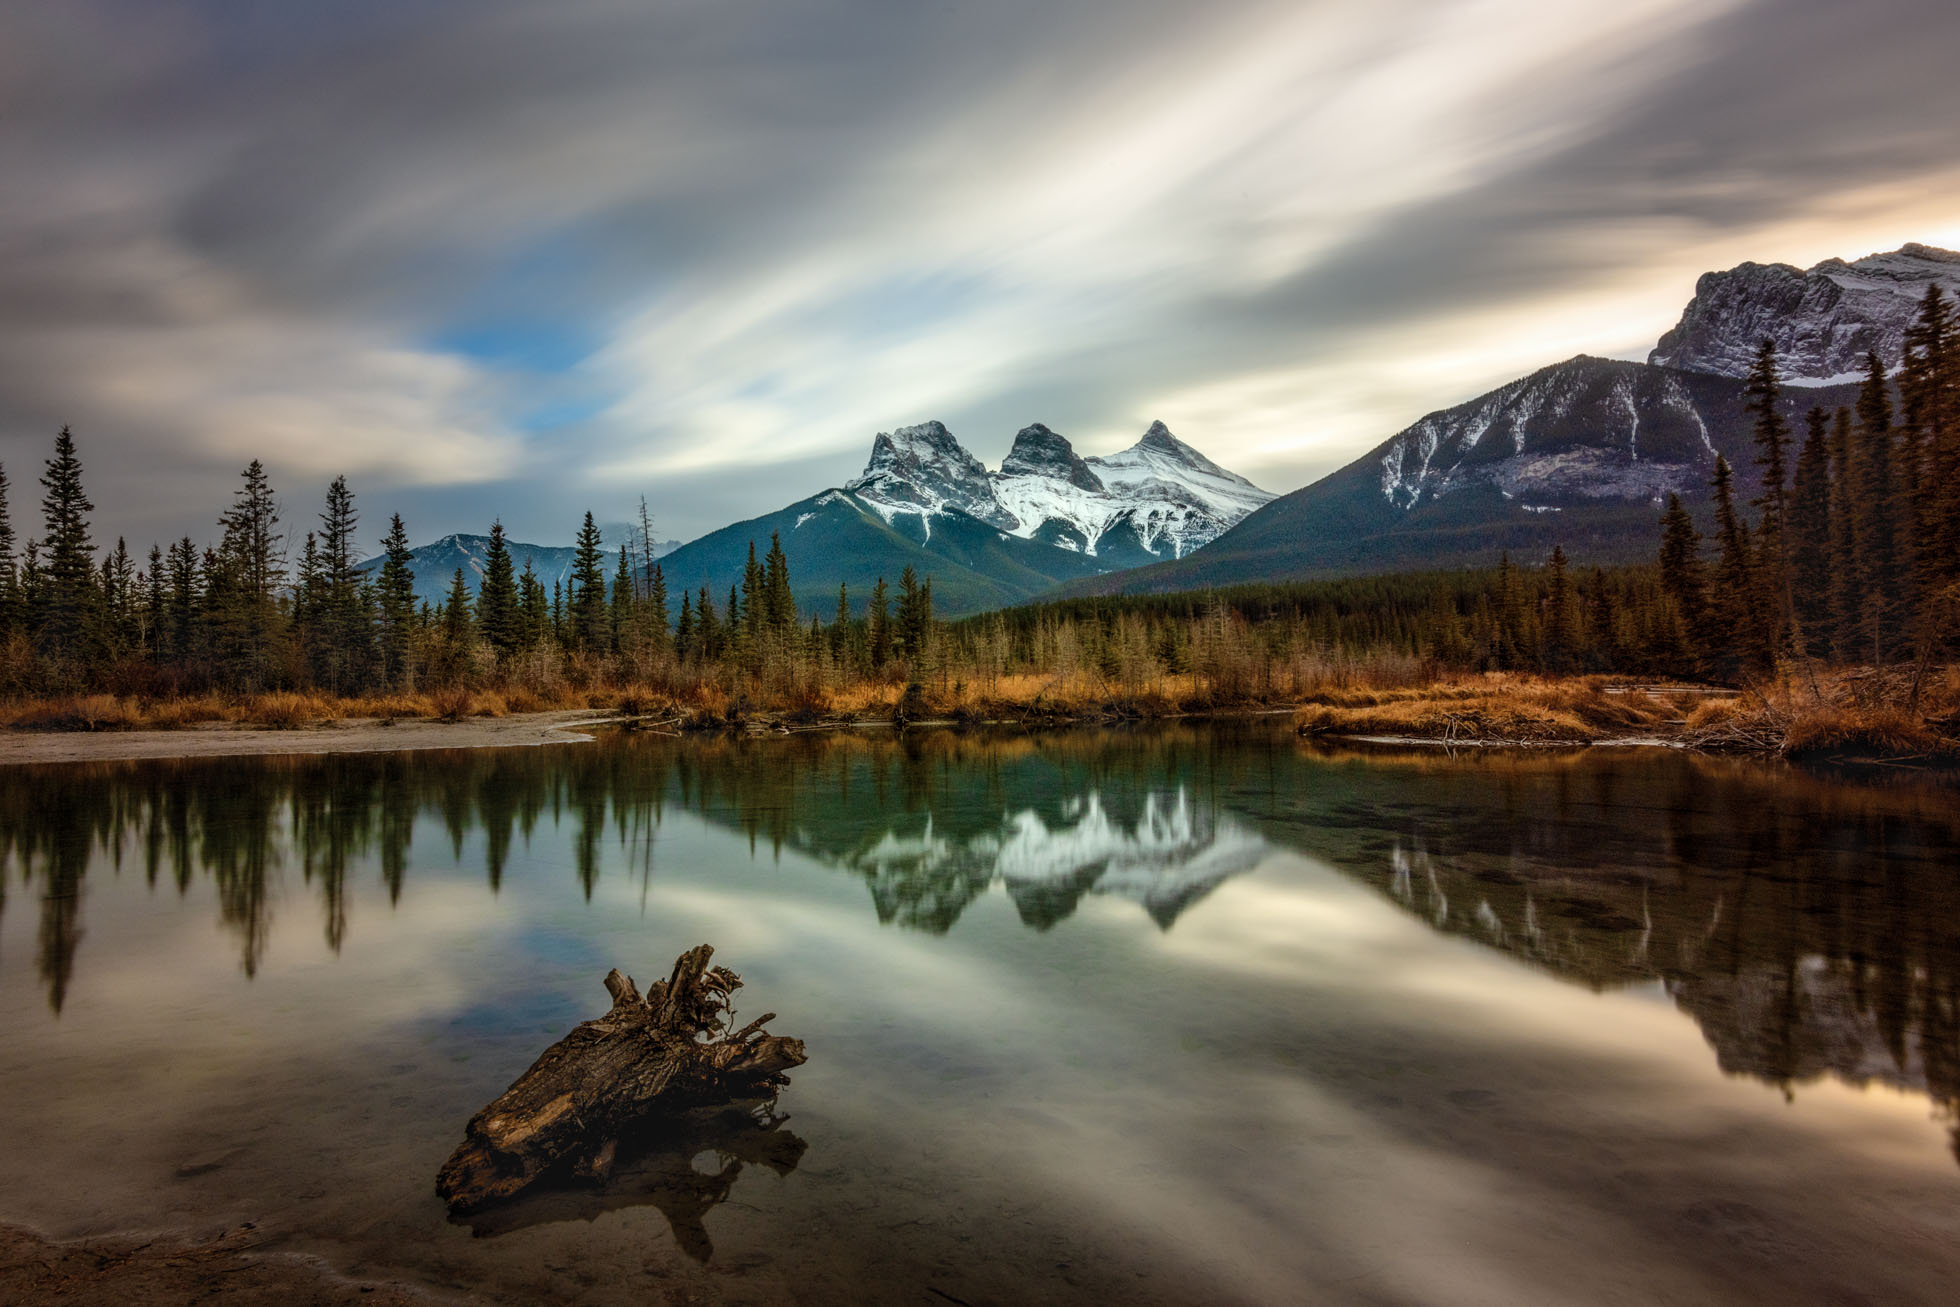
See BEFORE & AFTER below of the Three Sisters in Canmore, Alberta Canada.
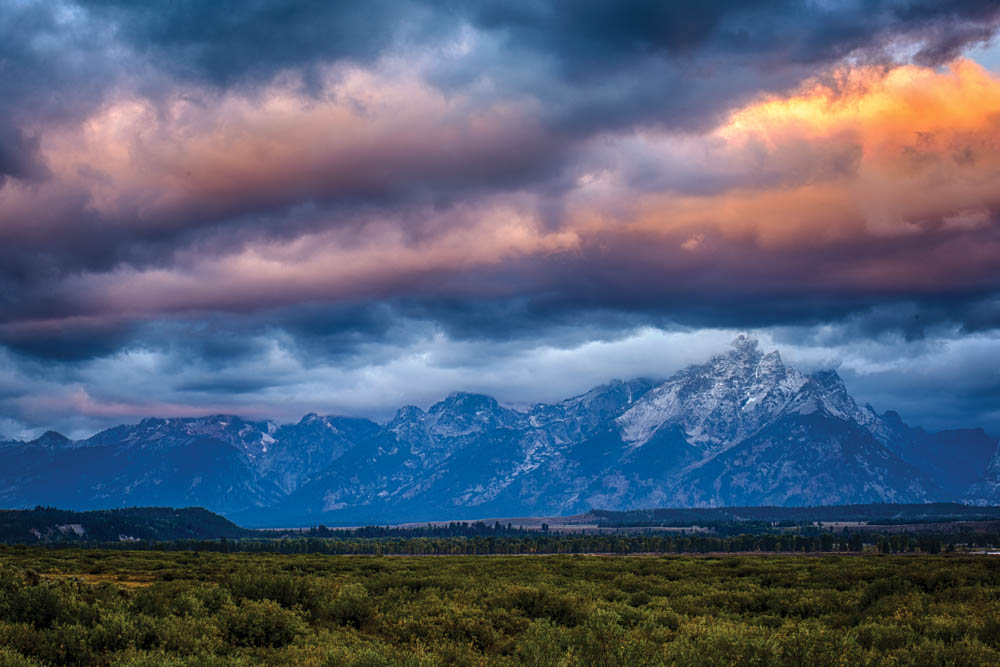
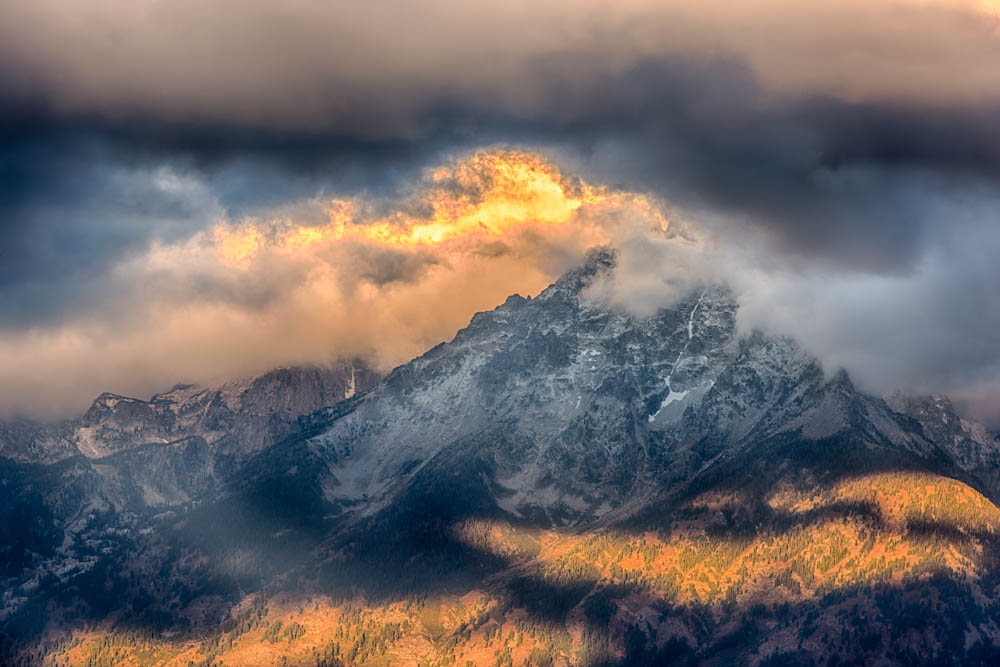
5. Get out in the right light
There is a reason landscape photographers get up early and stay out late. The light at these times will create more compelling and dynamic images. Yes, it is possible to create incredible photographs in the daytime hours, but more often than not, those golden hours into night time will raise the interest in your landscape imagery.
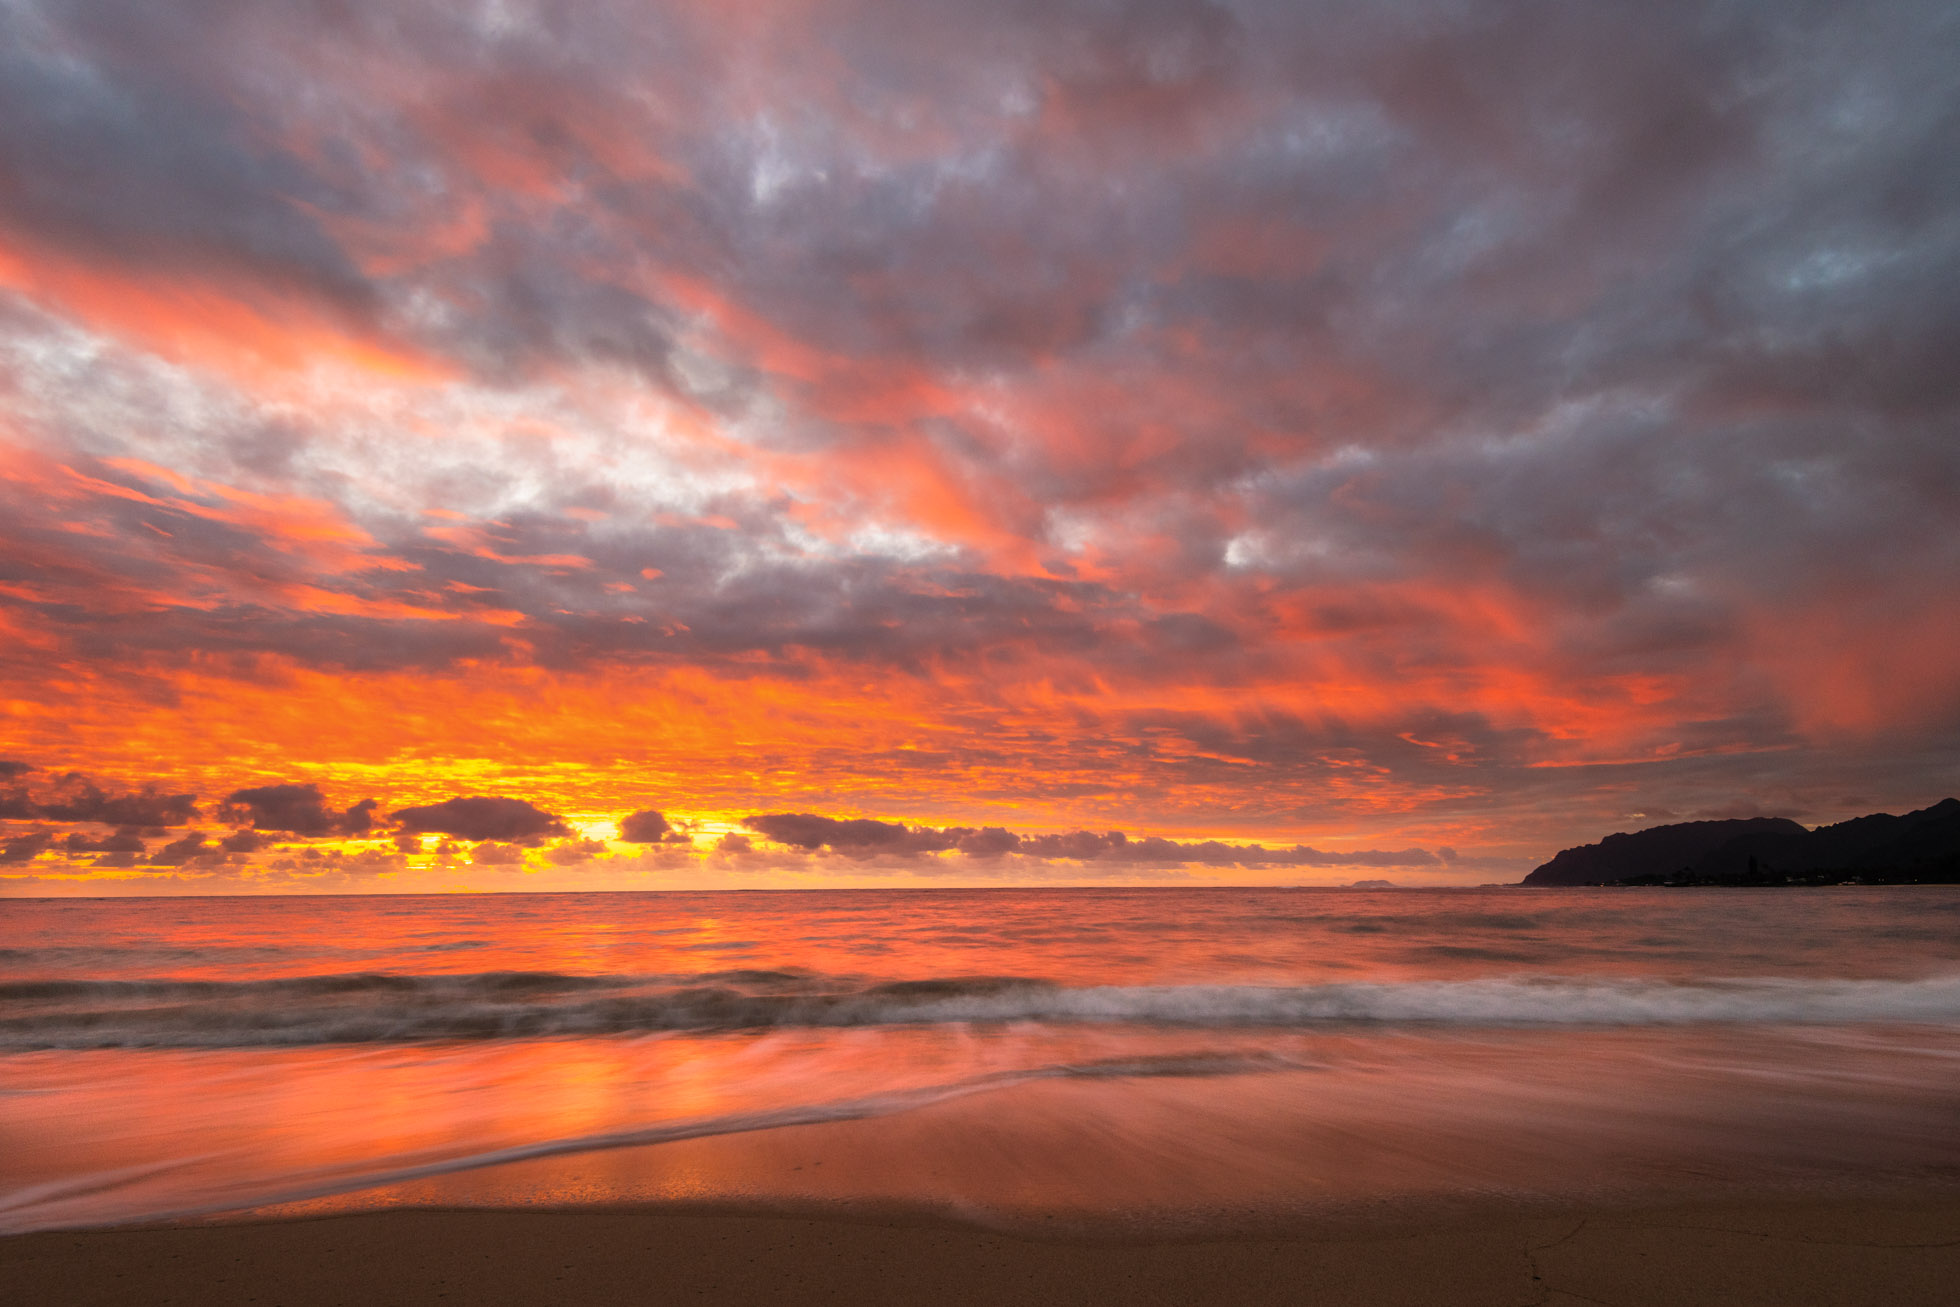
Sunrise in Oahu, Hawaii
6. Experiment with perspective
You got the tripod, set it up, and stay there shooting away, right?! NO! Always vary your perspective. Get high, get low (even if that means taking the camera OFF the tripod), find some framing, look for leading lines and foreground interest. Perhaps there is a perspective that grabs you right away. Capture it. Then move around and find another one.

In this image, I used the ice in the foreground to create depth, a unique perspective and a greater sense of season and story.
7. Be creative with your shutter speed
In landscape photography, creative use of a shutter speed is often what takes an image from pretty to WOW! When photographing water or clouds in particular, a creative shutter speed allows you to put your own artistic spin on a scene that makes it unique. Finding the ‘right’ shutter speed for your vision can be a process but a fun creative experience.

.4 seconds of waves in Oahu, Hawaii
8. Vary your focal length
Often with landscape photography we naturally think the widest angles are best. And often this is true, but not in every case. Sometimes the widest angle will make our subject appear too small in the scene and we need a middle focal length. Other times it is details that draw our eye which can only be captured by a telephoto lens. Many times I try to capture a scene with various focal lengths to create several unique images from the same location. In the grid below the images are focal lengths as follows:
35mm. 70mm
130mm 200mm
9. Slow Down
Instead of quickly snapping the shutter, slow down and take in the scene in front of you. Consider the light. Thing about what is drawing you to the scene and why. Think about how you are feeling. Look for a unique perspective and take your time setting up the shot.
10. Capture what speaks to you!
In any scene you are capturing, there is something or some number of things that are drawing you to that scene. Perhaps it is the overwhelmingly wide expanse of the land, the way the light is hitting the trees, the curve of a wave, or the formation of the clouds at the tip of a mountain. Hone in on the beauty that is speaking to you and use your tools to capture the scene in a way that highlights those details. Listen to your inner voice and follow it. Always shoot for yourself, to satisfy your own inner artistic voice.
Check back next week for more tips to improve your landscape photography!

A beautiful icy and snowy afternoon in the Midwest
Kristen Ryan is a landscape and fine art photographer residing in the Midwest suburbs of Chicago. All images can be purchased in the Fine Art Store. Kristen leads ladies landscape photography retreats in the Tetons, Chicago, and the Canadian Rockies, offers private mentoring and teaches an online landscape photography workshop twice a year.
9 Tips for Creative Long Exposures
One of my very favorite things to do when shooting nature and landscapes is to experiment with long exposures Anytime I have the opportunity to get a creative exposure of clouds or water, I try to take it.
60 seconds in Grand Teton National Park - using a 10 stop filter.
Here are some tips to help you find success when experimenting with long exposures:
1) A tripod is your best friend. I know, I know, they are cumbersome and a pain to carry but are necessary so that you can keep your frame stable throughout the long exposure. Make sure your tripod is steady and secure.
2) Invest in good Neutral Density Filters. I recommend having a 3 stop, 6 stop and 10 stop ND filter in your bag.. In brighter light and to get 30 second or longer exposures, you will often need a 10 stop filter. In lower light and/or an exposure of just a couple seconds, a 6 stop filter may be sufficient. For even longer exposures in daylight you can use a 15 stop filter as well, or you can stack a 10 stop with a 3 stop or 6 stop.

4 seconds at Natural Bridge in Yoho National Park - using a 6 stop filter.
3) Compose your frame and focus for the desired depth of field BEFORE putting the filter in front of the lens. Once you put a 10 stop filter on, you can't see through to focus and compose.
4) Set the new exposure BEFORE putting the filter on the lens. Find your proper exposure without the filter on. Then you can use a Long Exposure Calculator App to find the new shutter speed after you put on the filter. Usually you will need to max out your ISO and aperture unless you are shooting in really low light. For example, say I set my ISO to 100 and aperture to f/22 and my base shutter speed is 1/80. If I enter into the app a 1/80 shutter speed and tell it I am using a 10 stop filter, the app will then tell me that a 13 second shutter speed will give me the same exposure with the filter on. So then I will change my shutter speed to 13 seconds before I put on the filter. The less I touch my camera after putting on the filter, the better.

4 minute exposure using a 15 stop ND filter in Grand Teton National Park.
5) Use a Shutter release remote. These are critical if you are using a shutter speed slower than 30 seconds as you must then turn to bulb mode. But even out of bulb mode, using a shutter release is one more way to eliminate the chances of bumping your frame and increasing sharp focus. Your camera’s timer is also a great option. I often use a 2 second timer.
6) Cover your eyepiece viewfinder to prevent light from coming into the frame as this creates undesirable light leaks. My Nikon D810 and D850 have a little door that covers the eyepiece. But otherwise, I would cover it with a black/dark cloth or anything else that will keep the light out.
7) Check your histogram. Sometimes finding the right exposure with the filter can be a bit of trial and error. Don’t rely on the app or the LCD screen. Make sure the histogram is toward the right without climbing the right wall. If you need to bump exposure, lower that shutter speed, OR if your shutter speed is where you want it for creative effect, raise your ISO or open up your aperture.

2 minutes with a 10 stop filter at Lake Louise in Alberta, Canada
8) Consider the creative effect and mood of the image you want to create! When choosing your shutter speed length, think about your creative vision. For really streaked clouds, you may need a 60 second exposure or even a few minutes. If clouds are moving fast, 15-30 seconds may create the look you desire. With water, you may want to create a really smooth effect with 20-60 seconds or perhaps you want to leave more texture in the water with a 1 second exposure or a fraction of a second.

2.5 seconds in Kauai
9) Lastly, look at the other areas of your frame. Do you have unwanted blur in other areas of your frame…such as trees, grasses or other foliage? If so, capture the exact composed frame with a faster speed so you can composite the two images later in post processing.

3 minute exposure for the sky combined with a fast shutter for the foreground grasses. Shot in the prairie of Illinois.
It's a little addicting, so don't say I didn't warn you! Are you looking for filters for long exposure photography? Check out Maven Filters.*
Check out my online workshop, mentoring, or ladies’ landscape photography retreats for educational opportunities.
*Affiliate Link

