


Are you wondering what lens is the best choice for landscape photography? I often get asked by my online students and retreat attendees what lens is best for landscape photography and which lens is my favorite. The simple answer is that my favorite lens/focal length is the one that best captures my vision of the image I am seeing in the moment.
The more in depth answer is that there really isn’t a SINGLE best lens for landscapes. It depends very much on the particular location. Sometimes you may need an ultra wide angle to get the entire scene in the frame or the sky is so amazing you want to include as much of it as you can. Other times, you want to hone in on a smaller portion of the scene; just the part that is grabbing your eye. And sometimes you really need reach to grab detail that you cannot get with anything other than a telephoto.
So, what’s the best lens? There isn’t ONE. However, I will give you some thoughts and examples of the several lenses I use and then you can see how these lenses would help you in the areas you photograph.
First off though….zoom or primes? Prime lenses are sharp and fast and will capture high quality images. However, as a photographer with a landscape focus, I am partial to zoom lenses in most circumstances. The reason being that it is not as easy to just ‘move your feet’ to get a different angle in most cases. I often need to zoom ‘out’ or zoom ‘in’ to change the frame. This also allows me to set up on a tripod and get various compositions from one location.
Ultra wide angle
I shoot with both the Nikon 14-24mm, the Nikon 16-35mm, and the Sigma 14mm f/1.8. I also have a 16-35mm for my Sony a7rii. All are fantastic lenses and I know from friends that the Canon 16-35mm f/2.8 is also an amazing lens.
These focal lengths will allow you to really showcase the expanse of the world. Imagine an endless sky, spanning view of mountains, or endless stars at night. The ultra wide angle is your best friend in these situations. If you love sunbursts, a wide angle lens will also give you the most amazing sunbursts!
The ultra wide angle is often my favorite. I love taking in the wide expanse of the world and very often, only the widest angles will truly capture that magic.

16mm was necessary to capture this wide scene of the Chicago Skyline to include the golden morning sunlight shining in from the left.

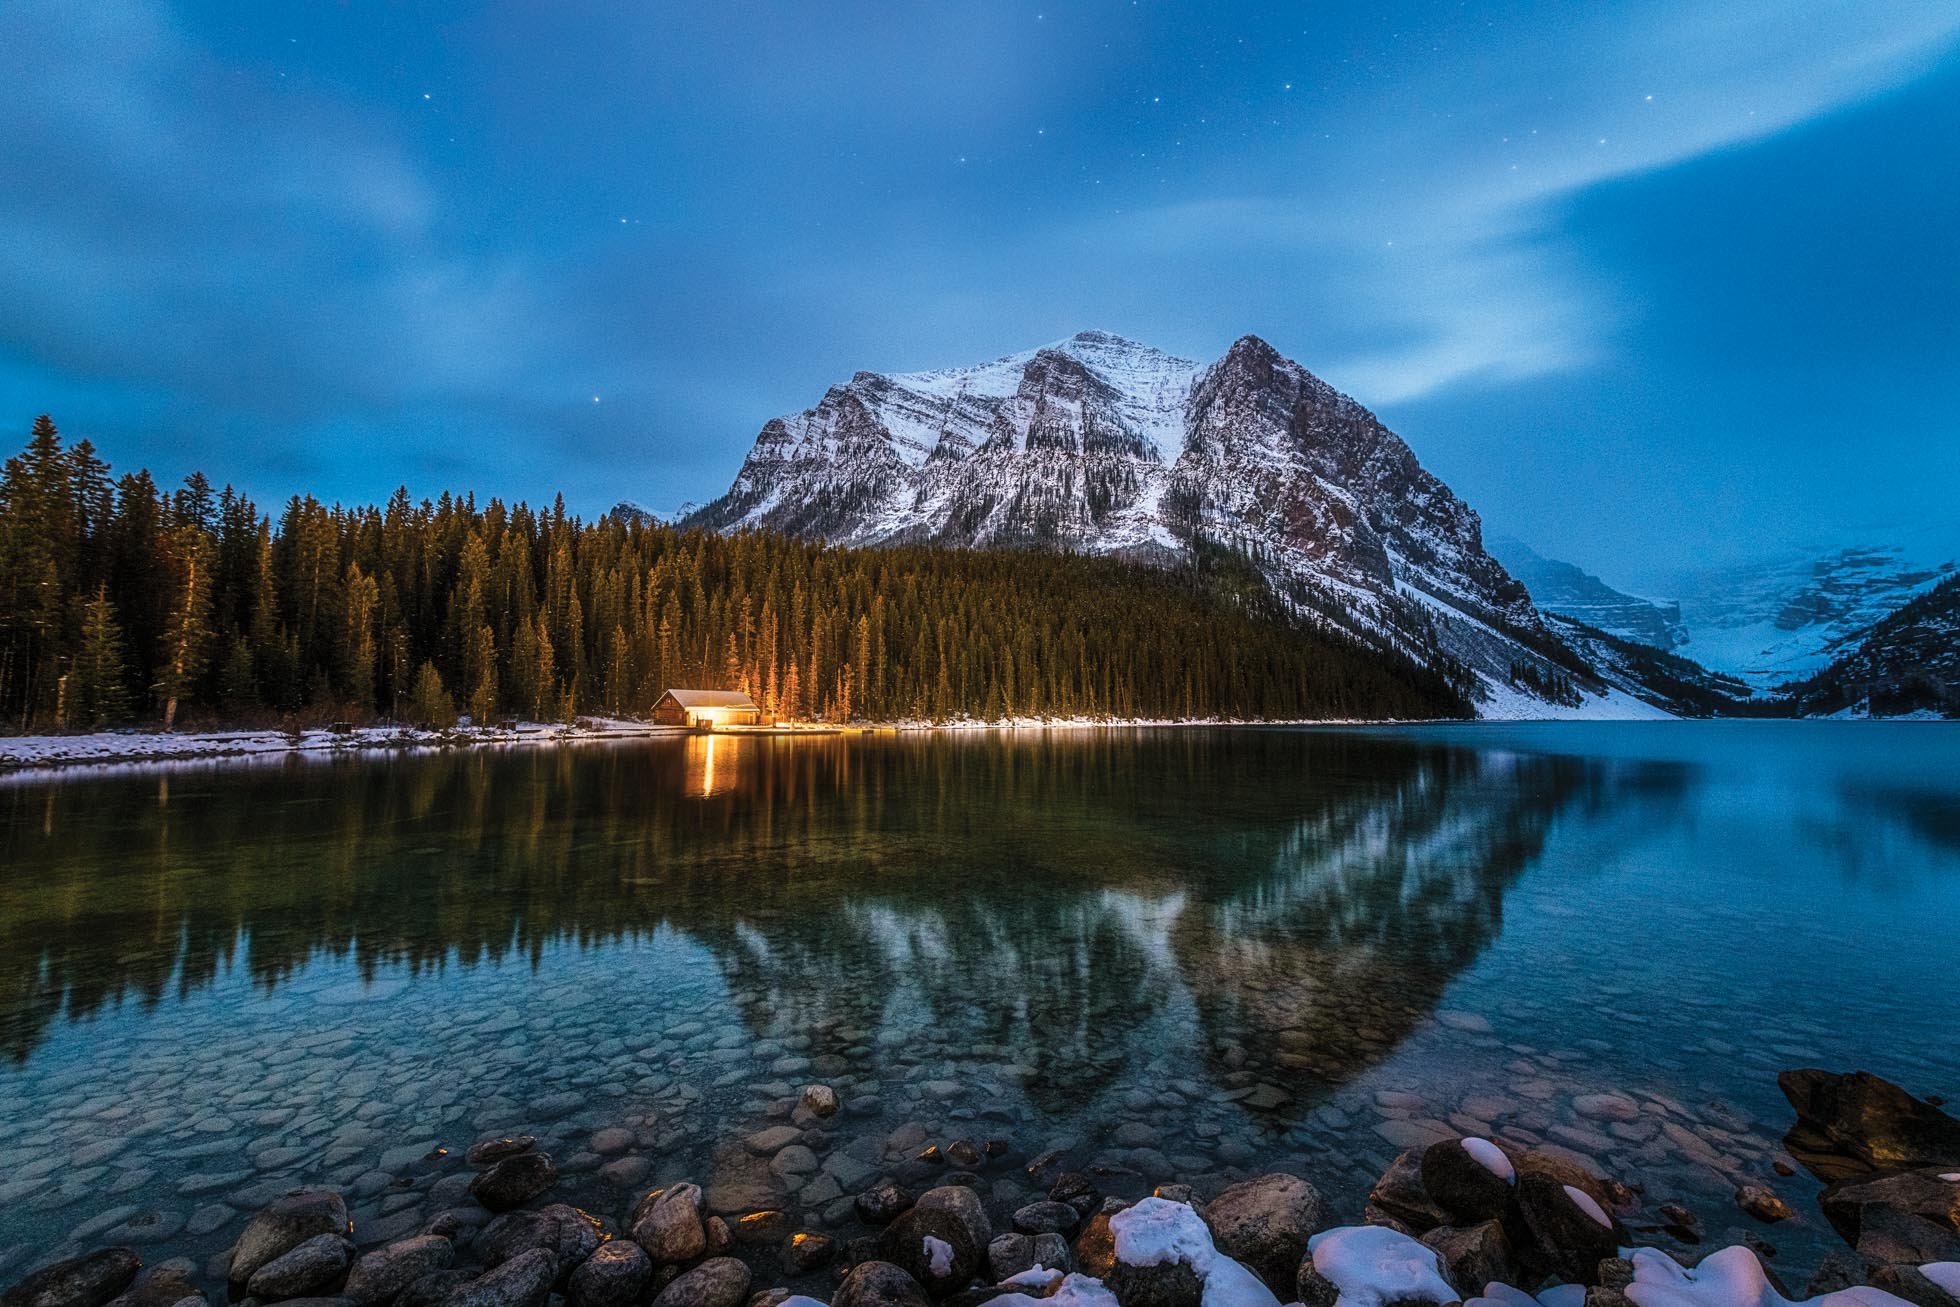
14mm is my favorite focal length for capturing the night sky. The ultra wide focal length captures the vast sky of stars in addition to the foreground scenery.

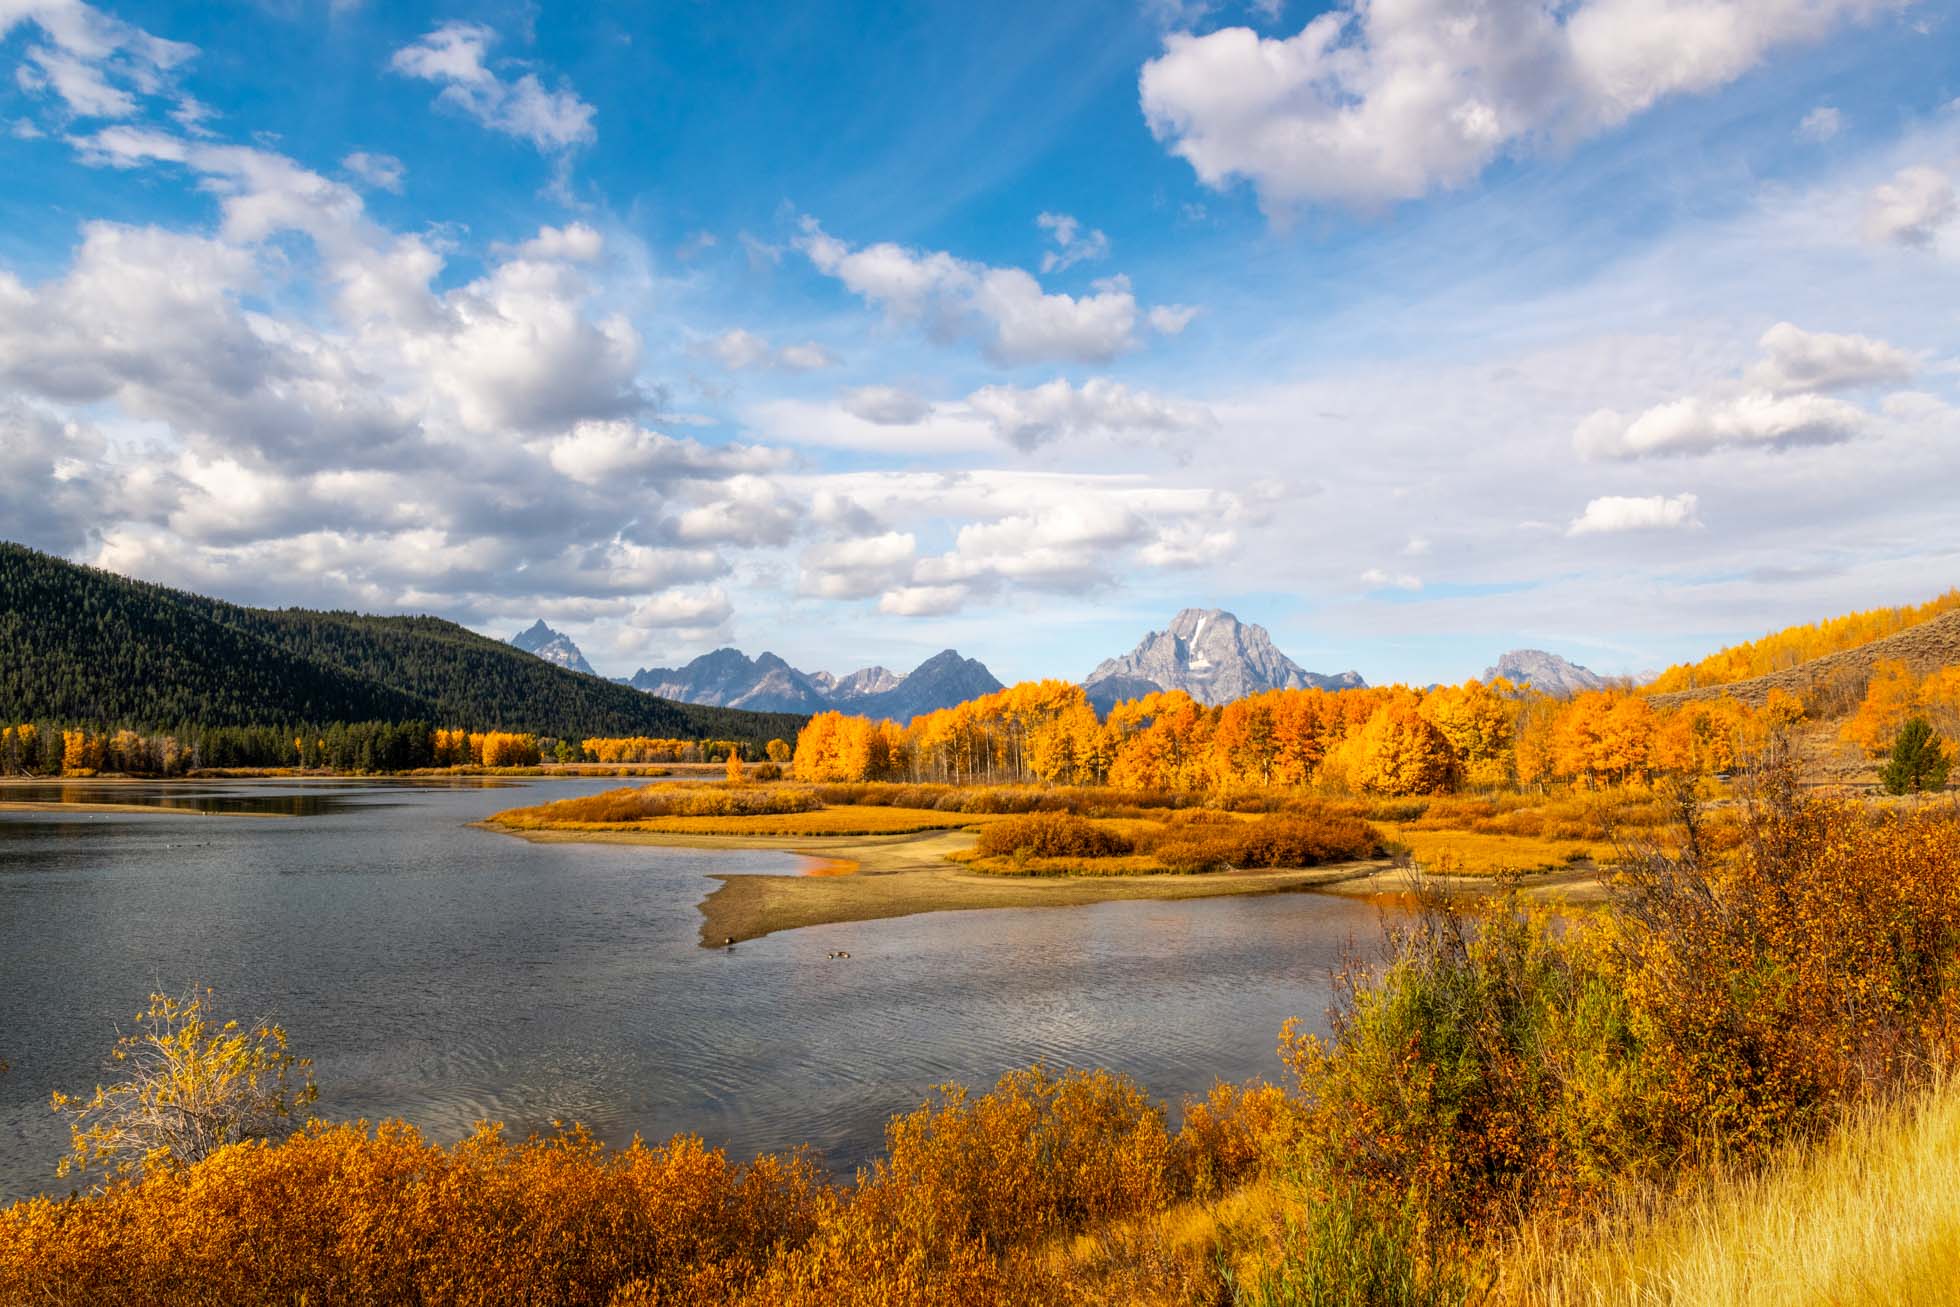
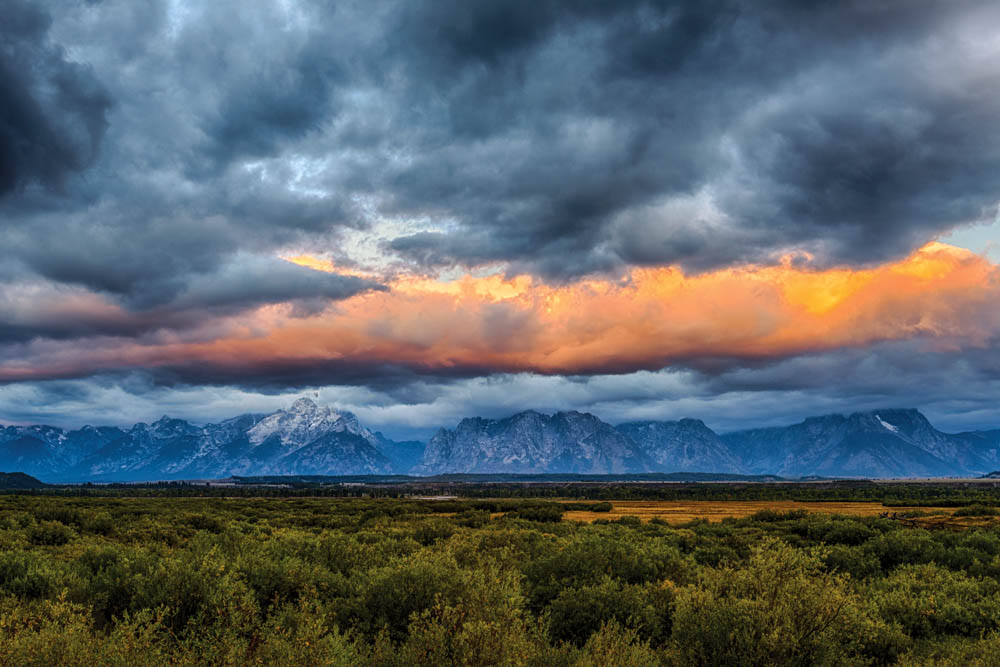
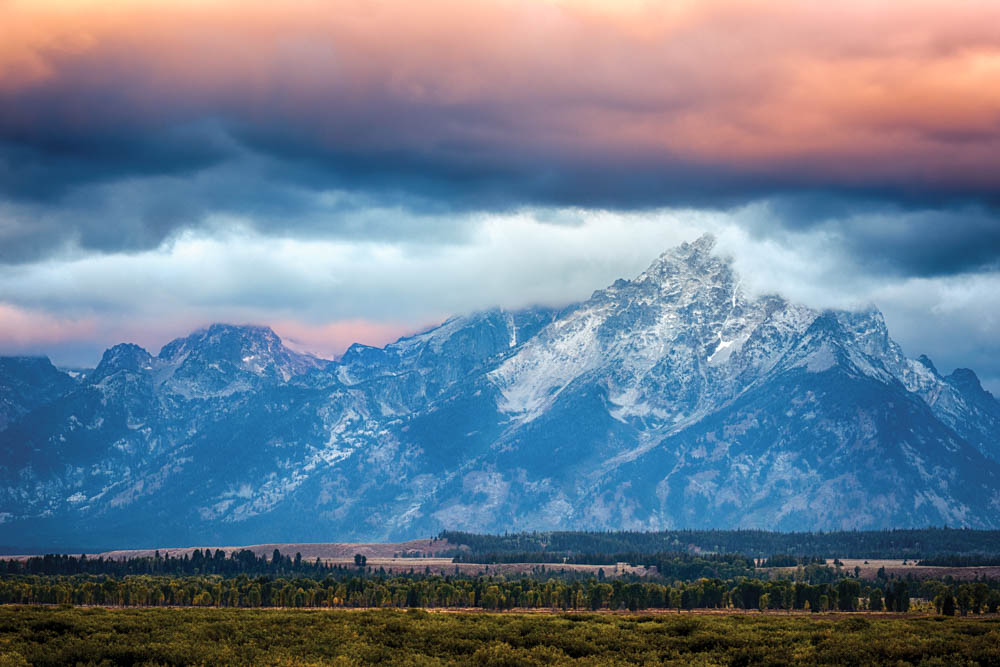
16mm captures the entire sunset scene in the Tetons, including a vivid and distinct sunburst.

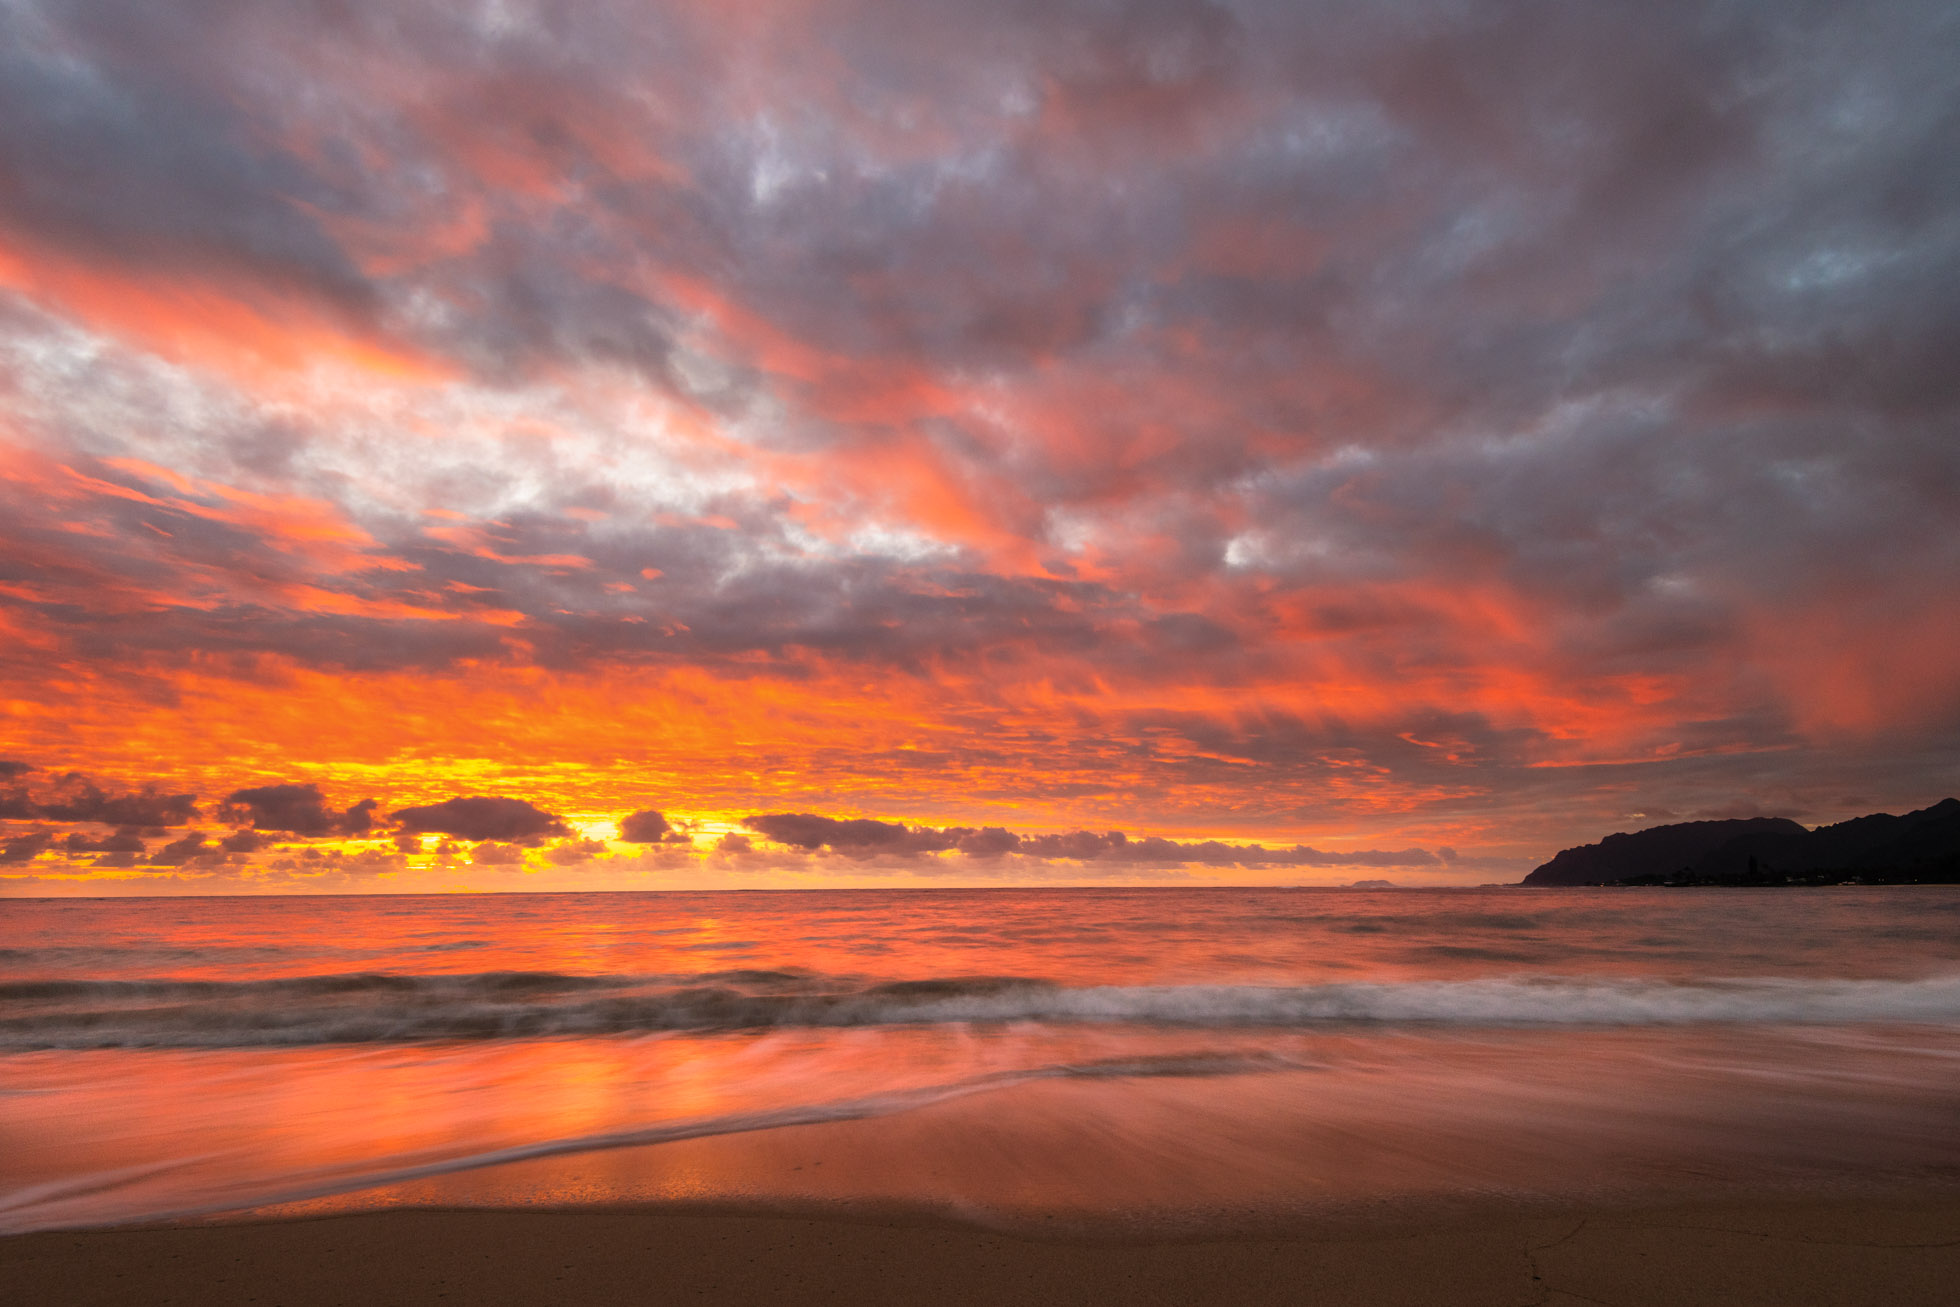
16mm allowed me to include significant foreground and ocean in addition to the beautiful sunrise sky.
But, I could not capture the variety that I do with only these widest angles.
Mid Range
I love my Nikon f24-70 f/2.8. If you could only buy or travel with ONE lens, I’d probably say to choose a 24-70 or 24-105 (which I don’t own but there are some great lenses out there in this focal length range)
The 24-70 (or 24-105) gives you a nice wide angle in the 24-35mm range but also allows you to zoom in a bit and grab some closer details. If I am hiking, for example, and want to only carry a camera without extra gear, this is often the lens I will grab. It is so versatile. This mid range gives you a very realistic view of the world’s scenery.
Some examples in this focal range.

48mm focused this frame between the trees. A wider focal length would have added distraction outside of the framed focal point of the waves.

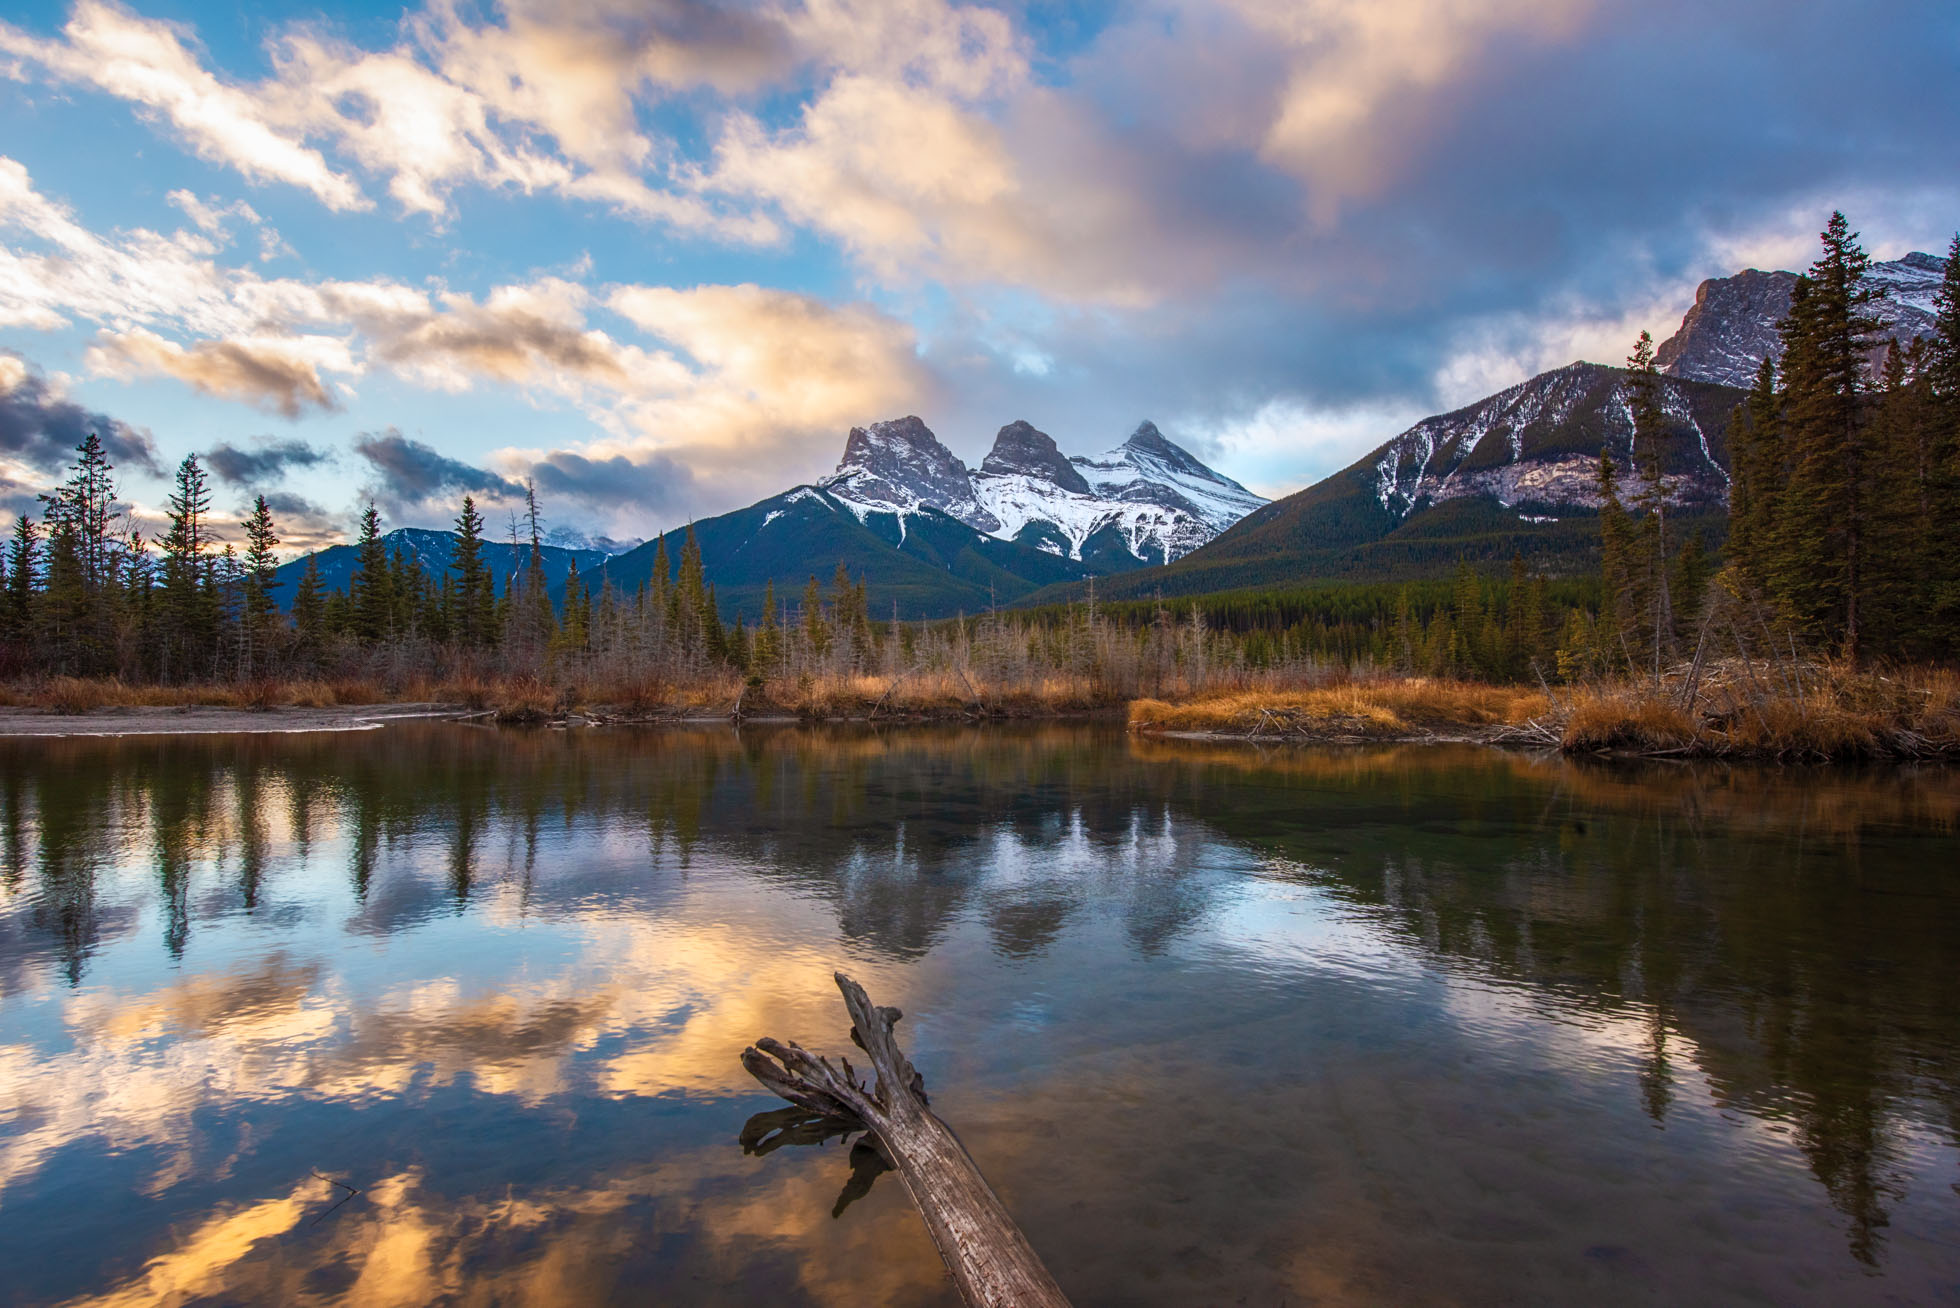
60mm brings me closer to Mt. Moran in this sunrise scene and creating nice symmetry between the mountains and their reflection.

70mm captures the birds and sun rays as the clear main subject of the frame while including the environment around them.

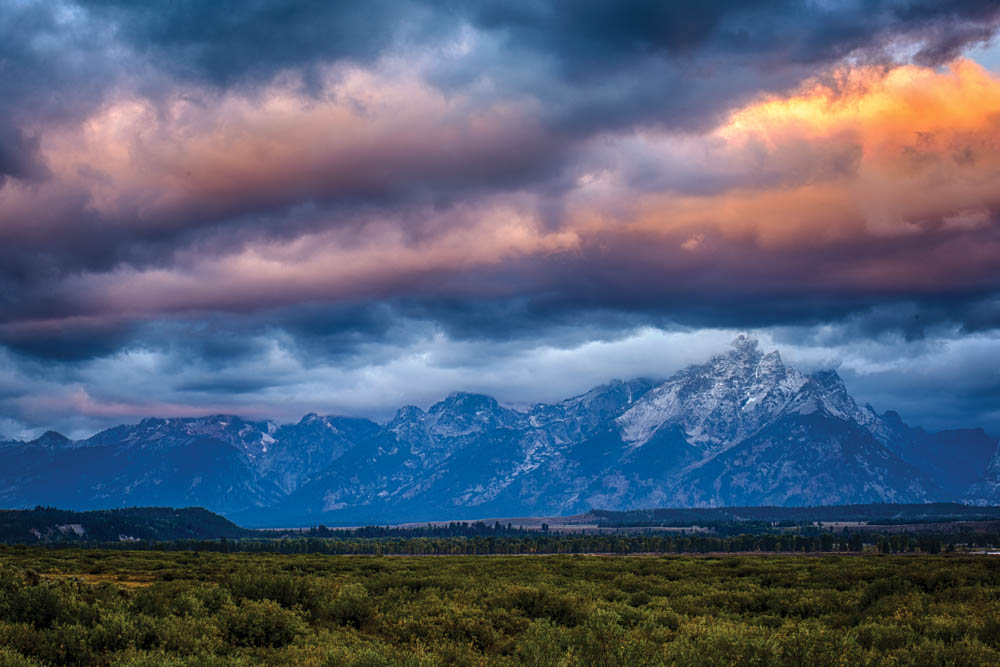
70mm brings the frame closer to the mountains and makes them a more prominent part of the frame than a wide angle
Telephoto
I own both the Nikon 70-200mm and the Sigma 150-600mm. I bought the Sigma more for wildlife and sports, but I also use it for some detailed landscapes.
Focal lengths in the 100+ range allow you to capture details of the landscape that you cannot get close enough to with the wider angles. Such as zooming in on a single mountain in a range, shooting across a body of water, or isolating certain details in a scene.

200mm
The week after Halloween, we got our first big snow. It just so happened I had just been out to the Arboretum the prior week photographing peak fall color. So after the snowfall, I drove through and spotted this incredible scene of seasons colliding. 200mm with my 70-200mm lens allowed me to highlight the detail of these two trees next to each other by filling the frame with the contrast of fall color and snowy branches.

175mm
I used my 70-20mm at 175mm here to isolate the crashing waves in the ocean of the coast of Oahu.

150mm
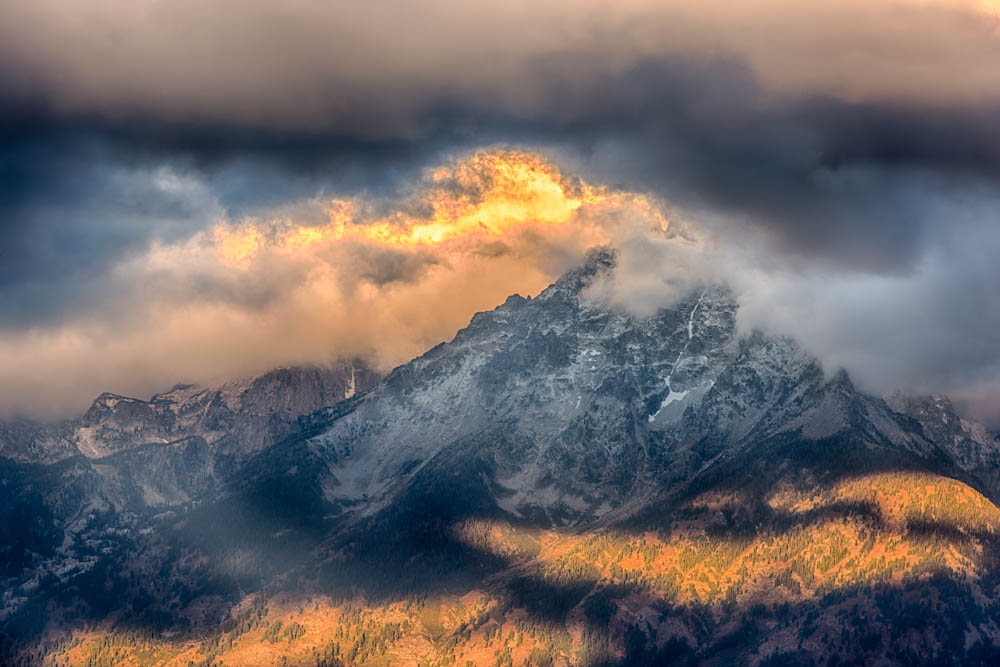
As the sunset’s golden light hit the Grand Teton, I captured this at 150mm to isolate the light on the Grand complimented by the colorful autumn foliage in the foreground.

550mm
While capturing the sunrise at Oxbow Bend, I noticed the way the light was hitting this beautiful golden tree across the water. I put on my Sigma 150-600mm to isolate the tree against the background of low clouds.
As you can see from the examples above, the best lens & focal length is the one that best captures the beauty speaking to you in that moment. Sometimes it is a wide angle, but other times you need a long focal length to isolate the beauty in the distance.
Hope these examples and thoughts help you to capture all the beauty in front of you at home and in your travels.
Kristen Ryan is a landscape and fine art photographer residing in the Midwest suburbs of Chicago. All images can be purchased in the Fine Art Store. Kristen leads ladies landscape photography retreats in the Tetons, Chicago, and the Canadian Rockies, offers private mentoring and teaches an online landscape photography workshop twice a year.