5 Reasons I Love My Telephoto Lens for Landscape & Nature Photography

So often when you think of landscape photography, you think of the wide expanse views photographed with wide angle lenses. There is certainly reason for this as quite often, we do reach for those wide lenses to capture a grand view or amazing sky. But sometimes it is only the telephoto lens that can fully capture the story of the details we are drawn to. So here are a few reasons I would reach for my Nikon 70-200 f/2.8 lens or my Sigma 150-600mm lens over a wider angle lens.

1) Your Subject Is So Far Away - Portrait and Lifestyle photographers can usually move their feet to get closer to their main subjects, but in nature & landscape photography, sometimes we can only achieve a closer view of our desired subject by having a lens that can zoom in closer. For example, shooting the top of a mountain peak or across a body of water.

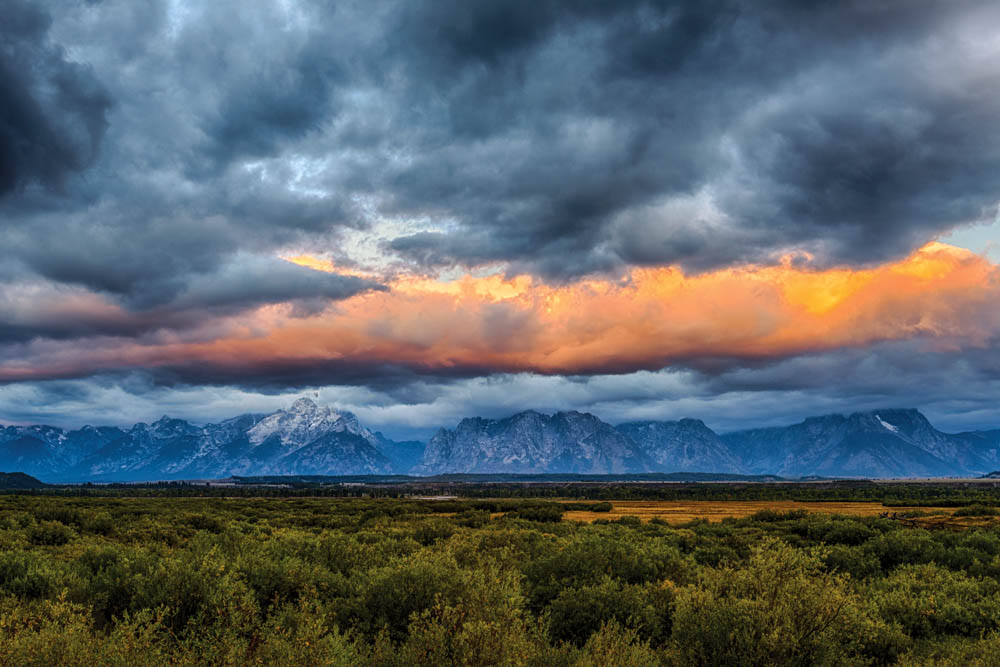
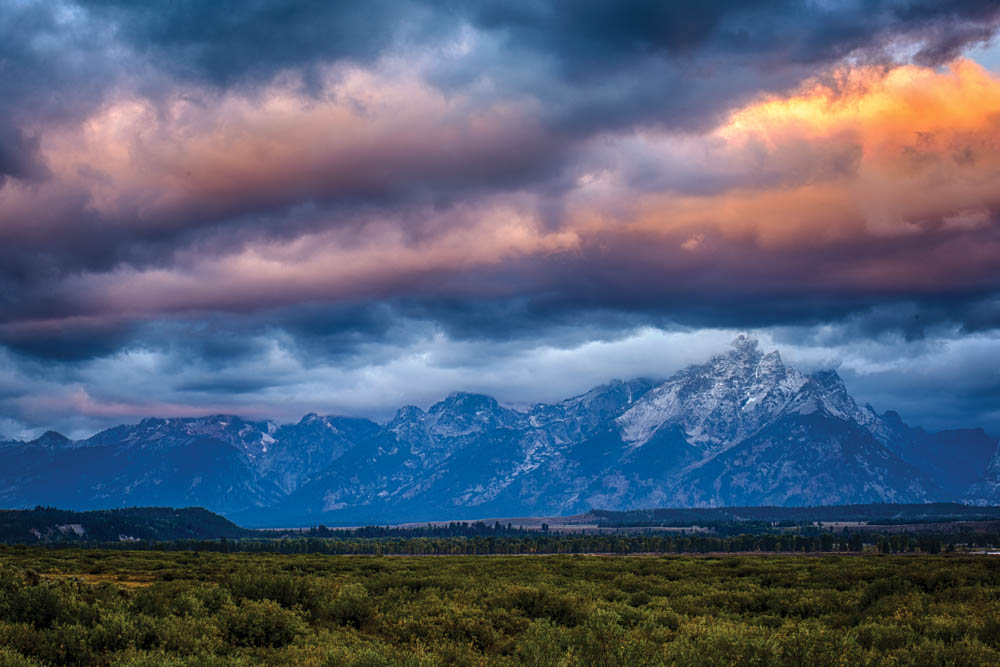
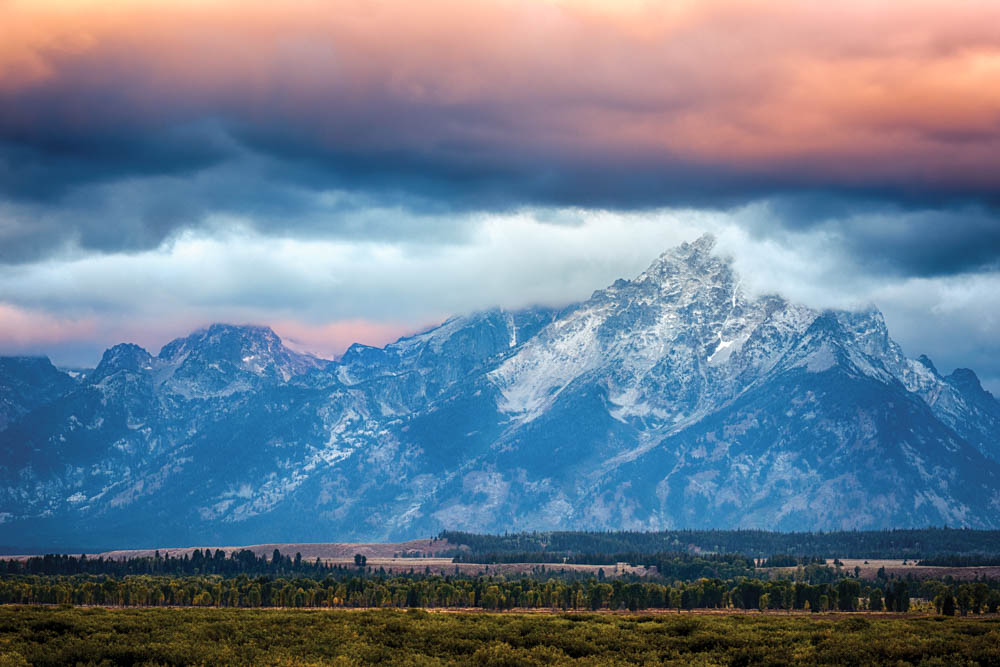
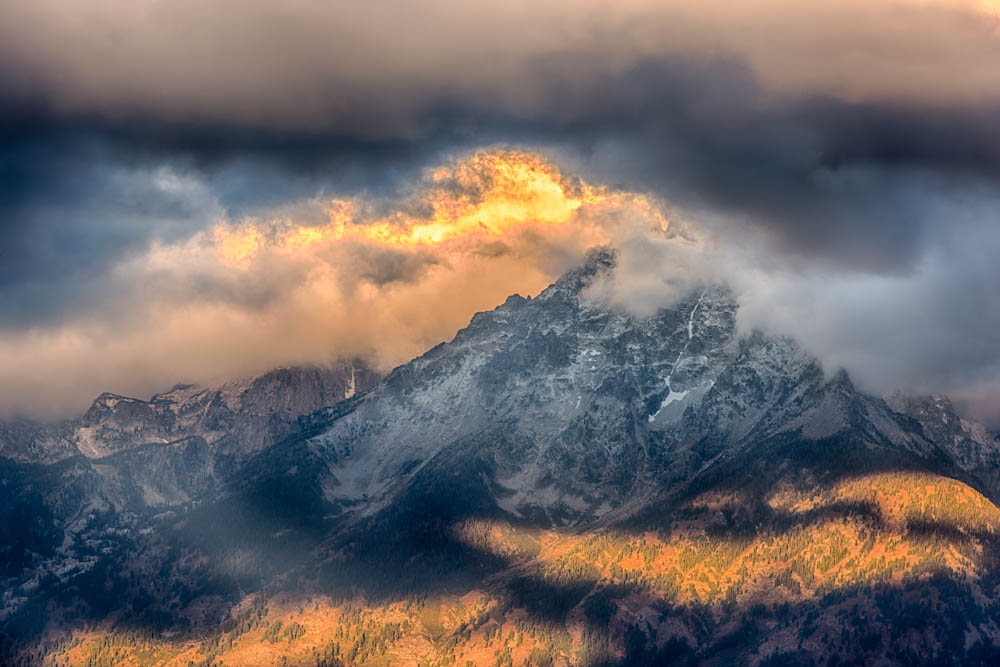
The following 2 images were shot with the Sigma 150-600.

The first captures the tips of the snow kissed Tetons as the clouds float across the sky.

Clouds around the Grand-001.jpg

The second captures a tree far off across the Snake River at Oxbow Bend as the light illuminated the fall colors.

Tree Across Oxbow_.jpg

2) The Beauty is in the Details - While often the awe of an expansive view is what draws us to a scene, sometimes the strongest beauty is in the details. The long lens allows us to isolate that beauty whether it is the light hitting a mountain peak, an ocean wave, or a single tree (like above). There can be so much intrigue and beauty in the simplicity that comes from picking one element of a scene and focusing on it with a longer lens. It helps bring the eye to the details we see that would otherwise be lost when captured with a wider angle lens.

Captured with my Nikon 70-200mm lens

Captured with my Nikon 70-200mm lens

3) Compression - As a landscape photographer I generally strive to obtain sharp focus throughout the frame, but sometimes a little compression and blur is a beautiful thing. This compression isolates our main subject and can create a soft dreamy quality in the image.

Oxbow Tree & Mist-001.jpg

4) Lackluster Skies - When the skies are overcast, drizzly, or even completely clear, they don’t add a lot of interest to landscape images. Using a longer lens to fill the frame with foreground interest can create a more dynamic and interesting image. In this image below, the weather went back and forth between drizzling and overcast. The low clouds floating through the trees, however, were so beautiful. My Sigma 150-600 was perfect to capture the beauty I saw on this otherwise dreary day.

Trees & Fog-001.jpg

5) Wildlife - While the majority of my photography is landscape imagery, I also love when I’m able to capture wildlife out and about. A longer lens is needed to capture wildlife in order to avoid scaring them off to respect their space. In the case of larger animals, it is also important for your safety.

Shoshone-001.jpg

So next time you head out, don’t forget to bring that telephoto lens with you! I can’t wait to see what you capture!


Kristen Ryan is a landscape and fine art photographer residing in the Midwest suburbs of Chicago. All images can be purchased in the Fine Art Store. Kristen leads ladies landscape photography retreats in the TetonsChicago, and the Canadian Rockies, offers private mentoring and teaches an online landscape photography workshop twice a year.

Did you know that The World Around You is now open for registration for the October 7, 2019 run?! Join me for a month of exploring the scenery around you and learn to capture stunning landscape imagery at home and in your travels.

Creative Cloud Exposures

A couple weeks ago I shared all about photographing creative exposures of water and last week I offered thoughts on choosing a neutral density filter for various long exposure effects. So today I’m sharing all about creative long exposures of clouds. One of my favorite things to do on a day with pretty clouds is experiment with shutter speed for wispy cloud movement. Now, this is not to say that I don’t love an image of gorgeous clouds with a faster shutter speed, because I do.

1/160 Shutter Speed

1/160 Shutter Speed

But it is a lot of fun to grab my 10 stop Neutral Density filter and shoot exposures with shutter speeds of 30 seconds and longer. As mentioned in last week’s post, if the clouds are moving fast, a shutter speed of 15 seconds may get some movement, but most often if I am shooting for cloud movement, my shutter speed will be 30 seconds to several minutes.

Below is a sample of 3 exposures, the first a faster shutter speed showing the clouds as we see them, the second one is 60 seconds and the third is 120 seconds. You can see dramatically more cloud movement from the first to the second and somewhat more cloud movement from the second to the third image.

1/13 Second Exposure

1/13 Second Exposure

60 Second Exposure

60 Second Exposure

120 Second Exposure

120 Second Exposure

The following images are more examples of long exposures to show cloud movement. Exposure times are listed in the captions.

3 Minute Exposure

3 Minute Exposure

2 Minute Exposure

2 Minute Exposure

1 Minute Exposure

1 Minute Exposure

6 Minute Exposure

6 Minute Exposure

To experiment with exposures 30 seconds and longer, I encourage you to invest in a 10 stop Neutral Density Filter and perhaps also a 15 stop filter. My favorite filters are from Breakthrough Photography *.

And don’t forget to find your focus and composition before putting on the 10 or 15 stop filter and cover the viewfinder with a black cloth to prevent light leaks! For more tips on long exposures check out 9 Tips for Creative Long Exposures. Have fun shooting long exposures of the clouds!


Kristen Ryan is a landscape and fine art photographer residing in the Midwest suburbs of Chicago. All images can be purchased in the Fine Art Store. Kristen leads ladies landscape photography retreats in the TetonsChicago, and the Canadian Rockies, offers private mentoring and teaches an online landscape photography workshop twice a year.

Did you know that The World Around You is now open for registration for the October 7, 2019 run?! Join me for a month of exploring the scenery around you and learn to capture stunning landscape imagery at home and in your travels.

*Affiliate Link

Choosing a Neutral Density Filter

Neutral Density filters block light from the camera sensor.  There are many Neutral Density (ND) filters of varying strength which block anywhere from 2 stops to 15 stops of light. In landscape photography, we use ND filters to reduce the light coming into our camera sensor so that we can slow down the shutter speed for creative effect. The ND filters that I always carry in my bag are 6 stop, 10 stop and 15 stop filters from Breakthrough Photography. The one that I need at any given time depends on the light of the scene, the subject I am photographing and the creative effect I am envisioning in my frame. 

1 second exposure in Oahu using a 6 stop Neutral Density Filter from Breakthrough Photography

1 second exposure in Oahu using a 6 stop Neutral Density Filter from Breakthrough Photography

6 Stop Filter 

A 6 stop filter is perfect for a number of situations where you want to reduce your shutter speed in the .4 second to 5 second range.  I use my 6 stop filter when I want to create abstract photos of water or trees by using a panning technique. The 6 stop filter is perfect for photographing waves and water when I don’t want to freeze the motion but I want to keep some shape, texture and detail in the water. This is a technique I love to use at the ocean, lakes or rivers. It is also perfect for smoothing the water of waterfalls to create a soft flow. The longer exposures of 5-10 seconds will create a very smooth effect while less than 5 seconds leaves a little more texture in the water.  In very low light, the 6 stop can allow an exposure of 10 seconds or more, but in brighter light, the 10 stop will be needed. 

.4 second exposure with a 6 stop Neutral Density Filter

.4 second exposure with a 6 stop Neutral Density Filter

1 second exposure capturing the movement of the waves of Lake Michigan using the 6 stop Neutral Density filter

1 second exposure capturing the movement of the waves of Lake Michigan using the 6 stop Neutral Density filter

1 second exposure panning the autumn color in Grand Teton National Park using a 6 stop Neutral Density Filter

1 second exposure panning the autumn color in Grand Teton National Park using a 6 stop Neutral Density Filter

Shutter Painting at Crystal Cove State Park using a 6 stop Neutral Density Filter

Shutter Painting at Crystal Cove State Park using a 6 stop Neutral Density Filter

1.6 second exposure with a 6 stop Neutral Density Filter

1.6 second exposure with a 6 stop Neutral Density Filter

The 10 stop is my go to filter for exposures 15 seconds and longer. In daylight, the 10 stop is needed for these creative long exposures of water or clouds. Imagine those super smooth waters and wispy clouds. Those are when I pull out my 10 stop filter. 

2 minute exposure during sunset with a 10 stop Neutral Density Filter

2 minute exposure during sunset with a 10 stop Neutral Density Filter

3 minute exposure during very early sunrise with a 10 stop Neutral Density Filter

3 minute exposure during very early sunrise with a 10 stop Neutral Density Filter

30 second exposure at Oxbow Bend with a 10 stop Neutral Density Filter

30 second exposure at Oxbow Bend with a 10 stop Neutral Density Filter

The 15 stop filter is the filter I need for creating dynamic wispy clouds during the daylight. This filter will allow me to shoot 3-6 minutes of clouds and capture creative clouds even with slow moving clouds. 

4 minute exposure using a 15 stop neutral density filter from Breakthrough Photography

4 minute exposure using a 15 stop neutral density filter from Breakthrough Photography

Neutral Density filters are an incredible tool for adding creativity to your landscape, seascape and nature photography. I highly recommend Breakthrough Photography* filters for their great quality. Have more questions about choosing a filter, feel free to reach out and ask me! I’m always happy to help.


Kristen Ryan is a landscape and fine art photographer residing in the Midwest suburbs of Chicago. All images can be purchased in the Fine Art Store. Kristen leads ladies landscape photography retreats in the TetonsChicago, and the Canadian Rockies, offers private mentoring and teaches an online landscape photography workshop twice a year.

*Affiliate Link

Photographing Water With Creative Exposures

When first learning to shoot in manual mode, we learn that aperture, ISO and shutter speed create the exposure triangle. If we change one of these settings, we then have to alter another one to achieve proper exposure. In the beginning, when I was learning the exposure triangle, I was shooting more portraits of my kids and loving the beautiful blur that came from wide open apertures. In creating this blur and bokeh, my shutter speed was typically fast to counterbalance the wide apertures in the exposure triangle.

Over time and especially as I fell in love with landscape photography, I learned to consider shutter speed as not only a part of the exposure triangle and important in freezing the motion of my fast moving toddlers, but as a creative choice. In fact, creative shutter speed use is one of my favorite techniques when shooting moving water within a landscape.

There are 3 main choices when it comes to using shutter speed to capture water: 1) A fast shutter speed used to freeze the motion of the water and maintain texture. 2) A slower shutter speed in the range of say .4 seconds - 3 seconds which will smooth the water a bit but maintain some texture and shape and 3) a very slow shutter speed of at least 5 seconds or longer that will smooth the water completely and create a dreamy quality. Each of these exposure times creates a different texture of the water and mood in the overall image.

Chicago Skyline on a windy and wavy day. Captured with a 1/320 shutter speed.

Chicago Skyline on a windy and wavy day. Captured with a 1/320 shutter speed.

1) Fast Shutter Speed - The image above was captured on a very windy day in Chicago and the waves were crashing hard along the pavement below the steps outside Adler Planetarium. The fast shutter speed freezes the motion of the waves and shows the texture of the water. This exposure choice allows the viewer to see the rough water and feel the mood of the scene captured.

1 second exposure of the rough waves on a windy day in Chicago!

1 second exposure of the rough waves on a windy day in Chicago!

2) Slow shutter speed in the .4 second to 3 second range. This choice of exposure does not freeze the motion of the water and creates a smoother effect than a fast shutter speed. The blur of the movement still maintains some texture in the water and shape in the waves. This choice also maintains a bit of the actual mood of the windy and wavy scene but also adds a creative effect. A shutter speed in this range will typically require the use of a Neutral Density filter unless shot in very low light. This image was captured using a 6 stop Neutral Density filter from Breakthrough Photography *.

60 second exposure after the sun dipped below the horizon

60 second exposure after the sun dipped below the horizon

3) Long Exposure 5 seconds or more. These exposure times will smooth out the movement of the water and the longer exposures (15 seconds+) will create a dreamy and serene feel in the image. This moment felt very serene standing on the shores of Lake Michigan watching the beautiful sunset colors light up the sky. While the image does not show the rough waters that existed, it does represent my mood as I captured the scene. Sometimes creative exposures capture how we feel even if the scene appeared a bit different in reality.

Longer exposures in the range of 5 seconds to minutes require the use of a Neutral Density filter except when shooting in the dark. This 60 second exposure also used a 6 stop Neutral Density filter from Breakthrough Photography.* Quite often, exposures of this length will need a 10 stop ND filter.


Kristen Ryan is a landscape and fine art photographer residing in the Midwest suburbs of Chicago. All images can be purchased in the Fine Art Store. Kristen leads ladies landscape photography retreats in the TetonsChicago, and the Canadian Rockies, offers private mentoring and teaches an online landscape photography workshop twice a year.

*Affiliate Link

7 Tips for a Great Sunburst

One of my very favorite techniques for adding drama and impact to landscape images is creating a sunburst when the sun is in the frame. Sunbursts introduce added interest to any frame and are especially fun to add in when you have a completely clear sky.

A starburst of the sun happens as a result of diffraction. Light goes into the small opening of a narrow aperture of our camera and is then bent around the edges of the blades. This disperses the light rays into a starburst.

Schwabacher's Sunburst final.jpg

Here are some tips and thoughts to think about as you capture sunbursts in your shooting!

1) Choose A Wide Angle Lens - Wider focal lengths will produce more rays in the starburst so your best bet will be a focal length in the 14-35mm range. This is not to say you cannot capture a sunburst with a longer lens, but the wider angles are ideal. Keep in mind that regardless of focal length, different lenses create different looking sunbursts. For example, my Nikon 14-24mm lens produces a bit of a circular flare starburst at 14mm (image below) which is different from my Nikon 16-35mm lens at 16mm. (image above) Experiment with your lenses and focal lengths to see which one produces your favorite burst!

Cunningham Starburst_.jpg

2) Close Down Your Aperture - Closing down the aperture will produce more distinctive rays in the sunburst. It is possible to get a sunburst with an aperture wider than f/16 but f/16 or f/18 are my top choices for a great sunburst.

3) Sky Matters - The best conditions for a good sunburst will be a patch of clear sky for a bright and sharp sunburst! Trying to create a starburst through a thin layer of hazy clouds is like banging your head against a wall. When the sky has some thicker clouds amongst clear sky, when the sun hits the clouds, this can create nice potential for a burst of rays into the sky and over the clouds.

4) Consider the Position of the Sun - When the sun is in the middle of a clear blue sky, a nice sunburst can be achieved. Other times, the best sunbursts are created as the sun hits another object, such as a mountain top, horizon, building, tree, etc. This helps the rays to disperse over the object the sun is hitting. This can require patience waiting for the sun to rise or set to the position desired. And sometimes it can require a little movement on your part to line things up.

Cunningham window view_.jpg
When shooting sunbursts through trees, even slight shifts in position can help create a better or more distinct sunburst.

When shooting sunbursts through trees, even slight shifts in position can help create a better or more distinct sunburst.

5) Expose for the Highlights - One of the keys to getting a great sunburst with distinct rays is to be sure that the highlights are well contained. Ideally, it is best to avoid blowing any of the sun highlights except for the circle of the sun. Exposing for the bright sun does mean that the overall image is somewhat underexposed and the shadows will be quite dark.

6) Bracket Exposures - Following #5’s tip for exposing for the highlights to get a great sunburst, consider bracketing your exposures and also taking an image exposed for the shadows and one for the midtones. Then combine them in post processing so you have detail in the full tonal range of the scene. You can bracket manually or program the camera to automatically take several images at different exposures.

Teton golden sunset tighter crop_.jpg

7) Consider Your Position - As mentioned in tip #4, both the position of the sun and your position matter for creating a strong sunburst. Another thing that is impacted by your position is additional flare. Shooting into the sun can bring creative and desirable flare but it can also create unwanted and distracting flare. Look for this unwanted flare as you shoot and in your test shots and consider shifting your position. Sometimes minor adjustments in your position can remove unwanted flare or position it better in the frame where it is less distracting or more easily cloned out. A lens hood can also be a useful tool to avoid unwanted flare. Though sometimes nothing avoids it completely.

1 Golden Meadow.jpg


Kristen Ryan is a landscape and fine art photographer residing in the Midwest suburbs of Chicago. All images can be purchased in the Fine Art Store. Kristen leads ladies landscape photography retreats in the TetonsChicago, and the Canadian Rockies, offers private mentoring and teaches an online landscape photography workshop twice a year.

9 More Tips for Astrophotography (Part 2)

My last blog post, toward the end of June, shared tips for Astrophotography. Summer travel and family life occupied all my time in the last month and a half, but as promised, here is part 2 with 9 more tips for shooting those starry night skies!

1) Check the Moon Phase calendar when planning your Astrophotography. The less moonlight, the more stars you will see and the brighter the Milky Way will be. New Moon will be the darkest time of the month. This is when there is no moonlight at all. During other moon phases, you may still be able to shoot the stars and Milky Way without moon interference, but you’ll need to check the moonrise and moonset times. I love to use the Sun Surveyor app to find out the moon phase plus rise and set times. Sun Surveyor also gives the times the Milky Way core will rise and set and when it is visible without moon interference in your location. I highly recommend checking out this helpful app.

2) Use an app like Photopills to plan your Milky Way shooting. Photopills will help you to find out where the Milky Way will be located at any time in any location. At home or away, you can put the pin on any location and see where the Milky Way will be at midnight, 1:00 a.m, 3:00 a.m., etc. For this June’s Teton Retreat, I had our 2:00 a.m. String Lake Milky Way shoot planned when I chose the dates of the retreat knowing the Milky Way would be in the ideal position from 2:00-3:00 a.m. Using an app such as Photopills allows you to know what to expect and plan for success.

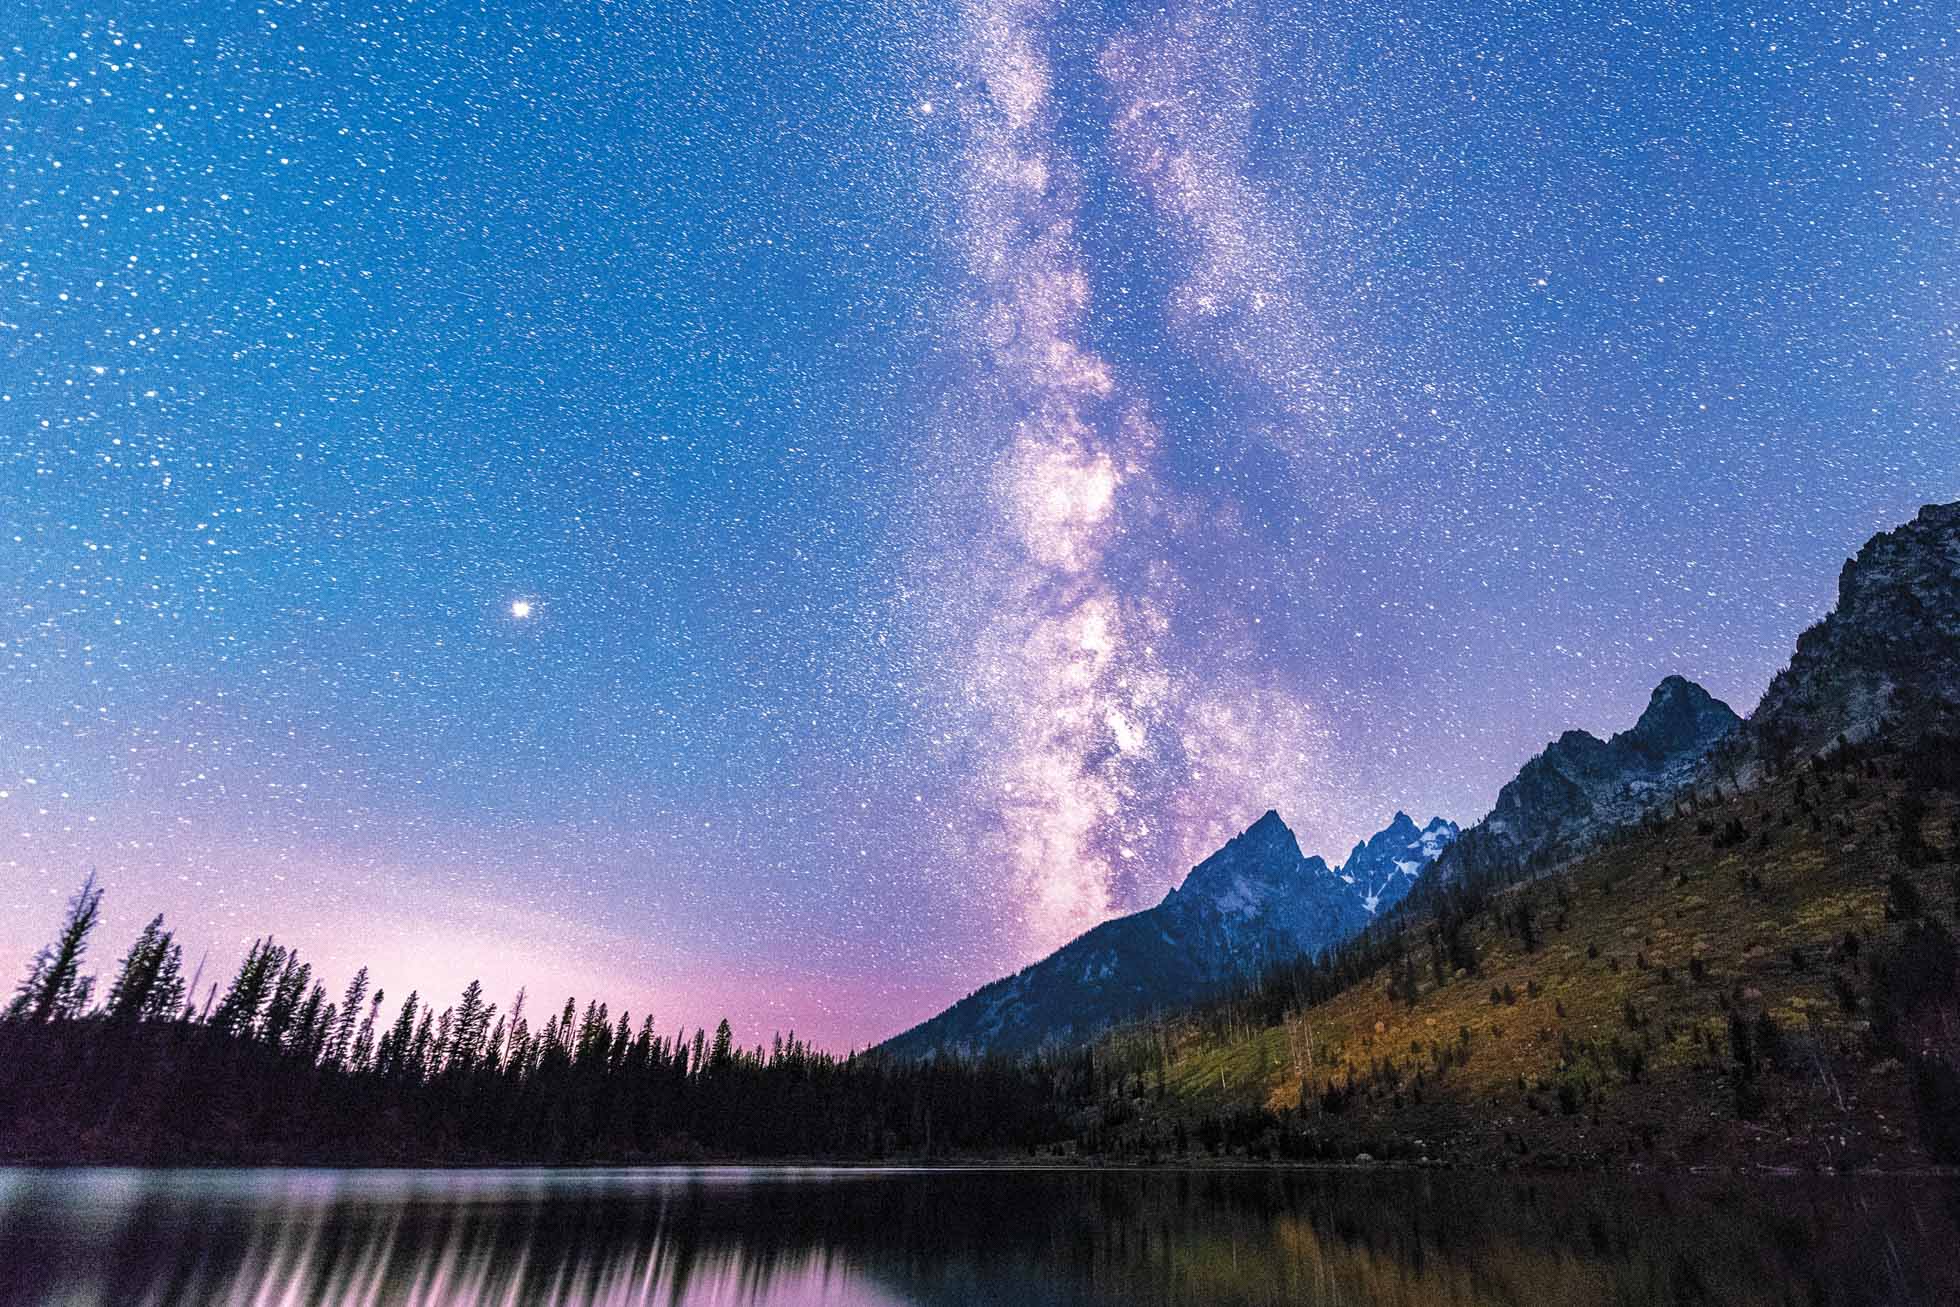
Milky Way over the Grand Teton at String Lake in June 2019 at the Magic in the Tetons Retreat

Milky Way over the Grand Teton at String Lake in June 2019 at the Magic in the Tetons Retreat

3) Get To Know Your Gear In The Dark - The very dark skies are great for capturing millions of stars, but this also means you can’t see your gear without a flashlight. If you are shooting with a friend or a group, turning on flashlights can ruin the exposures of your fellow photographers. Being able to put your camera on your tripod in the dark, adjust your tripod and check your LCD without turning on your flashlight is extremely helpful. Additionally, the longer you keep lights off, the more your eyes adjust to the dark.

4) Watch Your Histogram & Expose To The Right - In evaluating your exposure, check your histogram rather than relying on your LCD screen. Exposing as bright as you can without blowing the highlights will produce the best quality image with the least noise. Noise is inevitable in the dark conditions with high ISO. The better exposure you have, the less noise there will be. Check to see that your histogram is as far toward the right as it can be without it climbing up the right wall. There will be more tones toward the left because it is so dark, but keeping them as far as possible off the left wall of the histogram will capture a better quality image.

5) Consider Foreground Exposure - The foreground of your scene will be much darker than the sky full of stars. There are a couple options for getting a well exposed foreground image to composite with a great exposure of the sky. The first is to get out before the sun sets and capture the frame you want with a well exposed foreground before sunset or during blue hour when a little more light will light the scene. Be sure to choose your composition and leave the frame and focus where it is before shooting the night sky. The second option depending on the foreground scene is to light the foreground with a flashlight or headlamp. The foreground will need to be close enough, and your light strong enough, to be lit with your supplemental light source. Light painting must also be allowed where you are shooting. Grand Teton National Park, for example, does not allow light painting so during my retreats we do not light the foreground. The third option, if you arrive in the dark, is to take a brighter exposure of the foreground to composite with the sky by taking a longer exposure. This will create star trails in the sky, but you can composite your longer foreground exposure with your static star exposure in Photoshop.

A starry evening at the Three Sisters in Canmore, Alberta Canada

A starry evening at the Three Sisters in Canmore, Alberta Canada

6) Consider Stacking to Reduce Noise - One technique to try for less noise in astrophotography is taking multiple exposures of the same frame and stacking them in a program called Starry Landscape Stacker. This program is very easy to use and stacks multiple exposures of the sky into one by lining up the sky. The resulting image has less noise than editing one single exposure. For example, you can capture 10 exposures at ISO 6400, f/2.8, 15 seconds and stack them in Starry Landscape Stacker. The program is $40 but very worth it!

7) Consider Composition - Just as with landscape images, composition matters in astrophotography too. It can be easier to find a pleasing composition in the daylight, so it can be helpful to scout out a location ahead of time, or get there before dark as mentioned above in the Foreground Exposure tip. Even in daylight, you can use your Photopills app to see where the Milky Way will be in the Night AR part of the app so if you will be shooting the Milky Way, you can think about composition ahead of time. Consider where other aspects of the scene may be comfortably placed in the frame and how you can create balance between the left and right sides of the frame as well as the top and bottom.

8) Look for Interesting Foreground - As you consider composition, look for a location that will have interesting foreground to be part of the scene. Mountain peaks, rock formations, barns, trees, and oceans all are examples of foreground spaces that will add impact to your night sky images.

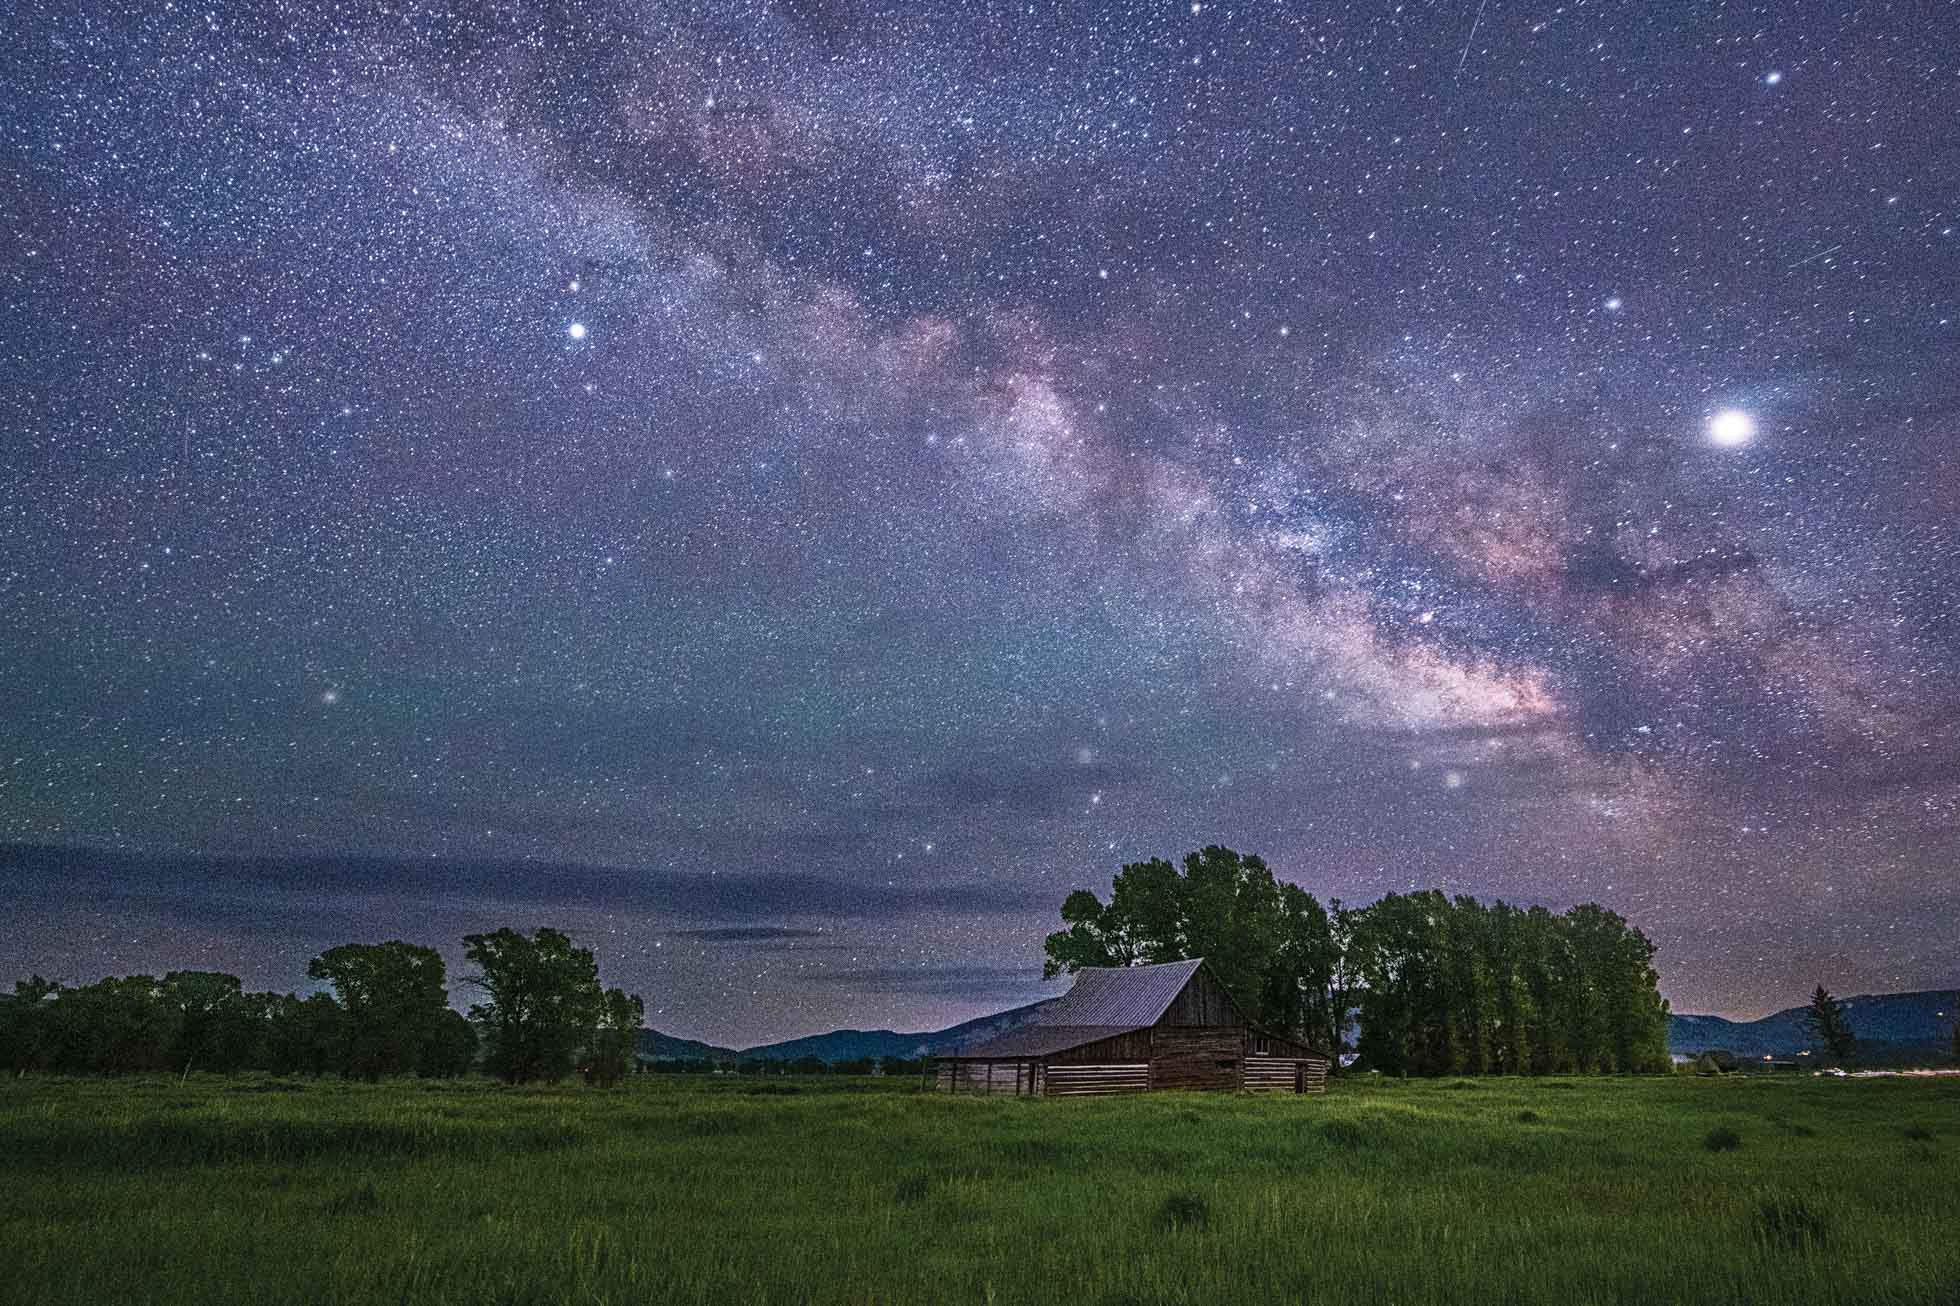
Milky Way over the Moulton Barn in Jackson Hole, Wyoming at the June 2019 Magic in the Tetons Retreat

Milky Way over the Moulton Barn in Jackson Hole, Wyoming at the June 2019 Magic in the Tetons Retreat

9) Pack Extra Batteries - A final gear recommendation for shooting astrophotography is to make sure to have at least 1 or 2 extra batteries. With (often) cooler temperatures and long exposures, batteries drain more quickly and it is disappointing to be capturing amazing images only to be thwarted by a dead camera battery! Make sure to head out prepared.

It can be challenging to get out to shoot at night, especially when it means giving up your sleep, but I promise it is worth it when you see the Milky Way on the LCD, or even just some beautiful stars!


Kristen Ryan is a landscape and fine art photographer residing in the Midwest suburbs of Chicago. All images can be purchased in the Fine Art Store. Kristen leads ladies landscape photography retreats in the TetonsChicago, and the Canadian Rockies, offers private mentoring and teaches an online landscape photography workshop twice a year.

9 Tips for Astrophotography - Part 1

Astrophotography has quickly become one of my very favorite genres of photography. There is something mesmerizing about the night sky and it is incredible the way the camera captures the night in ways that our naked eye cannot see. Being out in the dark under the vast night sky is exhilarating and it is even more so when you see what your camera can capture. That said, it can be a bit nerve-racking being out in the dark and a bit overwhelming trying to figure out the best techniques to capture it well.

Today I’m sharing Part 1 of two blogs posts with tips on capturing the night sky.

String Lake Astro_.jpg

1. A Tripod Is Essential - Ambient light at night is extremely low and in order to capture the scene, a slow shutter speed will be necessary. A tripod is required to keep your camera steady throughout the long exposure. Choose one that is sturdy and comfortable for you to use. This will be essential working with it in the dark.

2. Use a remote shutter - Triggering the shutter with a remote will take away the chance that manually pressing the shutter will create movement and reduce sharpness of the image. An intervalometer will also be useful for programming if you want to try shooting star trails.

Stars at Mt. Rundle vertical.jpg

3. Shoot in RAW - Shooting in RAW will give you more ability to work with the exposure and white balance in post processing than a JPEG. It is always best to get exposure and white balance correct in camera but shooting in RAW maintains all the information from your file so you can work more creatively while editing.

4. Choose a wide angle lens - The night sky is vast and a wide angle lens will allow you to capture a much larger expanse. A 24mm lens or wider is ideal for astrophotography. My two favorite lenses for astrophotography are my Sigma 14mm f/1.8 and my Nikon 14-24mm f/2.8.

5. Shoot in Manual Focus - In the extreme low light, your camera cannot autofocus so you must focus manually. Make sure you have your camera and lens set to manual focus so that your shutter doesn’t try to focus once you have achieved a sharp frame. Focusing is the trickiest part of astrophotography. A few options for finding focus in the dark are 1) Get to your location earlier in the evening and find your composition and focus and stay there until dark without changing your setting. 2) Find where your lens focuses at infinity and remember it so you can manually set focus. Keep in mind that zoom lenses will not focus in the same spot relative to the infinity symbol for all the focal lengths in the range. 3) Use a very bright flashlight or car headlights to focus on an area as far from you as possible to set focus. After setting focus and taking a test shot, zoom in and check your focus. If it is not quite sharp, manually tweak the focus just slightly left or right until you get it in sharp focus. Once you get focus, leave it!

Hyatt Milky Way_.jpg

6. Use a wide & fast aperture - Ideally the wide angle lens you are using will be able to open wide to f/2.8 or wider. This will allow you to let in as much light as you can in the dark shooting conditions. Because the sky is so far away, the stars will still be in focus with a wide aperture.

7. Choosing a Shutter Speed - For static stars, you want to choose a shutter speed that gives you sharp pinpoint stars. At longer shutter speeds, the stars begin to look like trails in the sky. If this is your vision, you can play with various shutter speeds for creative effect. For static stars, you can start with the 500 rule which says to take 500 divided by the focal length to give you the maximum shutter speed. So for 24mm, 500/24 = 20. 20 seconds would be the longest exposure time you can choose before your stars begin to trail. I generally find 15-20 seconds is the ideal range. If you are shooting on a crop sensor, take your focal length and multiply it by 1.5 to get the full frame equivalent and then do your 500 rule division. So a 16mm lens on a crop X 1.5 = 24. Then 500/24 = 20 seconds.

8. Set your White Balance on ‘Daylight” - The Daylight white balance setting, or around 5500 Kelvin, is a good starting point for your white balance. If it looks too warm at that setting, adjust from there. If you are shooting in RAW, you will also have the ability to tweak it in post processing.

9. Look for Dark & Clear Skies - Ideally, a very clear night will be your best bet for capturing the stars in the night sky. Dark skies without a lot of light pollution will also reveal the most stars. A few wispy clouds in the sky can also be beautiful though, so don’t get discouraged if it isn’t 100% clear. Also, some clouds move through the sky more quickly than others. More about dark skies and planning coming in Part 2.

Two Jack Milky Way_.jpg

10. Be safe and bring a buddy with you! The most important thing is always to be safe and make wise choices. The darkness prevents us from easily seeing what is around us and dark skies are often found in the middle of nature where you always should be prepared for the unexpected. It’s always smart to shoot with a buddy or bring a friend with you to keep you company. Safety is always more important that any images.

Look for “Tips for Astrophotography” part 2 coming up in the next couple weeks!

Kristen Ryan is a landscape and fine art photographer residing in the Midwest suburbs of Chicago. All images can be purchased in the Fine Art Store. Kristen leads ladies landscape photography retreats in the TetonsChicago, and the Canadian Rockies, offers private mentoring and teaches an online landscape photography workshop twice a year.

My Essential Landscape Gear

As I prepare for my first 2019 Ladies Magic in the Tetons Retreat, I thought I would share the tools that I carry in my bag to capture the beauty around me. Landscape Photography is a genre that tends to be heavy on gear. And quite often I will weigh down my shoulders in order to have all the creative options available to me. If you read my recent article on the Best Lenses for Landscape Photography, you know that there is not just one lens that works best for every scene. Add in tripods and filters and my bag gets pretty full! Keep reading and you can learn about my favorite and most used gear and why each is essential to my landscape work.

1. Promaster City Backpack

I absolutely love my Promaster bag. It has a big main section that fits 2 camera bodies plus several lenses. The top flap has a thin compartment that is perfect for carrying an iPad, small laptop, or important papers or items to stash away in a safe area while out and about. There are several zippered compartments perfect for holding my other gear I will share below such as an intervalometer, filters, extra batteries and memory cards. One side has a pocket perfect for my water bottle or coffee thermos and both sides have straps to hold a travel tripod.

2. Nikon D850 & Nikon D810

My D850 is my workhorse camera and it is the main body I use to capture the majority of my images. It has incredible resolution and is super sharp. The tilt and touch screen is amazing for capturing unique perspectives and all the buttons are so intuitive and easy to adjust settings with ease. My D810 is my well loved second body and I always have it with me not only as a back up but to be able to set it up for a time lapse or shoot fast shutter speed images while my D850 is shooting long exposures.

3. Tripod

My tripod is an essential item in my landscape bag. I have two lightweight carbon fiber tripods that travel with me for my landscape photography trips. My lightest and most compact tripod is my Gitzo GIGT1555T Traveler Series 1 Carbon Fiber Tripod. It is extremely light and compact and can fold up to fit in a carry on roller bag. My other tripod is a Promaster Specialist Professional Tripod and it is also very light with flip lock legs. I love that there is a soft foam area on one tripod leg for carrying as the tripod legs can get extremely cold in frigid weather. A tripod is essential to have for long exposures, night photography and time lapse photography. I will often have two tripods so that I can do time lapse and long exposures at the same time.

4. Nikkor 16-35mm f/4G

This wide angle lens spends a lot of time on my camera. I love a wide angle that showcases dramatic skies or the jaw dropping expanse of a mountain range. 16mm can capture an extensive scene while 35mm is still a wide angle but brings the scene closer to what our eyes experience in real life. It is a perfect range for capturing the incredible landscapes of the world.

16mm

16mm

5. Nikkor 24-70mm f/2.8

My 24-70mm lens is my go to lens when I go on a hike and just want to carry my camera with one lens. At 24mm, you can get a nice wide expanse. At 70mm you can zoom in and get more detail. In the mid range, the images beautifully represent the landscape the way our eye experiences the scene.

24mm

24mm

60mm

60mm

6. Nikkor 70-200 f/2.8

I adore my 70-200mm f/2.8. The lens is extremely sharp and captures those beautiful details that are far away from me. This telephoto lens allows me to capture the beauty of light hitting a mountain peak or filling my frame with details and texture that draw me in. While the wide angle focal lengths capture the great expanse of the whole scene, the telephoto captures those far off details.

200mm

200mm

7. Sigma 14mm f/1.8 & Nikkor 14-24mm f/2.8

These two lenses are my go to lenses for astrophotography. Both of these lenses are extraordinary choices for shooting the night sky. Not only do their ultra wide angles capture an incredible number of stars but they are also fast, allowing me to keep my ISO lower as I open up the aperture. One might ask why have two lenses for astrophotography but I love to set one to take a time lapse while I experiment with compositions with my other camera & lens.

14mm

14mm

8. Sigma 150-60mm

This lens is a beast of a lens but it is perfect for capturing those very far off details like the tip of a mountain top, a tree with beautiful light across a lake or wildlife in which you must keep a safe distance.

550mm

550mm

9. Breakthrough Photography Filters

Filters are an essential technical and creative tool in my landscape imagery. Polarizers, Neutral Density Filters, and Graduated Neutral Density Filters are each helpful in their own way. Polarizers cut out haze and glare and give greater definition to clouds and vibrance to colors. They also cut glare off of water when shooting rivers, waterfalls, and lakes.

Graduated Neutral Density filters cut out light from part of the frame, such as a bright sky, to allow you to brighten your exposure and capture more detail in the shadows without blowing out the highlights of the scene. This filter is extremely helpful scenes with a large dynamic range.

Neutral Density Filters cut light from the entire frame. You can purchase neutral density filters in varying degrees of strength. I own 6 stop, 10 stop and 15 stop filters. Depending on the ambient light and the creative effect I am going for, I choose which filter will help me create my art.

Natural Bridge.jpg

10. Intervalometer

My remote intervalometer is one of my most used tools. A remote trigger is helpful to avoid any camera shake when the shutter is pressed. I use my intervalometer for shooting long exposures and time lapses.

11. Headlamp & Flashlight

If I am headed out at night, I have a headlamp and a flashlight for both lighting my way in the dark and locating necessary gear or buttons. It is so helpful for night photography to know your gear well in the dark, but sometimes you need a little extra light. A strong headlamp light is not only helpful but is also comforting in the pitch black as you get to your shooting location.

Lake Louise at night.jpg

12. Extra Batteries & Memory Cards

There is nothing worse than discovering your camera is missing its memory card or battery, finding them run down or out of space at the beginning or middle of a shoot. I keep several extra batteries and memory cards in my bag so that I have back ups in case of an emergency.

13. L Bracket

My L Bracket on my D850 allows my camera to sit tight in my tripod whether I am shooting vertically or horizontally.

14.. Extras

Some additional items I often carry in my bag are clean microfiber clothes & Zeiss Lens wipes for cleaning my lenses, extra AA batteries for my intervalometer, hand warmers for colder weather, and a coffee thermos and/or water bottle!

Folly Beach Sunset.jpg

Beautiful landscape imagery can be captured with whatever gear and camera you own, so don’t let what’s in YOUR camera bag stop you from getting out and capturing the beauty. But if you are looking for new tools, I hope these favorites of mine will help you out!

Kristen Ryan is a landscape and fine art photographer residing in the Midwest suburbs of Chicago. All images can be purchased in the Fine Art Store. Kristen leads ladies landscape photography retreats in the TetonsChicago, and the Canadian Rockies, offers private mentoring and teaches an online landscape photography workshop twice a year.


8 Tips for Landscape Photography on Family Vacations

If school isn’t out where you live, then it is likely starting to wrap up! Summer is finally here and this is a popular time for family vacations. Long, carefree days and so many options for travel in weather that encourages outdoor activities.

One question I am often asked is how I am able to capture landscapes when traveling with my family. So I thought I’d share some of my thoughts and tips as summer vacation preparation is upon us!

Crashing Waves.jpg

1. Have Realistic Expectations! A family vacation is just that, a ‘family vacation’ not a ‘photography vacation’. On a photography trip, we can chase the light to our heart’s content and make that the number one priority. On a FAMILY vacation, our loved ones and our family experience is the top priority. If you have a love for landscape photography like I do, I do not think it is unrealistic to take a little time for yourself to shoot and fulfill the creative need, just like a runner is filled up by a daily run. And if you are traveling somewhere beautiful, you will want to capture some of those scenes. But you won’t get every sunrise, sunset and top photographic location. I come home with images I love, and many in good light, but I do not explore in the way I would on a photography trip. Going into the trip with unrealistic ideas just creates disappointment and that is not what you want for your experience with the people you love.

2. Ask Locals for Tips and/or Research Top Photo Ops - Before you go, research your destination’s top photographic spots! If you are visiting for a short time, you will want to know the hot spots ahead of time. Choose the ones that are reasonable to get to for sunrise or some that would be fun for the family to explore. In addition to Google, ask some locals for tips. This may be local photographers or even hotel or restaurant employees.

Oahu sunrays_.jpg


3. Get Up For Sunrise - This is one of my top tips! Sunrise is one of the most beautiful and peaceful times of day. Even when I visit a very populated location, sunrise not only has some of the best light of the day, but it also is a time I can experience the beauty of nature with the fewest other people around, often completely by myself. My family also likes to sleep in so I am able to sneak out for an hour or two in the morning before they are ready for the day. I get my landscape fix and start the day in a positive way without my photography taking away from family time.

Pounders Beach with the drone_.jpg

4. Scout locations While Exploring during the Daytime - As you and your family explore, consider if any of the locations would be great spots to come back to for sunrise or sunset (if opportunity allows). Always look for spectacular views, interesting lines, foreground and framing elements.

5. Include Your People in the Frame - Landscapes are not always void of people and quite often including a human element in the frame can enhance the strength and impact of your image. The human element can create a great sense of scale and a stronger story. Including your own loved ones in your images adds more meaning and sense of experience for you as well.

Danny at Sunrise_.jpg

6. Keep Your Camera With You Often - When it is convenient and makes sense, keep your camera with a versatile lens (24-70, or 24-105 would be my top picks) around your neck during your exploring so you can capture those special moments or gorgeous views as you come upon them. Unless you are shooting long exposures or in low light, a tripod isn’t necessary to capture gorgeous images and memories.

7. Get in the Frame - This tip is not necessarily landscape related, though could be. Adding yourself into the landscape is also a great way to add impact to your images. But take the opportunity to set your camera on a tripod and capture yourself with your family. You’ll never regret doing it, but you very well may regret it if you don’t.

My handsome husband and I in Oahu

My handsome husband and I in Oahu

8. Let it Go & Enjoy! - Sometimes it is just best to put the camera down and enjoy your family and the experience. The creative process can take a lot of energy at times, and sometimes it is just best to let it go and give all that energy to just enjoying your loved ones. It is just an image after all. The people in your life are worth so much more.

My four favorite little people

My four favorite little people

BONUS TIP #9: Plan a trip FOR your photography! Sign up for a workshop or retreat or plan a trip for yourself where you can go and make chasing the light and top locations your number one priority. Gifting yourself this opportunity is truly invaluable. And when you know you will get this dedicated creative time, it is easier to miss out on opportunities when you travel with non-photographers.

Where will you be traveling this summer? I’d love to hear about it in the comments :)

Kristen Ryan is a landscape and fine art photographer residing in the Midwest suburbs of Chicago. All images can be purchased in the Fine Art Store. Kristen leads ladies landscape photography retreats in the TetonsChicago, and the Canadian Rockies, offers private mentoring and teaches an online landscape photography workshop twice a year.

Turtle Bay drama_.jpg

Best Lenses for Landscape Photography

Are you wondering what lens is the best choice for landscape photography? I often get asked by my online students and retreat attendees what lens is best for landscape photography and which lens is my favorite. The simple answer is that my favorite lens/focal length is the one that best captures my vision of the image I am seeing in the moment.

The more in depth answer is that there really isn’t a SINGLE best lens for landscapes.  It depends very much on the particular location. Sometimes you may need an ultra wide angle to get the entire scene in the frame or the sky is so amazing you want to include as much of it as you can.  Other times, you want to hone in on a smaller portion of the scene; just the part that is grabbing your eye. And sometimes you really need reach to grab detail that you cannot get with anything other than a telephoto.  

So, what’s the best lens? There isn’t ONE. However, I will give you some thoughts and examples of the several lenses I use and then you can see how these lenses would help you in the areas you photograph. 

First off though….zoom or primes? Prime lenses are sharp and fast and will capture high quality images. However, as a photographer with a landscape focus, I am partial to zoom lenses in most circumstances. The reason being that it is not as easy to just ‘move your feet’ to get a different angle in most cases. I often need to zoom ‘out’ or zoom ‘in’ to change the frame.  This also allows me to set up on a tripod and get various compositions from one location.

Ultra wide angle 

I shoot with both the Nikon 14-24mm, the Nikon 16-35mm, and the Sigma 14mm f/1.8. I also have a 16-35mm for my Sony a7rii.  All are fantastic lenses and I know from friends that the Canon 16-35mm f/2.8 is also an amazing lens. 

These focal lengths will allow you to really showcase the expanse of the world. Imagine an endless sky, spanning view of mountains, or endless stars at night. The ultra wide angle is your best friend in these situations.  If you love sunbursts, a wide angle lens will also give you the most amazing sunbursts!

The ultra wide angle is often my favorite. I love taking in the wide expanse of the world and very often, only the widest angles will truly capture that magic.

16mm was necessary to capture this wide scene of the Chicago Skyline to include the golden morning sunlight shining in from the left.

16mm was necessary to capture this wide scene of the Chicago Skyline to include the golden morning sunlight shining in from the left.

14mm is my favorite focal length for capturing the night sky. The ultra wide focal length captures the vast sky of stars in addition to the foreground scenery.

14mm is my favorite focal length for capturing the night sky. The ultra wide focal length captures the vast sky of stars in addition to the foreground scenery.

16mm captures the entire sunset scene in the Tetons, including a vivid and distinct sunburst.

16mm captures the entire sunset scene in the Tetons, including a vivid and distinct sunburst.

16mm allowed me to include significant foreground and ocean in addition to the beautiful sunrise sky.

16mm allowed me to include significant foreground and ocean in addition to the beautiful sunrise sky.

But, I could not capture the variety that I do with only these widest angles.

Mid Range

I love my Nikon f24-70 f/2.8.  If you could only buy or travel with ONE lens, I’d probably say to choose a 24-70 or 24-105 (which I don’t own but there are some great lenses out there in this focal length range)

The 24-70 (or 24-105) gives you a nice wide angle in the 24-35mm range but also allows you to zoom in a bit and grab some closer details.   If I am hiking, for example, and want to only carry a camera without extra gear, this is often the lens I will grab. It is so versatile. This mid range gives you a very realistic view of the world’s scenery.

Some examples in this focal range.

48mm focused this frame between the trees. A wider focal length would have added distraction outside of the framed focal point of the waves.

48mm focused this frame between the trees. A wider focal length would have added distraction outside of the framed focal point of the waves.

60mm brings me closer to Mt. Moran in this sunrise scene and creating nice symmetry between the mountains and their reflection.

60mm brings me closer to Mt. Moran in this sunrise scene and creating nice symmetry between the mountains and their reflection.

70mm captures the birds and sun rays as the clear main subject of the frame while including the environment around them.

70mm captures the birds and sun rays as the clear main subject of the frame while including the environment around them.

70mm brings the frame closer to the mountains and makes them a more prominent part of the frame than a wide angle

70mm brings the frame closer to the mountains and makes them a more prominent part of the frame than a wide angle

Telephoto

 I own both the Nikon 70-200mm and the Sigma 150-600mm. I bought the Sigma more for wildlife and sports, but I also use it for some detailed landscapes.  

Focal lengths in the 100+ range allow you to capture details of the landscape that you cannot get close enough to with the wider angles.  Such as zooming in on a single mountain in a range, shooting across a body of water, or isolating certain details in a scene.

200mmThe week after Halloween, we got our first big snow. It just so happened I had just been out to the Arboretum the prior week photographing peak fall color. So after the snowfall, I drove through and spotted this incredible scene of seasons coll…

200mm

The week after Halloween, we got our first big snow. It just so happened I had just been out to the Arboretum the prior week photographing peak fall color. So after the snowfall, I drove through and spotted this incredible scene of seasons colliding. 200mm with my 70-200mm lens allowed me to highlight the detail of these two trees next to each other by filling the frame with the contrast of fall color and snowy branches.

175mmI used my 70-20mm at 175mm here to isolate the crashing waves in the ocean of the coast of Oahu.

175mm

I used my 70-20mm at 175mm here to isolate the crashing waves in the ocean of the coast of Oahu.

150mmAs the sunset’s golden light hit the Grand Teton, I captured this at 150mm to isolate the light on the Grand complimented by the colorful autumn foliage in the foreground.

150mm

As the sunset’s golden light hit the Grand Teton, I captured this at 150mm to isolate the light on the Grand complimented by the colorful autumn foliage in the foreground.

550mmWhile capturing the sunrise at Oxbow Bend, I noticed the way the light was hitting this beautiful golden tree across the water. I put on my Sigma 150-600mm to isolate the tree against the background of low clouds.

550mm

While capturing the sunrise at Oxbow Bend, I noticed the way the light was hitting this beautiful golden tree across the water. I put on my Sigma 150-600mm to isolate the tree against the background of low clouds.

As you can see from the examples above, the best lens & focal length is the one that best captures the beauty speaking to you in that moment. Sometimes it is a wide angle, but other times you need a long focal length to isolate the beauty in the distance.

Hope these examples and thoughts help you to capture all the beauty in front of you at home and in your travels.


Kristen Ryan is a landscape and fine art photographer residing in the Midwest suburbs of Chicago. All images can be purchased in the Fine Art Store. Kristen leads ladies landscape photography retreats in the TetonsChicago, and the Canadian Rockies, offers private mentoring and teaches an online landscape photography workshop twice a year.


10 More Tips to Improve Your Landscape Photography

Last week I shared 10 Tips to Improve Your Landscape Photography. I hope it gave you a little inspiration to remember next time you head out to shoot! Today I am sharing 10 MORE tips, plus a bonus tip :)


1. Get out often & early - The more you get out to shoot and practice all of the techniques, the more they will become second nature and your workflow will become fluid. Landscape photography has a variety of creative and technical practices that take frequent practice to become second nature.  Getting to your location early allows you to take your time in finding your chosen composition and prevents you from feeling rushed as the light changes. 

Sunrise in Oahu, Hawaii

Sunrise in Oahu, Hawaii

2. Know How to Read Your Histogram - Understanding your histogram and how to adjust settings for the best exposure is so critical to capturing the details throughout the dynamic range. My goal is always to capture detail from the bright highlights to the dark shadows. I aim for my histogram to be as far to the right side as possible without it climbing the right wall.

3. Use a shutter release - A shutter remote is one piece of gear I always have with me. When I use a tripod I always use a shutter release. This will enhance the sharpness of your images and is also useful for shooting long exposures and time lapses. 

1.3 seconds of wave action at sunrise in Oahu, Hawaii

1.3 seconds of wave action at sunrise in Oahu, Hawaii

4. Invest in good filters - Learn about the various types of filters from polarizers, graduated neutral density filters and regular neutral density filters, and invest in good ones. Polarizers help to cut glare and haze and enhance the vibrance of skies. Graduated neutral density filters cut light in part of the frame to allow you to capture more detailing the shadows without blowing out the highlights. And regular neutral density filters will block light so you can shoot longer exposures for creative effect. 

Long exposure of the clouds and water utilizing a 10 stop Neutral Density Filter at Lake Louise, Alberta, Canada

Long exposure of the clouds and water utilizing a 10 stop Neutral Density Filter at Lake Louise, Alberta, Canada

5. Scout out locations - Taking the time to scout out locations for good light and compositions will help you maximize your shooting opportunities when you go during sunrise and sunset. Sometimes the best light and color lasts only mere minutes so making sure you have scoped out the best perspective ahead of time will help you be more successful. 

6. Check your frame - Pay attention to what is IN your frame AND OUT of your frame. Examine the edges and consider everything that you include and leave out. Both can be equally important to the viewer’s scan path. 

A gorgeous autumn afternoon in Grand Teton National Park

A gorgeous autumn afternoon in Grand Teton National Park

7. Look for leading lines and framing opportunities - Nature has so many lines from trails, shorelines, roads, etc. Use them to lead the viewer’s eye to your main subject. Framing your subject can create depth and impact. I love to look for framing to capture a unique perspective of a frequently photographed location. 

Sunrise on a chilly morning on the Chicago Lakefront

Sunrise on a chilly morning on the Chicago Lakefront

8. Less can be more - While many strong landscapes are composed with many elements, sometimes a minimal frame can be just as impactful. Examples of less is more may be an abstract seascape or a simple subject like a tree surrounded by a lot of negative space. 

Panning of the Pacific Ocean in Crystal Cove State Park, California

Panning of the Pacific Ocean in Crystal Cove State Park, California

9. Break the rules - There are lots of rules that are rules for a reason, such as using the rule of thirds for composition, not blowing your highlights or clipping your shadows, etc. However, rules are meant to be broken. Know the rules but be willing to break them with intention and creative purpose.  For example, not centering your horizon is generally considered a "rule" in landscape photography. But I LOVE a centered horizon 

Long Exposure in Grand Teton National Park, Wyoming

Long Exposure in Grand Teton National Park, Wyoming

10.  Maximize foreground interest - Foreground elements are one of the best ways to create depth in your landscape images. Rocks, shells, grasses, flowers, etc. are all great examples of foreground elements. Consider the placement and type of foreground and be intentional. Foreground should add to the frame and lead the eye to the main focal point rather than distract. 

Sunrise at the Three Sisters Reflection Pond in Canmore, Alberta, Canada

Sunrise at the Three Sisters Reflection Pond in Canmore, Alberta, Canada

BONUS!! #11. Learn from your mistakes & successes -The number one thing that has improved my landscape photography the most is learning from my mistakes and successes while shooting. Every single shoot that I go on, in spending time with my images afterward, I self critique where I made mistakes in exposure, focus and composition.  This analysis has helped me to refine my techniques and remember to look for things that I didn’t think to look for when I was first starting out.

Night capture of Lake Louise boat house in Alberta, Canada. Image is a merge of an exposure for the boat house and another for the rest of the scene.

Night capture of Lake Louise boat house in Alberta, Canada. Image is a merge of an exposure for the boat house and another for the rest of the scene.

Kristen Ryan is a landscape and fine art photographer residing in the Midwest suburbs of Chicago. All images can be purchased in the Fine Art Store. Kristen leads ladies landscape photography retreats in the TetonsChicago, and the Canadian Rockies, offers private mentoring and teaches an online landscape photography workshop twice a year.

10 Tips to Improve Your Landscape Photography

1. Learn the fundamentals - It is really important to understand all the settings of your camera and have a solid understanding of the exposure triangle and white balance. Having a solid understanding of how to use ISO, aperture and shutter speed will not only create better technical photographs but increase your artistic creativity as well.

Kualoa Ranch_.jpg

2. Buy a great tripod and USE it! 

    I know no one is excited about another heavy piece of gear to carry but a tripod is one of the best investments you can make in your landscape photography. A tripod will help increase the sharpness of your images by keeping your camera steady. This is especially crucial when bracketing images or using slow shutter speeds. This is such an easy step to achieve in improving your landscape imagery.

This 30 second exposure in the Tetons could not be achieved without a tripod

This 30 second exposure in the Tetons could not be achieved without a tripod

3. Shoot In RAW 

    Landscape photography often means shooting in light with a high dynamic range. In order to capture and keep all the details in your image, you want all the information that a RAW file will capture. RAW files are much more forgiving when you make a mistake an underexpose your image. You can often rescue a underexposed image without damaging the image quality with a RAW file, but not with a JPEG. 

4. Learn Basic Post Processing

    Learn to process those RAW files so that you can bring out the scene you captured. Even the most basic RAW adjustments can go a long way to transforming the straight out of camera file you captured. Lightroom is excellent for cataloging and quick adjustments and is easy to use. Remember that often just some small adjustments are all you need to take an image to that next level. 

See BEFORE & AFTER below of the Three Sisters in Canmore, Alberta Canada.

5. Get out in the right light    

    There is a reason landscape photographers get up early and stay out late. The light at these times will create more compelling and dynamic images. Yes, it is possible to create incredible photographs in the daytime hours, but more often than not, those golden hours into night time will raise the interest in your landscape imagery. 

Sunrise in Oahu, Hawaii

Sunrise in Oahu, Hawaii

6. Experiment with perspective 

    You got the tripod, set it up, and stay there shooting away, right?! NO! Always vary your perspective. Get high, get low (even if that means taking the camera OFF the tripod), find some framing, look for leading lines and foreground interest. Perhaps there is a perspective that grabs you right away. Capture it. Then move around and find another one. 

In this image, I used the ice in the foreground to create depth, a unique perspective and a greater sense of season and story.

In this image, I used the ice in the foreground to create depth, a unique perspective and a greater sense of season and story.

7. Be creative with your shutter speed

    In landscape photography, creative use of a shutter speed is often what takes an image from pretty to WOW! When photographing water or clouds in particular, a creative shutter speed allows you to put your own artistic spin on a scene that makes it unique. Finding the ‘right’ shutter speed for your vision can be a process but a fun creative experience. 

.4 seconds of waves in Oahu, Hawaii

.4 seconds of waves in Oahu, Hawaii

8. Vary your focal length 

    Often with landscape photography we naturally think the widest angles are best. And often this is true, but not in every case. Sometimes the widest angle will make our subject appear too small in the scene and we need a middle focal length. Other times it is details that draw our eye which can only be captured by a telephoto lens. Many times I try to capture a scene with various focal lengths to create several unique images from the same location.  In the grid below the images are focal lengths as follows:

35mm. 70mm

130mm 200mm

9. Slow Down

Instead of quickly snapping the shutter, slow down and take in the scene in front of you. Consider the light. Thing about what is drawing you to the scene and why. Think about how you are feeling. Look for a unique perspective and take your time setting up the shot.

10. Capture what speaks to you! 

    In any scene you are capturing, there is something or some number of things that are drawing you to that scene. Perhaps it is the overwhelmingly wide expanse of the land,  the way the light is hitting the trees, the curve of a wave, or the formation of the clouds at the tip of a mountain. Hone in on the beauty that is speaking to you and use your tools to capture the scene in a way that highlights those details. Listen to your inner voice and follow it. Always shoot for yourself, to satisfy your own inner artistic voice.

Check back next week for more tips to improve your landscape photography!

A beautiful icy and snowy afternoon in the MidwestKristen Ryan is a landscape and fine art photographer residing in the Midwest suburbs of Chicago. All images can be purchased in the Fine Art Store. Kristen leads ladies landscape photography retreat…

A beautiful icy and snowy afternoon in the Midwest

Kristen Ryan is a landscape and fine art photographer residing in the Midwest suburbs of Chicago. All images can be purchased in the Fine Art Store. Kristen leads ladies landscape photography retreats in the Tetons, Chicago, and the Canadian Rockies, offers private mentoring and teaches an online landscape photography workshop twice a year.

Serenity in the Canadian Rockies

I adore this “Serenity” project as photography really is something I love for the ‘serenity’ it brings me. The time I spend in nature capturing the beauty of the world brings me to a place of peace. There is nothing like the sound of the ocean or the expanse of the mountains to bring a calm to my mind and body. This place of serenity is something that continuously reminds me why I pick up my camera and especially why I seek landscape photography as my favorite genre.

I love to travel to new beautiful places, but I also love to return to favorite places I have traveled before, revisiting favorite locations and capturing images in different light and weather than I have in the past. Last November I traveled up to Calgary to meet up with one of my best photographer friends, Gina Yeo, for an adventure in Banff National Park. We had only a few days and a mix of forecasted weather but we covered a lot of ground and capture, sunrise, sunset, twinkling stars, falling snow, low dramatic clouds and amazingly, the incredible aurora!

There is something wonderfully serene about November in the Rockies. As the weather turns cold and the snow starts falling, the mountains take on a pristine beauty and the crowds are thin. Just us and the awe inspiring beauty.

Beautiful Bow Lake

Beautiful Bow Lake

Starry night over Mt. Rundle

Starry night over Mt. Rundle

Lake Louise Boathouse

Lake Louise Boathouse

Sunrise at Lake Vermilion

Sunrise at Lake Vermilion

Aurora at Lake Minnewanka

Aurora at Lake Minnewanka

Continue the circle to see what brought my friends Serenity this month. Next up is my good friend, Emily Hamson of Lavender Lime Photography.


I am delighted to share that Gina Yeo and I have teamed up to offer “Enchantment in the Rockies”, an incredible 4 day ladies landscape photography retreat in the Canadian Rocky Mountains. Sign up for the Retreat Update Newsletter for all the info and priority registration!


Prints available through the Fine Art Store or contact me for special requests.

Seascape Panning

One of my favorite techniques to play with at the beach is horizontal panning. It is really simple and can create a beautiful dreamy effect of the water, sand, and sky in any combination. 

You will want to use a shutter speed between about 2 seconds up to around 1/30 of a second or so. To do this, you’ll need to set your ISO quite low and close down your aperture significantly. If during the day, you may need a Neutral Density Filter to block some light. A 6 stop or 3 stop filter would be best in this situation. A 10 stop filter will be more than you need and prevent you from being able to see through the viewfinder when the filter is on.   

You can use a tripod or shoot handheld. A tripod may keep you steadier horizontally but handheld works too so definitely don’t hesitate to try this without a tripod. In either case, you’ll want to frame your shot and focus on your scene and then after you press the shutter, or AS you press the shutter with the faster shutter speeds, just pan the camera to the right. When I shoot handheld I hold my arms close to my body and just turn my body to keep steady. If shooting around 1/30 of a second, you’ll need to move quicker to get the effect. With a second or two you can go slower as you have more time. 

Sometimes it helps to start moving and then press the shutter, or you can also try putting your camera on continuous mode and as you twist your body press the shutter and let it take several shots as you move left to right.

The fun thing is that you get a slightly different effect each time. You may get a bunch you don’t like along with one or two that you really love. The painterly effect is subjective so choose the ones that YOU love! 

Have questions, feel free to reach out!

Sunset panning in Dana Point.jpg
Crystal Cove Panning.jpg

Looking for a 6 stop filter to help you reduce the shutter speed? My favorite Neutral Density filters are from Breakthrough Photography! * I always have a 6 stop in my bag for capturing this effect and others!

Kristen Ryan is a fine art landscape photographer from the suburbs of Chicago. You can purchase prints in the Fine Art store or contact her for custom orders. She teaches an online landscape photography workshop, “The World Around You” and hosts in person ladies’ landscape photography retreats.

Serenity of Seascapes

Another month gone by and it is already time for our Serenity blog circle to come together and share those moments and images that brought us serenity this past month. Many of us attended the Click Away conference in Dana Point, California earlier this month and I’m sure we’d all agree that the Pacific Ocean is a perfect recipe for serenity! Despite the chilly and sometimes rainy weather, we all felt rejuvenated by the crashing waves, beautiful views, and colorful sunsets. The only thing that competed with the views were the incredible friendships and connections grown stronger through the weekend.

I was fortunate to be asked to attend as an instructor at this year’s conference and taught three classes on shooting dreamy seascapes and long exposures. Not only do I find great serenity in viewing seascapes captured with slow shutter speeds, but the process itself is extremely calming and mindful. When I am out by the ocean with my camera and tripod, experimenting with shutter speed and timing of the waves, I am completely in the moment. My worries and anxiety disappear as I become engrossed in the creative process.

Panning at Crystal Cove

Panning at Crystal Cove


We were lucky to be able to shoot sunset each night and I was able to visit several different beaches in the area, from Dana Point, Laguna Beach and Crystal Cove State Park. As always I have many I have yet to touch, but I have spent time with a handful of my images and they bring me back to those beautiful moments on the beaches with friends.

Victoria Beach Sunset darker cropped.jpg
Crystal Cove Cloud Reflections.jpg
Crystal Cove Sunset_.jpg

Click on over to my talented friend, Nancy Armstrong, Kansas City Fine Art Photographer to see her view of Serenity this month and to follow the circle.

All images available in the Fine Art Store. Custom sizes and prints available upon request.


What Do You Do With An Idea?

Have you ever had an idea, a big idea? An idea that just kept staying with you and nagging at you despite uncertainty of whether it was a GOOD idea? What did you do with that idea? Did you ignore it? Did you do something with it? Do you have one of those ideas now?

A few months ago, September to be exact, I was signed up to be the ‘mystery reader’ in my 2nd grade son’s classroom. I wasn’t sure what book he would want me to read, so I asked the teacher to grab me a couple books. One of the books she handed me was titled, “What Do You Do With An Idea?” By Kobi Yamada. While it is a children’s book, I know the words had a much bigger impact on me that day than any of the children listening.

The inner tab of the book says “This is the story of one brilliant idea and the child who helps to bring it into the world. As the child’s confidence grows, so does the idea itself. And then, one day, something amazing happens.”

The way the story in the book goes, the “idea” is more of a true object that follows the child around and won’t go away. The child tries to ignore it and walk away from it, but it sticks around and gradually the idea grows on the child.

“I showed it to other people even though I was afraid of what they would say. I was afraid that if people saw it, they would laugh at it. I was afraid they would think it was silly,” the child says. And some people said it was a waste of time and he almost listened. But instead he decides that his idea deserves his attention because “no one knows it like he does”. So the idea grew and grew, as did his ‘love for it’.

After all that attention and love, “one day, something amazing happen. My idea changed right before my very eyes. It spread its wings, took flight, and burst into the sky.” And at the end, the child says “And then, I realized what you do with an idea… You change the world.”

I love the way this is written so simply as a children’s story and yet holds inspiration for people of all ages. The timing of reading this story resonated so strongly with me that I had a lump in my throat at the end. Only 3 days later I would be flying to Jackson Hole to host my second Magic in the Tetons ladies retreat, and this story made me think of my idea for my ladies’ landscape photography retreats.

Just like the child’s idea in the book, my idea for a women’s landscape photography retreat followed me around for quite some time. It began a couple years before I took any steps to make it a reality. The idea just stuck in my head and sometimes I would dream about the idea and then put it aside to go about my life. Sometimes I would talk about it with my husband, or with friends. While I received nothing but encouragement, the idea seemed large, and daunting to figure out all those details. Not the part of actually being there with the ladies. That part I felt like I could do in my sleep. I’d known the Tetons since I was little, after all. But the planning and pricing and getting a permit; well, those details felt overwhelming. And putting it out there for people felt even scarier.

There were plenty of landscape photography workshop out there, and there were other types of ladies’ retreats, but my research didn’t show any Ladies Landscape Photography Retreats. I was convinced we needed one. After teaching my online landscape photography workshop, The World Around You, for several years and teaching at larger conferences, I believed that an intimate retreat for nature loving women to come together and chase the light in a beautiful place was exactly what many of us needed. So often, we, women & moms, don’t take the opportunity to feed our creativity and connect with other like minded women. If I needed it, wouldn’t others? But would anyone sign up?

I love the Tetons, I love landscape photography, and I love connecting with and helping other women who share my passions. And so I took the risk, and followed my idea. I dove in and made my idea a reality. It took me out of my comfort zone and it was absolutely scary. In fact, I remember when I finally announced it, I was convinced I would pass out or throw up.

Did it change the world, like the child’s idea in the book? Well, no, it didn’t change THE world. But it definitely changed MY world! Because I now have amazing memories and adventures that are so special to me, and I share them with 18 beautiful friends, for whom I am so thankful.

I feel so much gratitude that this adventure has been successful thus far, for all the ladies who put their faith in me and the experience I am offering, and to those who have expressed interest in joining me in the future. What if it hadn’t been a success though? When I took those first steps to make it happen, I thought, if nothing else, at least I will have tried, and I won’t wonder “What if?”.

So I wonder, do YOU have an idea? One that has been with you awhile? One that you want to pursue but fear others’ response? An idea that takes you out of your comfort zone?

Maybe go find the book, “What Do You Do With An Idea?” And see if inspires you to take action. Who knows what can happen. Maybe it will change your world!

Captured in September 2018 in the Tetons

Captured in September 2018 in the Tetons


Serenity ~ Abstract Nature

This month creeped up on us in our Serenity Project Blog Circle. With the holidays at the end of December, this month flew by. With the holidays comes lots of chaos and craziness. So many special moments and memories but also so many tasks and things on the calendar and to-do list. Our holiday craziness is always compounded by having my birthday right after Christmas and my twins’ birthday shortly after the new year. With everything going on, I have done very little shooting recently. Though I am craving nature, longing for the beauty of snow, mountains, and magical light. The busy days make me crave those moments of ‘serenity’ where I am out with my camera and tripod and completely absorbed in the moment of Mother Nature’s magic I am preserving with that click of the shutter.

This year we added a ski trip to our winter break and drove up to Michigan with several other families. And while we were there, I played a bit with vertical panning of the trees. There is something about the abstract nature of these images that I find dreamy and soothing. The more I experiment with this technique, the more I love it.

Wintry Panning.jpg
Snowy Panning _.jpg
Ski Trip  Panning _.jpg
Snowy Panning 2.jpg
Wintry Panning wide_.jpg


Please continue the circle to enjoy the serene views of my talented friends. First, click over to Iris Nelson, Metro Phoenix Photographer, and see what she has shared with us this month.

18 Landscapes of 2018

2018 was a year of a lot of nature adventure for me with travel to Florida, Mexico, California, Canada, Kauai, and the Tetons! I loved getting out to shoot whether it was a devoted photography trip or just a quick shooting opportunity on a family trip. I have so many images I love from this past year and all of them bring back special memories. I went through and chose 18 favorites to represent my year.

Captured in the Tetons the evening before the 2018 Magic in the Tetons retreat began. After the sun went below the mountains, the light shone across the Grand so beautifully. I grabbed my Sigma 150-600 to capture this scene up close at 150mm.

Captured in the Tetons the evening before the 2018 Magic in the Tetons retreat began. After the sun went below the mountains, the light shone across the Grand so beautifully. I grabbed my Sigma 150-600 to capture this scene up close at 150mm.

My first trip to Yosemite was short and sweet. Tunnel view was the first stop I made with my mom and the kids. I captured this image of Bridalveil Falls with my Nikon 70-200 at 200mm and was thrilled to see the rainbow of colors in the water.

My first trip to Yosemite was short and sweet. Tunnel view was the first stop I made with my mom and the kids. I captured this image of Bridalveil Falls with my Nikon 70-200 at 200mm and was thrilled to see the rainbow of colors in the water.

June brought me back to the Canadian Rockies with my girlfriends where I finally got to shoot Emerald Lake. This image was selected as a finalist in Click & Company’s 2018 Voice Collection.

June brought me back to the Canadian Rockies with my girlfriends where I finally got to shoot Emerald Lake. This image was selected as a finalist in Click & Company’s 2018 Voice Collection.

The night sky in Kauai was just amazing this summer. I went out and captured the stars several nights during our stay at the Grand Hyatt Kauai.

The night sky in Kauai was just amazing this summer. I went out and captured the stars several nights during our stay at the Grand Hyatt Kauai.

June’s trip to the Rockies culminated in this stunning sunset at Lake Louise. I couldn’t help but succumb to my long exposure addiction here!

June’s trip to the Rockies culminated in this stunning sunset at Lake Louise. I couldn’t help but succumb to my long exposure addiction here!

I love a dramatic sky and September’s trip to Jackson Hole for the 2018 Magic in the Tetons retreat brought a couple days of stormy skies. This was captured during my final night during sunset.

I love a dramatic sky and September’s trip to Jackson Hole for the 2018 Magic in the Tetons retreat brought a couple days of stormy skies. This was captured during my final night during sunset.

Our first Chicago snowfall occurred just a week after peak autumn color. I took the opportunity to head to the Arboretum and pulled over upon seeing this collision of seasons. This image was selected as part of the “Opposites” story assignment for N…

Our first Chicago snowfall occurred just a week after peak autumn color. I took the opportunity to head to the Arboretum and pulled over upon seeing this collision of seasons. This image was selected as part of the “Opposites” story assignment for National Geographic’s Your Shot.

In early November, I took the opportunity to fly up to Canada for a quick weekend with my photographer friend Gina Yeo and we ventured to Emerald Lake for a wintry evening shoot. The low clouds over the lake were just magical.

In early November, I took the opportunity to fly up to Canada for a quick weekend with my photographer friend Gina Yeo and we ventured to Emerald Lake for a wintry evening shoot. The low clouds over the lake were just magical.

After  the Magic in the Tetons retreat, I stayed one extra day and spent the afternoon at this location with a couple friends enjoying the view of the mountains and this beautiful moose.

After the Magic in the Tetons retreat, I stayed one extra day and spent the afternoon at this location with a couple friends enjoying the view of the mountains and this beautiful moose.

When I visited Moraine Lake in the summer of 2017, I was with my family and did not have the opportunity to capture a sunrise here. In June, my girls, Gina & Addie, & I made sure to make it there for this beautiful reflection of alpenglow.

When I visited Moraine Lake in the summer of 2017, I was with my family and did not have the opportunity to capture a sunrise here. In June, my girls, Gina & Addie, & I made sure to make it there for this beautiful reflection of alpenglow.

Totally unexpected, my November weekend with Gina culminated in a showing of the Aurora over Banff! This was an absolute bucket list moment for me!

Totally unexpected, my November weekend with Gina culminated in a showing of the Aurora over Banff! This was an absolute bucket list moment for me!

A stunning sunset welcomed me to the Tetons in September! Again, my obsession with long exposures tugs at me when there are beautiful clouds.

A stunning sunset welcomed me to the Tetons in September! Again, my obsession with long exposures tugs at me when there are beautiful clouds.

Such a stunning beach in Kauai lured me out of bed several mornings for sunrise. I love the softness of the long exposure but the way the waves still have shape.

Such a stunning beach in Kauai lured me out of bed several mornings for sunrise. I love the softness of the long exposure but the way the waves still have shape.

One night of the Magic in the Tetons retreat, the Milky Way would be visible without moon interference. I led my group to this beautiful spot for sunset so everyone would be set up to capture the magic of the Teton nights.

One night of the Magic in the Tetons retreat, the Milky Way would be visible without moon interference. I led my group to this beautiful spot for sunset so everyone would be set up to capture the magic of the Teton nights.

The colors of a sunset and gorgeous water in Mexico provided a great opportunity for this panning seascape.

The colors of a sunset and gorgeous water in Mexico provided a great opportunity for this panning seascape.

This night in the Tetons was magical. The gorgeous glow of sunset just seemed to last forever! My ladies and I had the best night.

This night in the Tetons was magical. The gorgeous glow of sunset just seemed to last forever! My ladies and I had the best night.

During the Magic in the Tetons we spent a couple hours shooting the autumn colors of the gorgeous trees. This shot is the result of vertical panning for 1 second.

During the Magic in the Tetons we spent a couple hours shooting the autumn colors of the gorgeous trees. This shot is the result of vertical panning for 1 second.

The first night in Canada in November, we ran over to Vermilion Lakes for a little star shooting. This capture is an 8 minute exposure of the stars over Mt. Rundle.

The first night in Canada in November, we ran over to Vermilion Lakes for a little star shooting. This capture is an 8 minute exposure of the stars over Mt. Rundle.

If you made it this far, thanks for staying with me through some of my favorite landscape photographic moments of 2018. I’m looking forward to many more adventures in 2019 including 2 Magic in the Teton retreats, Click Away, the Insta Inspire Retreat, and some new ideas I’m working on!

Happy 2019!

Serenity in Hawaii

One of the reasons I love landscape & nature photography so much is the peace and serenity it brings to my mind and life. There is something about being out in nature watching the clouds float through the sky or the waves crashing on the shore that brings a sense of calm.

So I’m very honored to join a talented and kind group of women for a Serenity Project blog circle.

When it comes to serenity, the island of Kauai pretty much epitomizes the idea of ‘serenity’. Imagine the clouds just floating over the mountains as the oceans waves lap along the shore. Whenever I shoot the ocean, I love to experiment with the shutter speed to capture the movement of the water in different ways. Sometimes I like to freeze the motion but often I love to shoot long exposures. Sometimes in the 1/4 of a second to 3 second range and sometimes really long exposures like a minute or more to capture movement in the clouds as well.

Shipwreck Sunrise 2.jpg
60 sec of Shipwreck Beach_.jpg

Another thing I love to do is use a slow shutter speed and use a panning effect to create a dreamy abstract image of the water and sky.

Shipwreck panning.jpg

And I love when a shutter speed around .6 seconds really creates a streaking of the water.

sunrise long exposure.jpg

Head on over to the blog of my talented friend Nancy Armstrong and continue the circle from there! Hope you have a wonderful holiday season!